Hydroponics Seed Starting: Step-by-Step Guide to Germination Success

Article-At-A-Glance
- Hydroponic seed starting offers faster germination rates and healthier seedlings compared to traditional soil methods.
- The key to success lies in selecting the right growing medium, with rockwool and coco coir being top choices for beginners.
- Maintaining proper humidity levels (70-90%) and temperature (65-75°F) creates the optimal environment for hydroponic seed germination.
- Leafy greens like lettuce and herbs such as basil are perfect first-time candidates for hydroponic seed starting due to their quick growth and high success rates.
- Pre-soaking seeds can dramatically reduce germination time and increase success rates by up to 30%.
Starting seeds for hydroponics doesn’t have to be complicated. In fact, with the right approach, it’s often easier and more successful than traditional soil methods. I’ve spent years perfecting these techniques, and I’m excited to share them with you today through Gardeners Basics, where we’ve helped thousands of gardening enthusiasts transform their growing experience with hydroponics.
Why Hydroponic Seed Starting Gives You an Edge

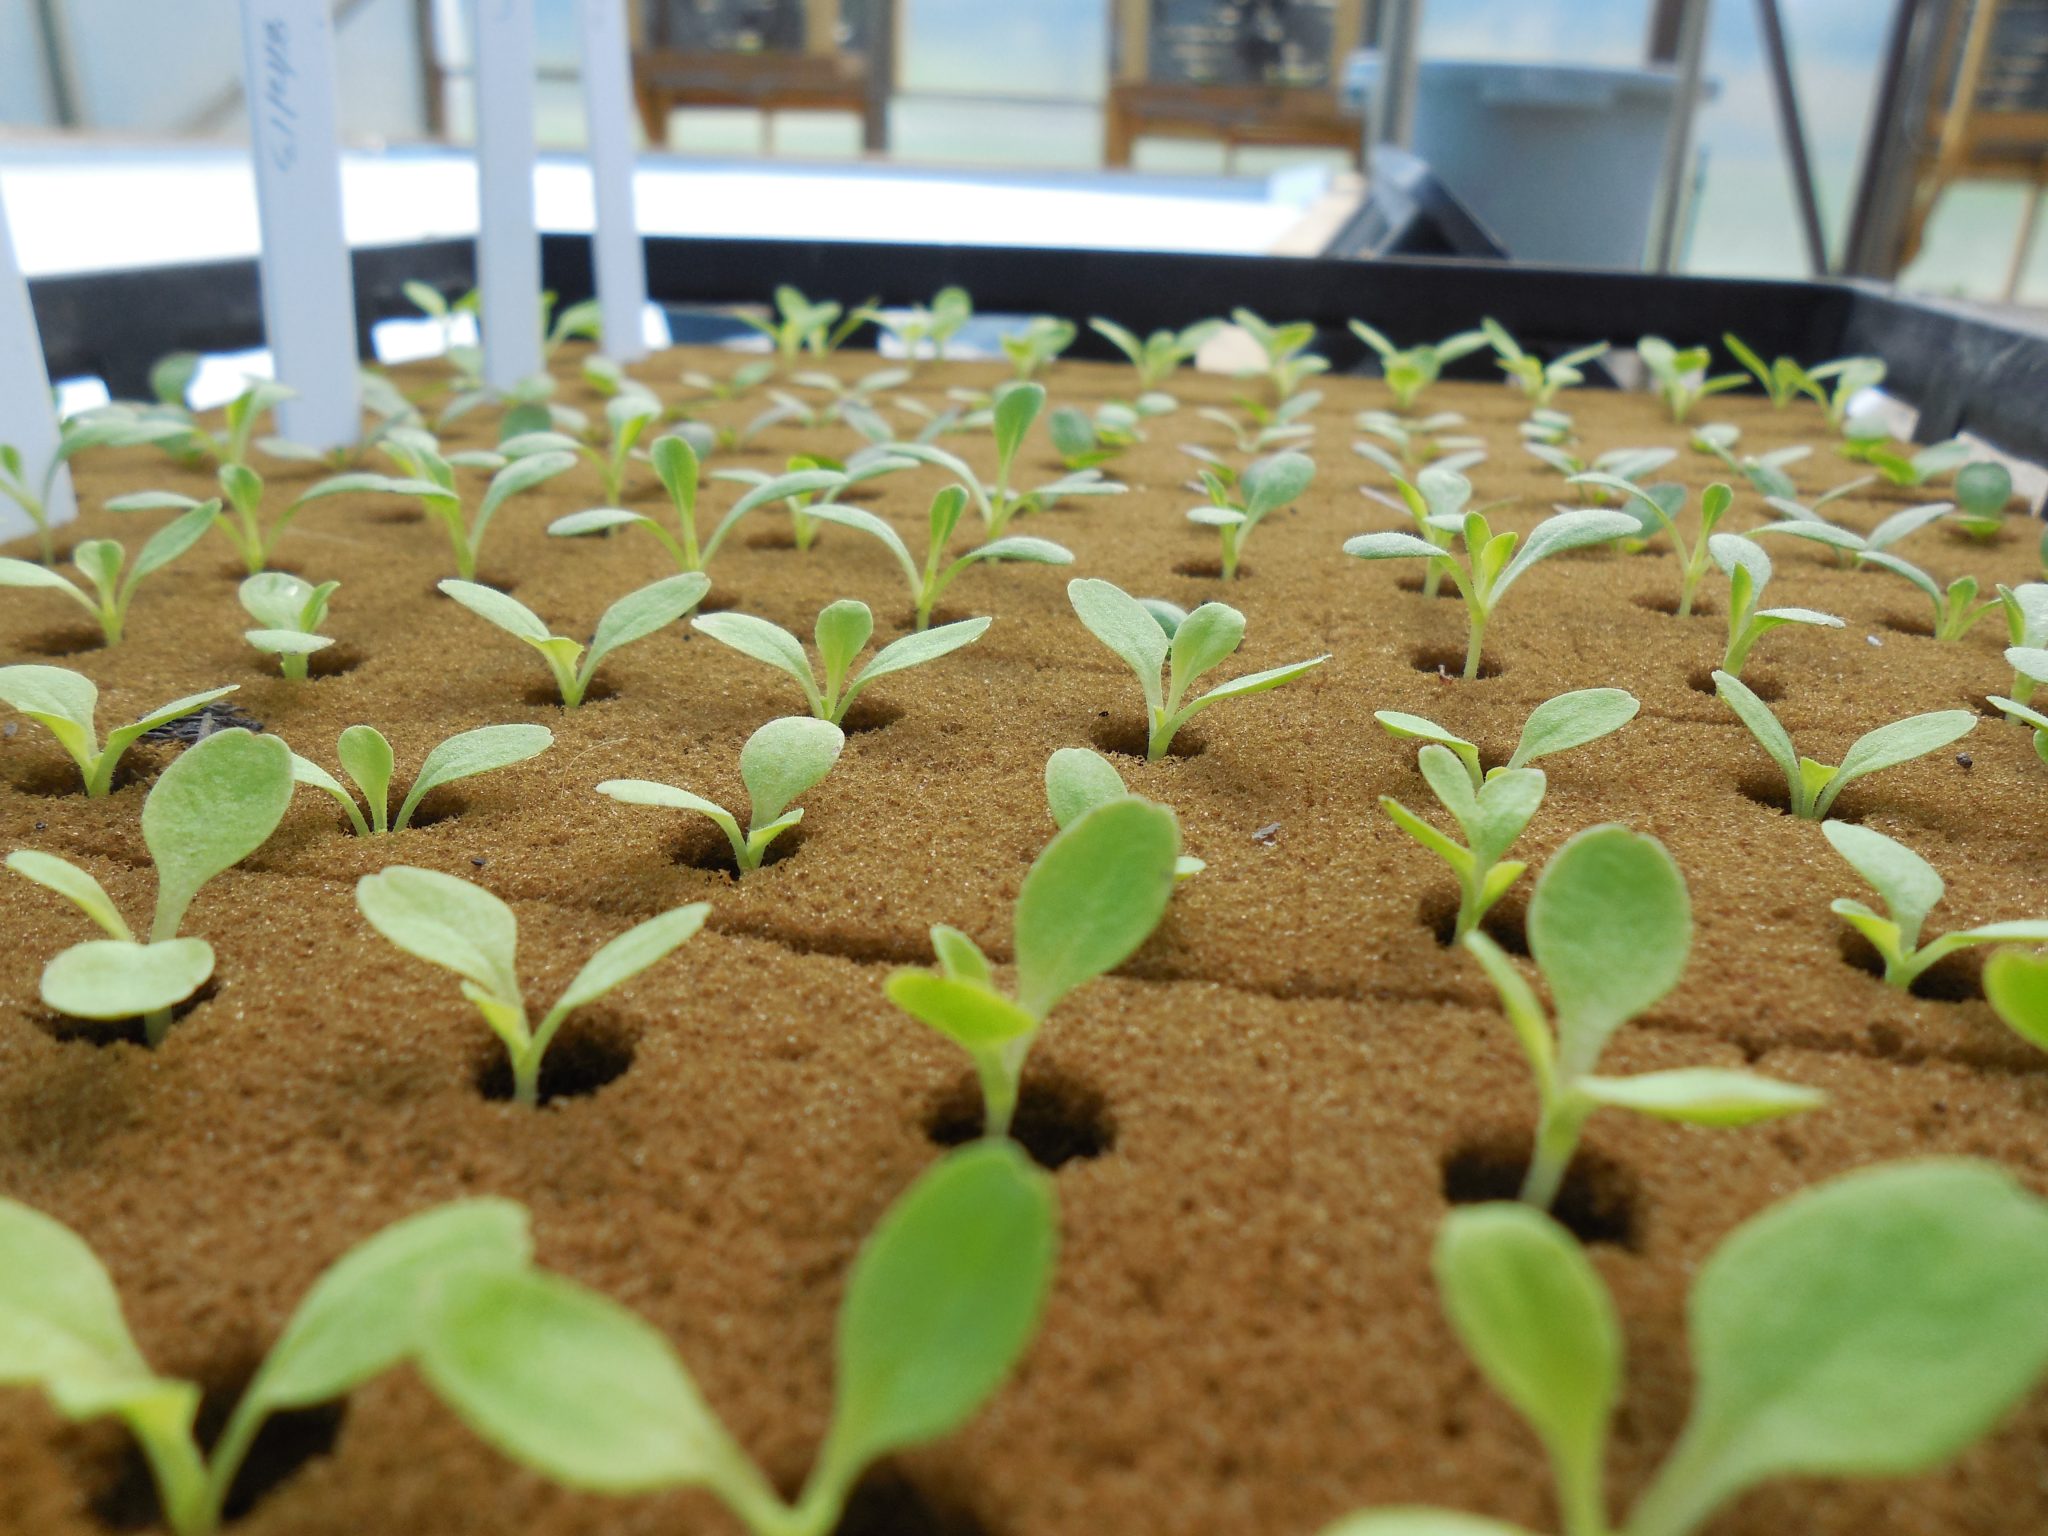
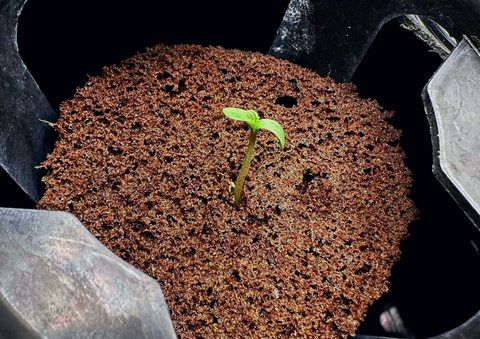
“Starting Seeds for Your Hydroponic …” from afarmishkindoflife.com and used with no modifications.
Hydroponic seed starting eliminates many of the frustrations of traditional soil germination. Without soil, you’ll see faster germination rates, cleaner growing conditions, and complete control over your plants’ nutrition from day one. My seedlings typically emerge 20-30% faster in hydroponic setups compared to soil, and their root development is noticeably superior. Plus, you’ll eliminate soil-borne diseases and pests that can devastate young seedlings before they even have a chance to thrive.
The beauty of hydroponic seed starting lies in its precision. Every environmental factor from moisture to nutrients can be fine-tuned for optimal growth. This level of control translates to seedlings that grow faster, stronger, and more uniformly than their soil-grown counterparts. You’ll also waste fewer seeds since germination rates typically exceed 90% when conditions are properly maintained.
Essential Supplies for Successful Hydroponic Germination
“Transplant Production for Hydroponic …” from www.aces.edu and used with no modifications.
Before diving into the seed starting process, gathering the right supplies is crucial. You don’t need an elaborate setup to begin, but certain essentials will significantly impact your success. I recommend starting with high-quality seed starting trays, humidity domes, a reliable growing medium, clean water, and a good light source. Optional but helpful tools include a spray bottle for gentle moisture control, heat mats for temperature regulation, and a simple pH testing kit to ensure your water conditions are optimal.
The Perfect Growing Medium Choices
Unlike soil gardening, hydroponic seed starting requires specialized growing media that provide structure without nutrients. After experimenting with numerous options, I’ve found certain media consistently outperform others for seed germination. Rockwool cubes remain my go-to choice for most seeds due to their excellent water retention and aeration balance. Coco coir offers a more sustainable alternative with similar benefits, while stone wool provides exceptional drainage for moisture-sensitive seeds. For beginners, I highly recommend starting with pre-cut rockwool starter cubes or plugs, as they’re specifically designed for germination success.
Growing Medium Comparison
Rockwool: Excellent water retention, sterile, reusable, pH neutral (7.0)
Coco Coir: Eco-friendly, good aeration, slightly acidic (5.2-6.8)
Oasis Cubes: Sterile, consistent density, pH neutral (5.5)
Peat Pellets: Biodegradable, good water retention, acidic (5.5-6.0)
Containers That Promote Healthy Root Development
The containers you choose for germination significantly impact root development and overall seedling health. I prefer using seed starting trays with individual cells sized 1-2 inches deep, providing sufficient space for initial root development without overwhelming young seedlings. Look for trays with drainage holes that prevent waterlogging while maintaining adequate moisture. For even better results, consider specialized hydroponic seed starting systems with built-in water reservoirs that provide perfect bottom-up moisture.
When selecting containers, remember that seedlings won’t stay in them long – typically just until they develop their first true leaves. The container should support the growing medium while allowing roots easy access to air and water. Transparent containers can be helpful for monitoring root development but may promote algae growth if exposed to light for extended periods.
Water and Nutrient Solutions for Seedlings
During germination, seeds rely primarily on their internal reserves rather than external nutrients. For this reason, I recommend using plain, clean water with a neutral pH (6.0-6.5) during the first phase of germination. Filtered water works perfectly, or if using tap water, let it sit uncovered for 24 hours to allow chlorine to dissipate. Once seedlings develop their first true leaves, you can introduce a very dilute nutrient solution at about 1/4 the strength recommended for mature plants.
3. Creating the Ideal Moisture Level
Maintaining the perfect moisture balance is perhaps the most critical aspect of successful seed germination in hydroponics. Your growing medium should be thoroughly moist but never waterlogged. I typically saturate the medium initially, then allow excess water to drain completely before placing seeds. For most seeds, the medium should feel like a wrung-out sponge – damp throughout but not dripping. Too much moisture creates anaerobic conditions that lead to rotting, while too little prevents germination entirely. For most hydroponic setups, misting the surface once or twice daily with a fine spray bottle is sufficient to maintain ideal conditions.
4. Temperature and Humidity Control Methods
Temperature and humidity work hand in hand to create the perfect germination environment. Most hydroponic seeds germinate best between 65-75°F (18-24°C), though specific varieties may have different requirements. Heating mats placed under germination trays provide consistent bottom heat that encourages strong root development. For humidity control, transparent domes create a mini-greenhouse effect that maintains 70-90% humidity levels ideal for germination. Once seedlings emerge, gradually introduce ventilation by partially removing dome lids for increasing periods each day. This controlled acclimation prevents shock while strengthening developing plants. For precise control, inexpensive digital thermometers and hygrometers can monitor conditions and help you make necessary adjustments.
5. Daily Monitoring Practices
Establishing a consistent daily monitoring routine dramatically improves germination success rates. Each morning, I check moisture levels, remove any condensation from dome lids, and ensure temperatures remain within optimal ranges. I look for the first signs of germination – typically a small white root emerging from the seed coat – which signals the beginning of the growth cycle. Once seedlings emerge, I monitor for signs of stretching (indicating insufficient light) or discoloration (suggesting nutrient deficiencies or pH issues). Keeping a simple journal of observations helps track patterns and refine your approach with each growing cycle. Remember, the most successful hydroponic gardeners are attentive observers who respond quickly to their plants’ needs. For more insights on starting seeds for a hydroponic garden, check out this guide.
The discipline of daily monitoring also helps prevent small issues from becoming major problems. I’ve learned through experience that catching challenges early – whether it’s excess moisture, temperature fluctuations, or early signs of fungal growth – means the difference between thriving seedlings and disappointing failure. A quick five-minute check each day is all it takes to stay ahead of potential problems.
The Germination Environment: Getting It Right
“Small-scale hydroponics | UMN Extension” from extension.umn.edu and used with no modifications.
Creating the ideal germination environment involves balancing several environmental factors simultaneously. This holistic approach considers how light, temperature, humidity, and air circulation work together to signal seeds it’s time to grow. I think of this environment as mimicking an ideal spring day – consistent mild temperatures, bright but indirect light, gentle air circulation, and consistent moisture. When these elements are in harmony, seeds receive all the proper cues to begin their growth cycle confidently.
The beauty of hydroponic seed starting is that you can create this perfect environment regardless of outdoor conditions. Whether it’s the dead of winter or the heat of summer, your controlled indoor environment provides seeds with exactly what they need. This environmental control is why many commercial growers rely on hydroponics for consistent year-round production without seasonal limitations.
Light Intensity and Duration for Seedlings
Contrary to popular belief, seeds don’t require light to germinate – in fact, many prefer darkness during the initial germination phase. However, once they emerge, light becomes crucial for healthy development. Position seedlings 2-4 inches below a standard fluorescent shop light or specialized grow light for 14-16 hours daily. This duration mimics spring/summer light conditions and prevents stretching. If using natural light from a window, rotate trays daily to prevent seedlings from leaning. I’ve found that LED grow lights with a full spectrum provide the best results while consuming less electricity than older lighting technologies. The intensity should increase gradually as seedlings mature – starting at about 100 μmol/m²/s for newly emerged seedlings and increasing to 200-300 μmol/m²/s as they develop true leaves.
Temperature Ranges for Different Plant Types
Different plant families have evolved under varied climate conditions, resulting in specific temperature preferences for optimal germination. Cool-season crops like lettuce, spinach, and kale germinate best at 55-65°F (13-18°C), while warm-season crops like tomatoes, peppers, and cucumbers prefer 70-85°F (21-29°C). Heating mats with adjustable thermostats allow you to customize temperatures based on what you’re growing. I’ve found that providing a slight temperature drop at night (5-10°F lower than daytime) more closely mimics natural conditions and often improves overall germination rates and seedling vigor.
Seeds that germinate particularly well in cooler temperatures include most leafy greens, brassicas (cabbage family), and many herbs like cilantro and dill. Those requiring warmer temperatures include the nightshade family (tomatoes, peppers, eggplants), cucurbits (cucumbers, melons, squash), and heat-loving herbs like basil. Understanding these preferences helps optimize your germination environment for specific crops.
Humidity Domes and Their Proper Use
Humidity domes create a microclimate that prevents growing media from drying out while seeds germinate. The enclosed environment maintains humidity levels between 70-90%, ideal for most seeds. However, proper dome management prevents excessive condensation that can lead to fungal issues. I vent domes briefly each day to exchange air, wiping away excess condensation during these ventilation periods. Once seeds germinate, gradually increase ventilation by propping the dome open slightly wider each day until seedlings are fully acclimated to room conditions, typically over 5-7 days. This gradual hardening off process strengthens cell walls and prepares seedlings for their eventual transfer to your main hydroponic system.
Troubleshooting Common Germination Problems
“Seed Starting for Hydroponics …” from www.floraflex.com and used with no modifications.
Even with perfect preparation, occasional challenges arise during the germination process. The good news is that most common problems have simple solutions when identified early. I’ve encountered virtually every seed starting issue over the years and have developed reliable remedies for each. The key is recognizing symptoms quickly and responding with appropriate adjustments rather than drastic interventions that might further stress developing seedlings.
When troubleshooting germination issues, consider the most common culprits first: improper moisture levels, temperature extremes, expired seeds, or inappropriate planting depth. Systematic evaluation of these factors will resolve the majority of problems. Remember that patience is also important – some varieties naturally take longer to germinate than others, so consult seed packets for expected germination timeframes before assuming something has gone wrong. For a detailed guide on starting seeds for a hydroponic garden, check out this easy guide.
Seeds Not Sprouting: Causes and Solutions
When seeds fail to germinate, several factors could be responsible. First, verify seed viability – older seeds have lower germination rates, and some varieties remain viable for only 1-2 years. Temperature extremes significantly impact germination; using a heating mat with thermostat provides consistent temperatures that encourage sprouting. Improper planting depth can also prevent germination – most seeds should be placed at a depth equivalent to 1-2 times their diameter. If all these factors check out, consider performing a simple germination test: place 10 seeds between damp paper towels in a sealed container for several days to assess viability percentage. Seeds that still don’t sprout after addressing these issues may simply be non-viable and should be replaced with fresher stock.
Dealing with Mold and Fungus Issues
White fuzzy growth on your growing medium or seedlings indicates fungal development, typically resulting from excessive moisture combined with poor air circulation. Immediately improve ventilation by removing humidity domes or increasing air movement with a small fan set on low. Reduce watering frequency and allow the medium surface to dry slightly between applications. For existing problems, gently spray affected areas with a 3% hydrogen peroxide solution (1 part household hydrogen peroxide to 11 parts water), which kills fungal spores without harming seedlings. Moving forward, preventative measures include using sterile equipment, maintaining proper spacing between seedlings, and applying air circulation even during the germination phase. These simple steps effectively control most fungal issues without requiring harsh chemical treatments.
Preventing Damping Off Disease
Damping off is a devastating fungal disease that causes seedlings to collapse suddenly at the soil line, usually within days of emergence. Prevention is the only effective strategy since infected seedlings rarely recover. Start with scrupulously clean equipment, disinfecting trays and tools with a 10% bleach solution between uses. Use fresh, sterile growing media rather than reusing materials from previous plantings. Maintain proper spacing between seeds to allow adequate air circulation, and use a small fan on the lowest setting to keep air moving gently across seedling trays. Cinnamon, chamomile tea, or diluted hydrogen peroxide can be applied as natural fungicides that discourage the pathogens responsible for damping off. Proper environmental conditions – particularly avoiding overwatering and maintaining good air circulation – remain your best defense against this common seedling killer.
Many growers successfully incorporate beneficial microorganisms like Bacillus subtilis or Trichoderma into their seed starting regimen. These beneficial organisms compete with and suppress pathogenic fungi, effectively creating a protective shield around developing roots. They can be purchased as powders or liquid concentrates and applied according to package directions.

Weak Seedlings: How to Strengthen Them
Leggy, pale, or weak seedlings typically result from insufficient light, improper temperature, or nutrient imbalances. Strengthen struggling seedlings by adjusting light placement – move lights closer (2-4 inches above plant tops) and extend duration to 16-18 hours daily. Introduce gentle air movement with a small oscillating fan, which strengthens stems through a process called thigmomorphogenesis – the plant’s response to physical touch or movement. For extremely leggy seedlings, you can carefully repot them deeper in the growing medium, as many plants will develop roots along buried stems. A light application of quarter-strength hydroponic nutrient solution after true leaves appear provides essential elements for stronger growth without overwhelming sensitive young roots. These adjustments typically produce visible improvements within 3-5 days as plants respond to optimized conditions.
Another effective technique for strengthening seedlings is “brushing” – gently running your hand across the tops of seedlings for about 20 seconds twice daily. This simulates natural wind conditions and triggers the seedlings to develop stronger, more compact stems. The practice takes just moments but significantly improves overall seedling quality and transplant success rates.
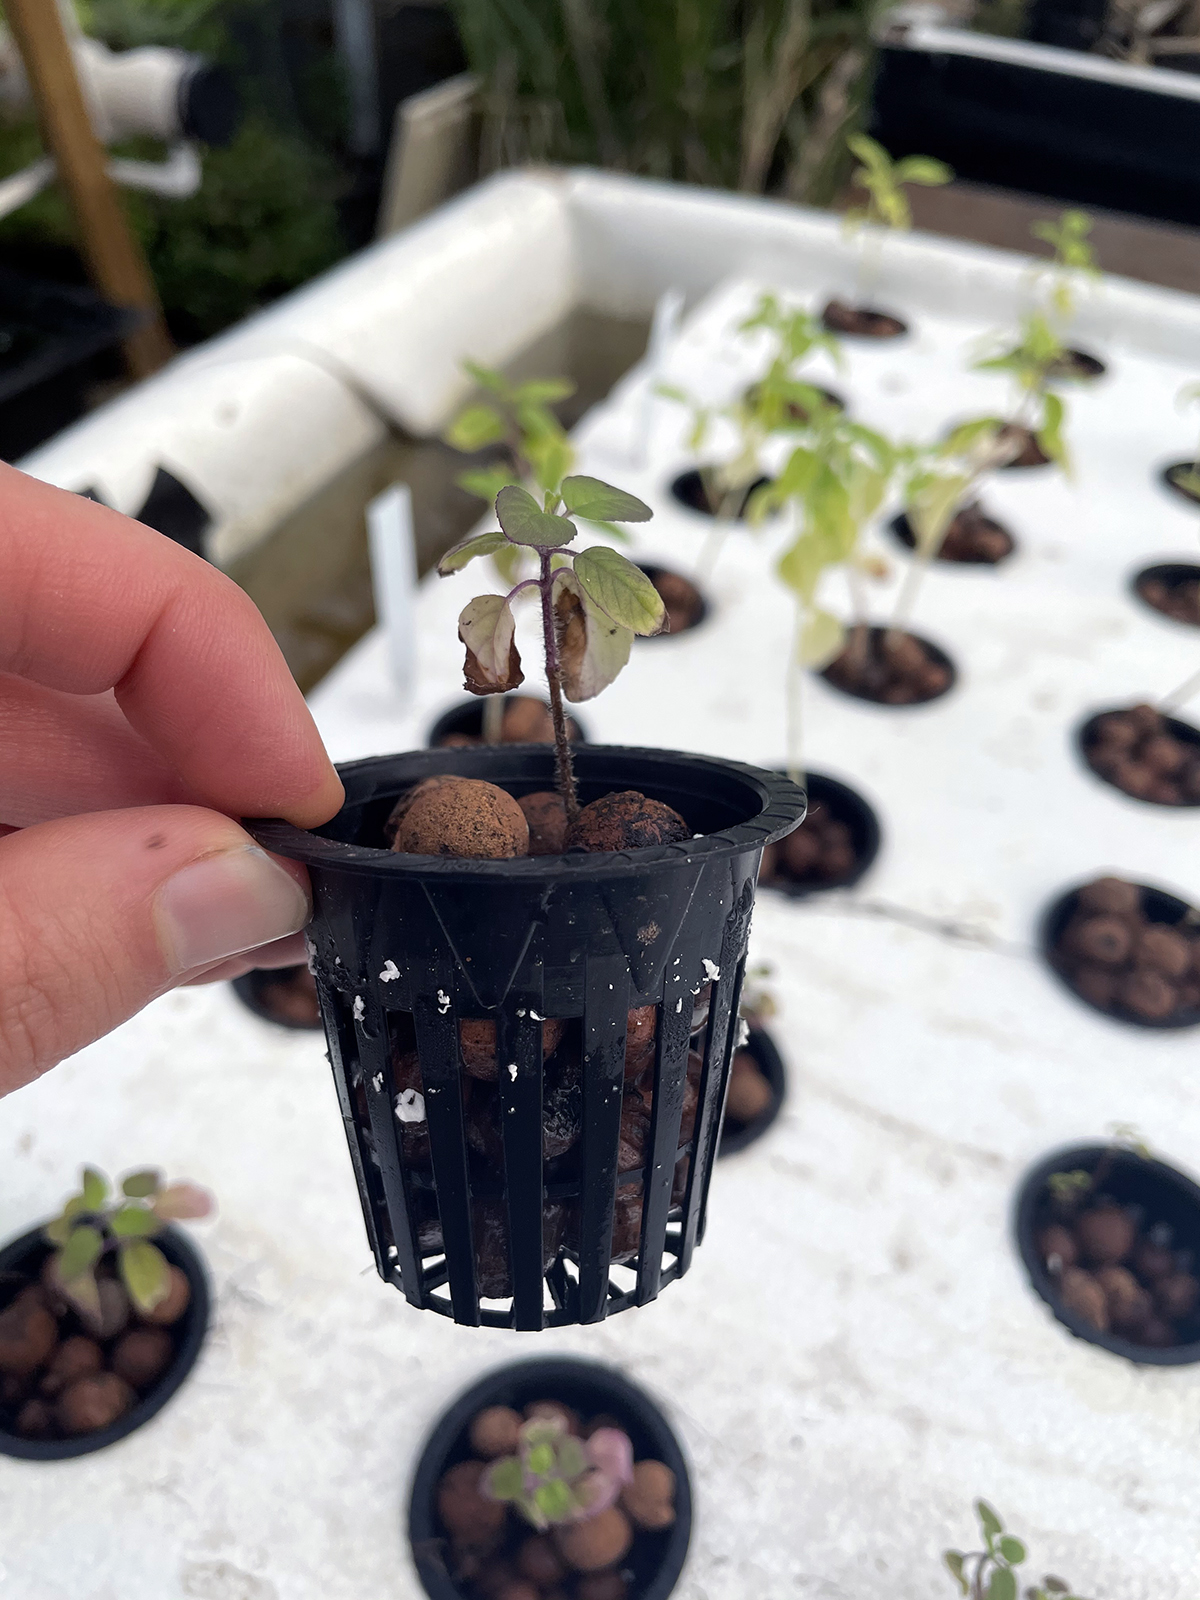
Transitioning Seedlings to Your Hydroponic System
Moving seedlings from their germination environment to your main hydroponic system represents a critical transition that requires careful timing and handling. The goal is to minimize transplant shock while positioning plants for vigorous growth in their permanent home. I’ve found that proper preparation of both the seedlings and the receiving system makes all the difference in transplant success. Seedlings should be gradually hardened off by slowly adjusting them to conditions similar to your main system, while the receiving system should be properly cycled and balanced with appropriate nutrient levels and pH for young plants.
When to Make the Move
Timing the transfer from seed starting medium to your hydroponic system is crucial for seedling success. The ideal window occurs when seedlings develop their first set of true leaves (not the initial seed leaves or cotyledons) and have established a healthy root system visible at the bottom of the growing medium. For most vegetables and herbs, this typically happens 10-21 days after germination, though timing varies by species. Avoid transplanting too early, as underdeveloped root systems struggle to adapt, or too late, when seedlings become root-bound and stressed in their confined starter medium. I’ve found that seedlings with 2-3 sets of true leaves and roots just beginning to emerge from the growing medium have the highest transplant success rate. Morning transplanting provides seedlings with a full day to adjust before the stress of darkness, further enhancing success rates.
Gentle Handling Techniques to Prevent Damage
Seedling roots are incredibly fragile during transplanting, and even minor damage can set back growth by days or weeks. When handling seedlings, I always grasp them by their leaves rather than stems – leaves can regrow if damaged, but stem damage is often fatal. Work in a sheltered area away from drafts or fans that might dry out delicate roots during the transfer process. This simple precaution prevents unnecessary stress on young plants during this vulnerable transition.
Before transplanting, thoroughly moisten the growing medium to make removal easier and reduce root disturbance. If using rockwool or similar media, the entire cube can be transferred directly into many hydroponic systems without separation. For seedlings in loose media like coco coir, gently tease apart the root ball rather than pulling, which preserves more of the delicate root structure. The key is minimizing exposure time between systems – aim to complete each transplant in under 30 seconds to prevent roots from drying out.
Temperature matching between systems is another critical but often overlooked aspect of gentle transplanting. Sudden temperature changes of more than 5°F can shock seedlings, so I always ensure my hydroponic system water is within a few degrees of the seedling’s growing environment. This small detail dramatically improves transplant success rates and reduces recovery time, allowing plants to resume active growth almost immediately.
- Always handle seedlings by their leaves, never by the stems
- Thoroughly moisten growing media before attempting removal
- Transfer the entire starter medium when possible to minimize root disturbance
- Work quickly to limit root exposure to air (under 30 seconds per plant)
- Match water temperatures between systems to within 5°F
After transplanting, I provide slightly subdued lighting for 24-48 hours to reduce transpiration stress while roots establish in the new environment. This gentle transition period allows seedlings to recover from any unavoidable transplant shock before resuming vigorous growth in their permanent hydroponic home.

First Nutrient Solution for Young Plants
Newly transplanted seedlings require a carefully balanced first feeding to support their transition into your hydroponic system. I start with a half-strength nutrient solution for the first week post-transplant, gradually increasing to full strength by the second or third week. This gentle introduction prevents nutrient burn while providing essential elements for continued development. For most leafy greens and herbs, an EC (electrical conductivity) reading of 0.8-1.2 mS/cm provides an ideal starting point, while fruiting plants like tomatoes and peppers may benefit from slightly higher concentrations of 1.2-1.5 mS/cm.
Pay special attention to calcium and magnesium levels during this early stage, as deficiencies of these elements commonly appear first and can quickly stunt development. I supplement my base nutrient solution with CalMag if needed, particularly when growing in rockwool, which can bind calcium and make it less available to young plants. Maintaining pH between 5.8-6.2 ensures optimal nutrient availability across the spectrum of essential elements. Testing pH and EC daily during the first week allows you to make small adjustments before problems develop, ensuring seedlings establish quickly without setbacks.
The transition period also represents an ideal time to introduce beneficial microorganisms to your hydroponic system. Products containing mycorrhizal fungi and beneficial bacteria support root development and help protect against pathogens. These biological inoculants work synergistically with proper nutrition to create an optimal growing environment that accelerates plant establishment and boosts overall system health. I’ve found that seedlings receiving both appropriate nutrition and beneficial microbes typically become established in about half the time compared to conventional approaches.
Grow Like a Pro: Advanced Germination Techniques
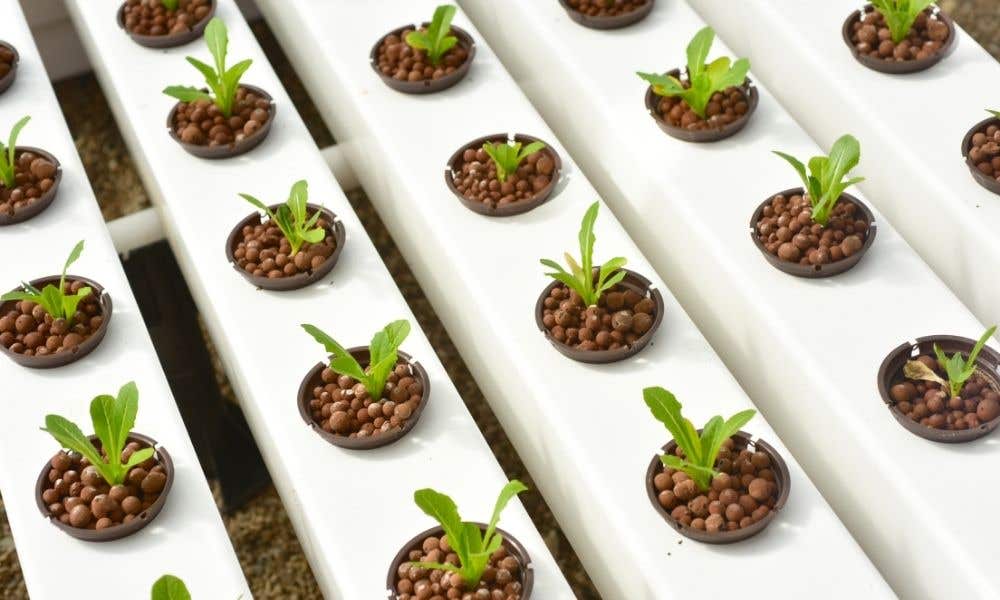
“Hydroponic Seed Germination: A Beginner …” from www.thehydrobucket.com and used with no modifications.
Once you’ve mastered the basics of hydroponic seed starting, several advanced techniques can further improve germination rates and seedling quality. These methods build upon fundamental principles to overcome specific challenges or enhance results for particularly valuable or difficult seeds. I’ve developed and refined these approaches over years of commercial hydroponic production, where consistency and efficiency are paramount.
Advanced techniques typically involve additional steps or specialized equipment, but the improved results often justify the extra effort. For home growers, these methods are particularly valuable when working with expensive seeds, heirloom varieties, or crops that have historically proven difficult to germinate reliably. Each technique addresses specific aspects of the germination process to maximize success rates and produce exceptionally vigorous seedlings that transition seamlessly into productive plants.
Pre-Soaking Seeds to Speed Up Germination
Pre-soaking seeds before planting dramatically reduces germination time for many varieties by softening seed coats and initiating metabolic processes. I typically soak medium to large seeds for 12-24 hours in room temperature water, adding a drop of hydrogen peroxide to prevent bacterial growth during soaking. Seeds with very hard coats, like morning glory or moonflower, benefit from a brief scarification – lightly nicking the seed coat with a file – before soaking. This technique has reduced germination time by up to 70% for some varieties in my experience, particularly with larger seeds like peas, beans, and squash. The key is avoiding over-soaking, which can lead to oxygen deprivation and seed death, particularly with smaller seeds that require shorter soaking periods of just 4-6 hours.
For maximum effectiveness, change the soaking water every 8-12 hours to prevent oxygen depletion and remove any substances that leach from the seeds. After soaking, drain thoroughly and plant immediately – never allow pre-soaked seeds to dry out again before planting. This simple technique not only speeds germination but often results in more uniform emergence, as all seeds begin the germination process simultaneously during the soak period rather than at variable rates after planting. The result is seedling trays with consistent development that simplifies subsequent care and transplanting. For more insights, check out this easy guide on starting seeds for a hydroponic garden.
Using Hydrogen Peroxide to Prevent Disease
A dilute hydrogen peroxide solution serves as an excellent preventative treatment against damping off and other fungal diseases that plague seedlings. I prepare a 0.5% solution by mixing 1 part 3% household hydrogen peroxide with 5 parts water, then use this to moisten growing media before planting seeds. This gentle sterilization suppresses harmful pathogens while providing beneficial oxygen that stimulates germination. For persistent fungal issues, a foliar spray of the same solution can be applied to seedlings every few days, thoroughly coating surfaces without causing damage to developing plants. The hydrogen peroxide breaks down into water and oxygen, leaving no harmful residues while providing a hostile environment for fungal spore development.
Beyond disease prevention, hydrogen peroxide offers the added benefit of oxygenating the root zone, which accelerates germination and encourages robust root development. I’ve found this approach particularly valuable during cooler months when slower evaporation rates can lead to waterlogged conditions that favor pathogen growth. The technique is completely compatible with organic growing methods and provides an effective alternative to commercial fungicides for those seeking chemical-free growing solutions. For best results, prepare fresh solutions before each application, as hydrogen peroxide degrades relatively quickly when diluted. For more insights, check out this role of hydroponic seed pods in hydroponic systems.
Creating a Mini Greenhouse Effect
Specialized germination chambers create ideal conditions for difficult-to-germinate seeds by maintaining perfect temperature and humidity levels. I construct simple chambers using clear plastic storage containers with lids, adding a waterproof heat mat beneath and small computer fans for gentle air circulation. This controlled environment allows for precise temperature regulation while maintaining high humidity without condensation issues that can lead to disease. For seeds requiring specific light conditions during germination, LED strip lights can be mounted inside the lid, providing customizable light levels without generating excessive heat that might disrupt temperature control.
For seeds requiring temperature fluctuations to trigger germination, programmable thermostats connected to heating mats create automated day/night temperature differentials that mimic natural conditions. This approach has proven particularly effective for native wildflowers and herbs that evolved with distinct temperature variations as germination cues. The enclosed environment also protects developing seedlings from pests and drafts while conserving moisture, reducing daily maintenance requirements. For larger-scale operations, commercial germination chambers offer similar benefits with greater capacity and more precise controls, though the basic principles remain the same regardless of scale.
Your Path to Hydroponic Gardening Success
Mastering hydroponic seed starting represents the foundation of successful soil-free gardening. The techniques outlined here provide the knowledge needed to consistently produce healthy, vigorous seedlings ready for transfer to any hydroponic system. Remember that observation and adaptation remain your most powerful tools – each growing environment has unique characteristics that may require adjustments to these guidelines. By starting with quality seeds, providing optimal germination conditions, and carefully transitioning seedlings to your main system, you’ll build the confidence and skills needed for hydroponic gardening success. For ongoing support and specialized hydroponic supplies designed for seed starting success, Gardeners Basics remains committed to helping gardeners at every stage of their hydroponic journey.
Frequently Asked Questions
Over years of teaching hydroponic techniques, I’ve encountered certain questions that arise consistently among both beginners and experienced growers. The following section addresses these common inquiries with practical, experience-based answers that supplement the main guide. These responses reflect real-world scenarios you’re likely to encounter in your own hydroponic seed starting journey.
While these questions cover many common concerns, remember that plant growing is both science and art. Your own observations and adaptations to your specific environment will ultimately guide your success. Don’t hesitate to experiment within the parameters provided here – often the most valuable insights come through hands-on discovery.
How long does it take for seeds to germinate hydroponically?
Hydroponic germination typically occurs 20-50% faster than in soil, though timing varies significantly by species. Leafy greens like lettuce and spinach often emerge within 2-3 days, while herbs may take 4-7 days, and fruiting crops like tomatoes and peppers generally require 5-10 days under optimal conditions. Temperature plays a crucial role – maintaining media at 70-75°F for warm-season crops and 60-65°F for cool-season varieties will provide the fastest reliable results. Consistent moisture, proper seed quality, and environmental stability are equally important factors that influence germination speed. Some seeds like celery or parsley naturally take longer (up to 14 days) regardless of conditions due to inherent germination inhibitors that must break down before growth begins. For more detailed guidance, you can explore this easy guide on starting seeds for a hydroponic garden.
Can I reuse my hydroponic growing medium for seed starting?
While possible, reusing growing media for seed starting carries significant risks that typically outweigh the cost savings. Pathogens, algae, and residual salt buildup can compromise germination and seedling health. If you choose to reuse media, thorough sterilization is essential – soak rockwool in a 10% bleach solution for 30 minutes, then rinse extensively and neutralize pH before reuse. Organic media like coco coir can be sterilized through complete drying followed by baking at 180°F for 30 minutes. Even with these precautions, expect somewhat lower germination rates and increased disease susceptibility compared to fresh media. For serious hydroponic gardeners, I recommend using new media for seed starting while reserving sterilized reused media for transplanting established seedlings where risks are lower.
What’s the best water temperature for hydroponic seed germination?
Water temperature directly affects dissolved oxygen content and seed metabolism, making it a critical factor in successful germination. For most hydroponic seed starting, maintain water temperatures between 68-72°F (20-22°C) to balance oxygen availability with metabolic activity. Cooler temperatures below 65°F slow germination significantly and can lead to rotting before emergence, particularly with warm-season crops. Conversely, temperatures above 78°F reduce dissolved oxygen to potentially harmful levels while encouraging bacterial growth that may attack seeds before they can establish. For more detailed guidance, check out this easy guide to hydroponic seed starting.
Using water that’s too cold or too warm represents one of the most common yet overlooked reasons for poor germination results. A simple aquarium thermometer provides an inexpensive way to monitor this crucial parameter. For precision control in larger operations, water chillers or heaters with thermostatic controls maintain ideal temperatures regardless of ambient conditions. Remember that water temperature affects not just germination but nutrient availability throughout the growth cycle, making this parameter worth monitoring even after seeds have successfully germinated.
In ebb and flow or deep water culture systems where water contacts the growing medium directly, temperature stability becomes even more critical. Temperature fluctuations greater than 5°F within a 24-hour period can stress developing seedlings and lead to inconsistent germination across a batch. Insulating reservoirs or placing them where ambient temperatures remain relatively stable helps maintain the consistent conditions that support optimal germination results.
Do I need special nutrients during the germination phase?
During initial germination, seeds rely on internal energy reserves rather than external nutrients, making plain pH-adjusted water (5.8-6.2) ideal until the first true leaves appear. Premature nutrient application can actually inhibit germination by creating osmotic pressure that makes water uptake more difficult for emerging roots. Once seedlings develop their first true leaves, introduce nutrients gradually, starting with a quarter-strength solution and increasing incrementally to half-strength over the following week. This gentle introduction prevents nutrient burn while providing essential elements as seedlings begin photosynthesizing and developing their root systems.
For advanced growers, specialized germination solutions containing beneficial microorganisms, humic acids, and seaweed extracts can enhance root development without the risks associated with conventional nutrients. These biostimulants work with the seed’s natural processes rather than potentially interfering with them. If using such products, follow manufacturer dilution guidelines carefully, as over-application provides no additional benefits and may introduce unnecessary complications to the germination process.
Why are my hydroponic seedlings growing tall and leggy?
Leggy seedlings with elongated stems and wide spacing between leaves indicate insufficient light intensity, the most common issue in indoor seed starting. Plants stretch toward available light when intensity falls below approximately 150-200 μmol/m²/s (roughly equivalent to 30-40W of LED grow light per square foot). Position lights closer to seedling tops (2-4 inches for fluorescent lights, 12-18 inches for higher-intensity LEDs or HID lighting) and extend the photoperiod to 16-18 hours daily. Light quality also matters – seedlings require blue spectrum light (5000-6500K color temperature) during early growth to develop compact, sturdy stems rather than the red-dominant spectrum preferred during flowering stages.
Beyond light issues, temperature extremes can also cause legginess, particularly when nighttime temperatures remain high (above 75°F) or when the difference between day and night temperatures is minimal. Maintaining cooler night temperatures (5-10°F lower than daytime) encourages compact growth and stronger cell development. Mechanical stimulation through gentle brushing of seedling tops or running a low-speed fan across them for 10-15 minutes several times daily triggers a thigmomorphogenic response that results in shorter, sturdier stems better prepared for eventual transplanting.