Hydroponic Vegetables: Beginner's Guide To Soilless Growing
Key Takeaways
- Hydroponic systems grow plants up to 25% faster than soil gardens while using 90% less water, making them ideal for year-round cultivation regardless of climate.
- For beginners, Deep Water Culture (DWC) systems offer the simplest and most affordable entry point to hydroponics with minimal maintenance.
- Leafy greens like lettuce, spinach, and kale are perfect starter crops that can be harvested just 30 days after planting in a hydroponic system.
- The absence of soil eliminates many traditional gardening challenges including weeding, soil-borne diseases, and pests, creating cleaner growing environments.
- Modern hydroponic systems can fit in spaces as small as a kitchen countertop, making fresh vegetable growing accessible even to apartment dwellers with limited space.
Imagine harvesting fresh lettuce in the middle of winter, or growing juicy tomatoes in your apartment without a speck of soil. That’s the reality of hydroponic gardening—a revolutionary growing method that’s transforming how we think about home food production.
Hydroponics strips gardening down to its essentials by removing soil from the equation entirely. Instead of searching through dirt for nutrients, plant roots receive exactly what they need directly from a water-based solution. This direct delivery system is why hydroponic plants typically grow faster, produce higher yields, and can thrive in places conventional gardening could never succeed. Whether you’re dealing with limited space, poor soil conditions, or simply want to grow year-round, hydroponics offers a solution that’s both practical and fascinating.
Grow Fresh Vegetables Year-Round Without Soil: The Hydroponic Revolution
“Hydroponic Vegetables Less Nutritious …” from www.scientificamerican.com and used with no modifications.
The hydroponic revolution is changing how we approach food production, from commercial operations to home gardens. By growing plants in nutrient-enriched water instead of soil, hydroponics creates ideal growing conditions regardless of outdoor weather or seasons. This method dates back to the ancient Hanging Gardens of Babylon, but modern technology has made it accessible to anyone with a bit of space and curiosity. Today, everything from leafy greens to fruiting plants like tomatoes and cucumbers can thrive in hydroponic systems, often producing harvests in less time than their soil-grown counterparts.
For beginners, hydroponics offers a controlled environment where many traditional gardening challenges simply don’t exist. No more battling weeds, tilling soil, or dealing with garden pests that live in the dirt. Instead, you’ll focus on maintaining water quality, nutrient levels, and providing adequate light—all of which become straightforward with a bit of practice. Growing with Modern Gardening Solutions can transform even the most challenging spaces into productive gardens that yield fresh vegetables throughout the year.
How Hydroponics Saves 90% More Water Than Traditional Gardening
Traditional gardening loses substantial water to evaporation and runoff, with only a fraction actually reaching plant roots. In contrast, hydroponic systems recirculate water in a closed loop, delivering moisture directly where plants need it most. This efficiency results in water savings of up to 90% compared to soil gardening, making hydroponics an environmentally conscious choice in drought-prone regions. The water conservation benefit alone makes hydroponics worth considering, especially as climate challenges continue to affect traditional growing methods across many regions.
Why Plants Grow Up to 25% Faster in Hydroponic Systems
Plants grown hydroponically often develop 25% faster than their soil-grown counterparts because they expend less energy searching for nutrients. In soil, roots must grow extensively to locate water and essential minerals. Hydroponic systems deliver these necessities directly to the root zone, allowing plants to redirect energy toward vegetative growth and fruit production instead. Additionally, perfectly calibrated nutrient solutions provide optimal nourishment at every growth stage, eliminating the feast-or-famine conditions often experienced in soil. This consistent nutrient availability, combined with ideal oxygen levels at the roots, creates the perfect conditions for rapid, healthy growth that soil simply cannot match.
What Makes Hydroponics Different From Soil Gardening

“How Hydroponics Works and What to Know …” from www.onegreenplanet.org and used with no modifications.
The fundamental difference between hydroponics and traditional gardening lies in how plants access nutrients. Soil acts as both a growing medium and nutrient repository, slowly releasing minerals as organic matter decomposes. Hydroponics bypasses this process entirely by delivering pre-dissolved nutrients directly to plant roots. This direct feeding approach eliminates the middleman, creating a more efficient growing system where plants receive precisely what they need, when they need it.
Beyond nutrition, hydroponics offers unprecedented control over the growing environment. Temperature, humidity, light intensity, and nutrient concentration can all be optimized for specific plants. This level of control simply isn’t possible in outdoor soil gardens, where weather conditions, soil quality, and pest pressures vary wildly. The result is a more predictable growing experience with fewer surprises and disappointments—ideal for beginners who want consistent results.
The Science Behind Plant Nutrition in Water
Plants require 16 essential elements to thrive, and contrary to popular belief, soil itself isn’t actually necessary. What matters is the availability of these nutrients in a form plants can absorb through their roots. In hydroponics, these elements are provided as dissolved ionic compounds in water, making them immediately available to plants without the decomposition process required in soil.
The macronutrients nitrogen, phosphorus, and potassium (often referred to as NPK) form the foundation of plant nutrition, promoting leafy growth, root development, and flowering/fruiting respectively. Secondary nutrients like calcium, magnesium, and sulfur support structural integrity and enzyme function. Micronutrients including iron, manganese, and zinc are needed in tiny amounts but are critical for photosynthesis and other cellular processes. In hydroponic systems, these nutrients are precisely formulated in solution to match exactly what your specific plants need at each growth stage.
Hydroponic Fact: NASA has been using hydroponics since the 1990s to study how plants might grow in space, with plans to use these systems for long-duration missions and potential Mars colonization. Their research has significantly advanced hydroponic technology for Earth-based applications as well.
Root Oxygenation: Why It Matters
In soil gardens, roots access oxygen through air pockets between soil particles. Hydroponics must actively provide this oxygen to prevent root suffocation, which is accomplished through various methods depending on the system type. Air pumps, falling water, and specialized growing media all help maintain adequate oxygen levels at the root zone. This deliberate oxygenation actually gives hydroponic plants an advantage, as oxygen levels can be maintained at optimal concentrations rather than being subject to soil compaction or waterlogging issues that plague traditional gardens.
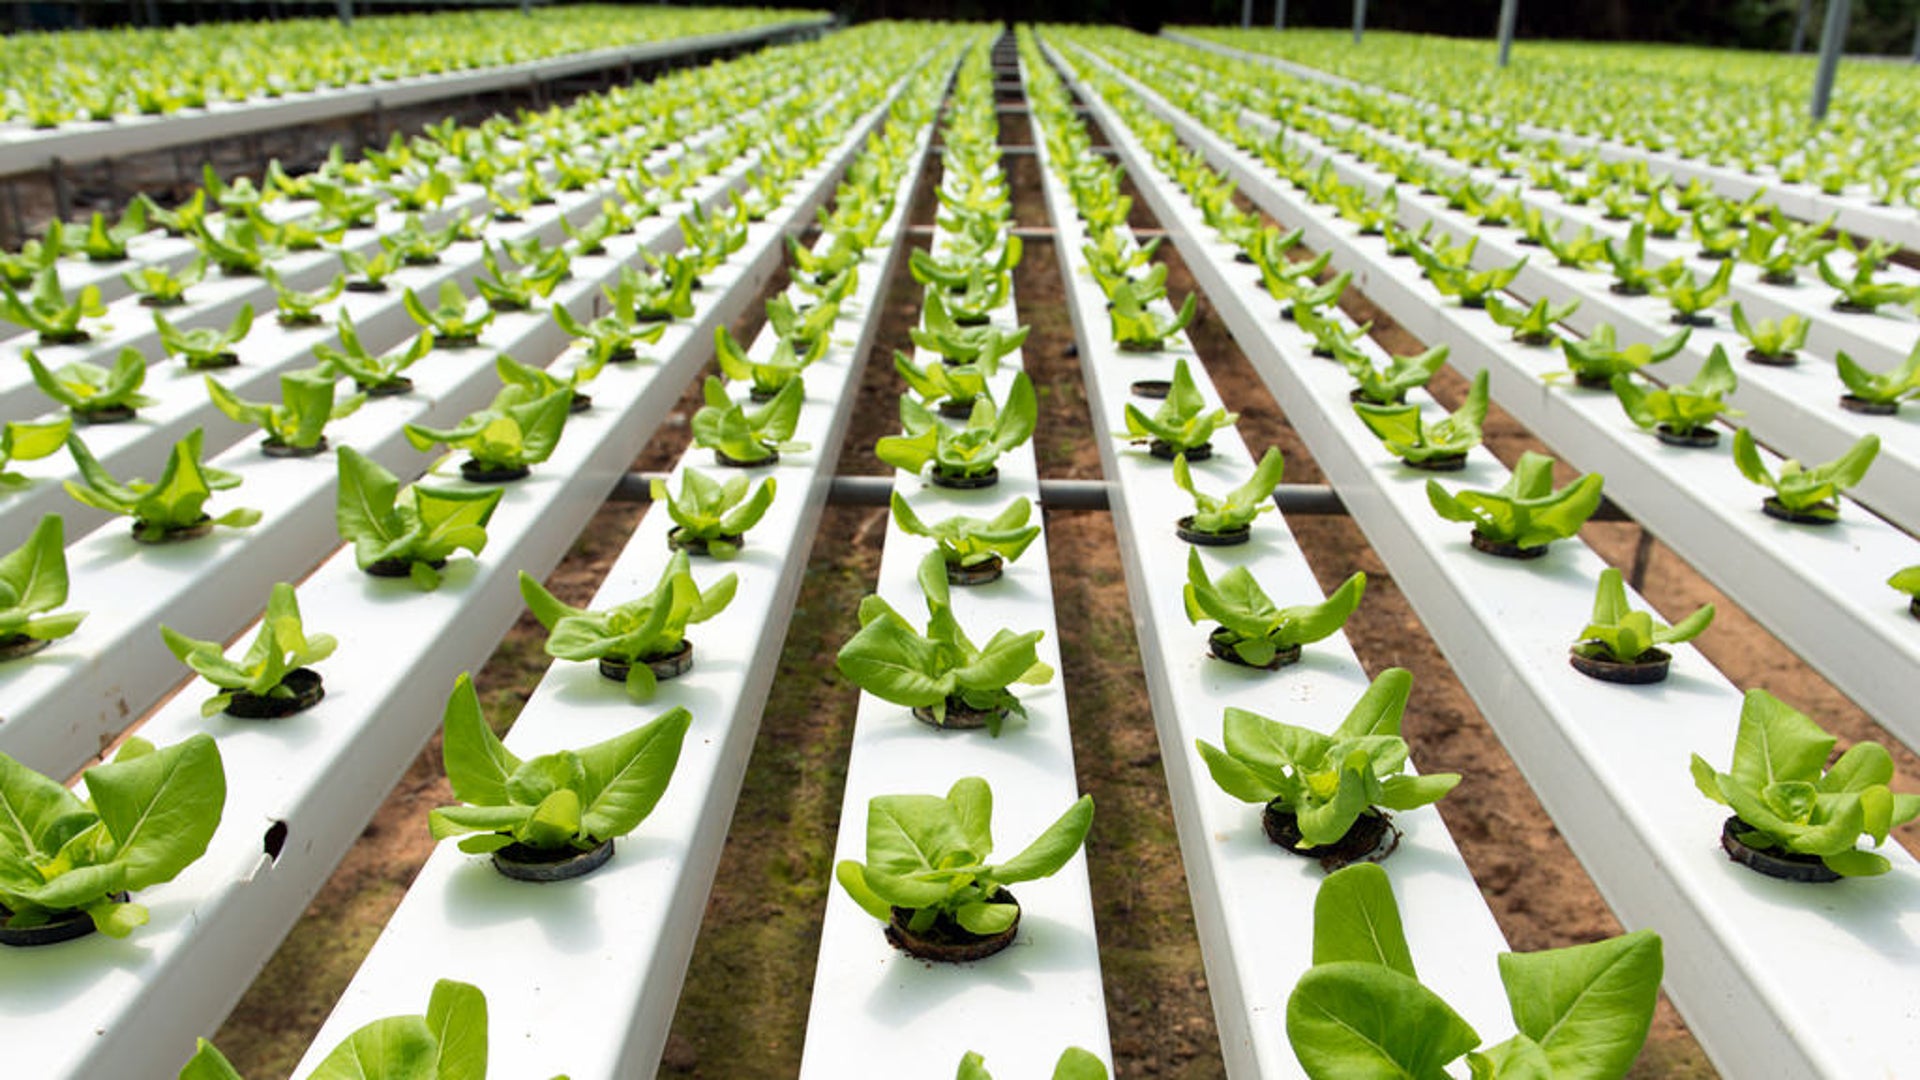
Space Efficiency: Growing More in Less Room
Hydroponic systems shine in their ability to maximize growing space. Without the need for extensive root systems to search for nutrients, plants can be positioned much closer together than in soil gardens. This density allows you to grow significantly more in limited spaces—perfect for urban dwellers or those with small yards. Vertical hydroponic systems take this efficiency even further by growing upward instead of outward, turning a small corner of your home into a productive garden.
Many hydroponic gardeners report harvesting 30-50% more produce per square foot compared to traditional methods. This space efficiency comes from both the higher planting density and the faster growth cycles that allow multiple harvests in the same time period a soil garden might produce just one. For apartment dwellers or those with limited outdoor space, this makes fresh homegrown produce a realistic option rather than just a dream.
Choose Your Perfect Hydroponic System

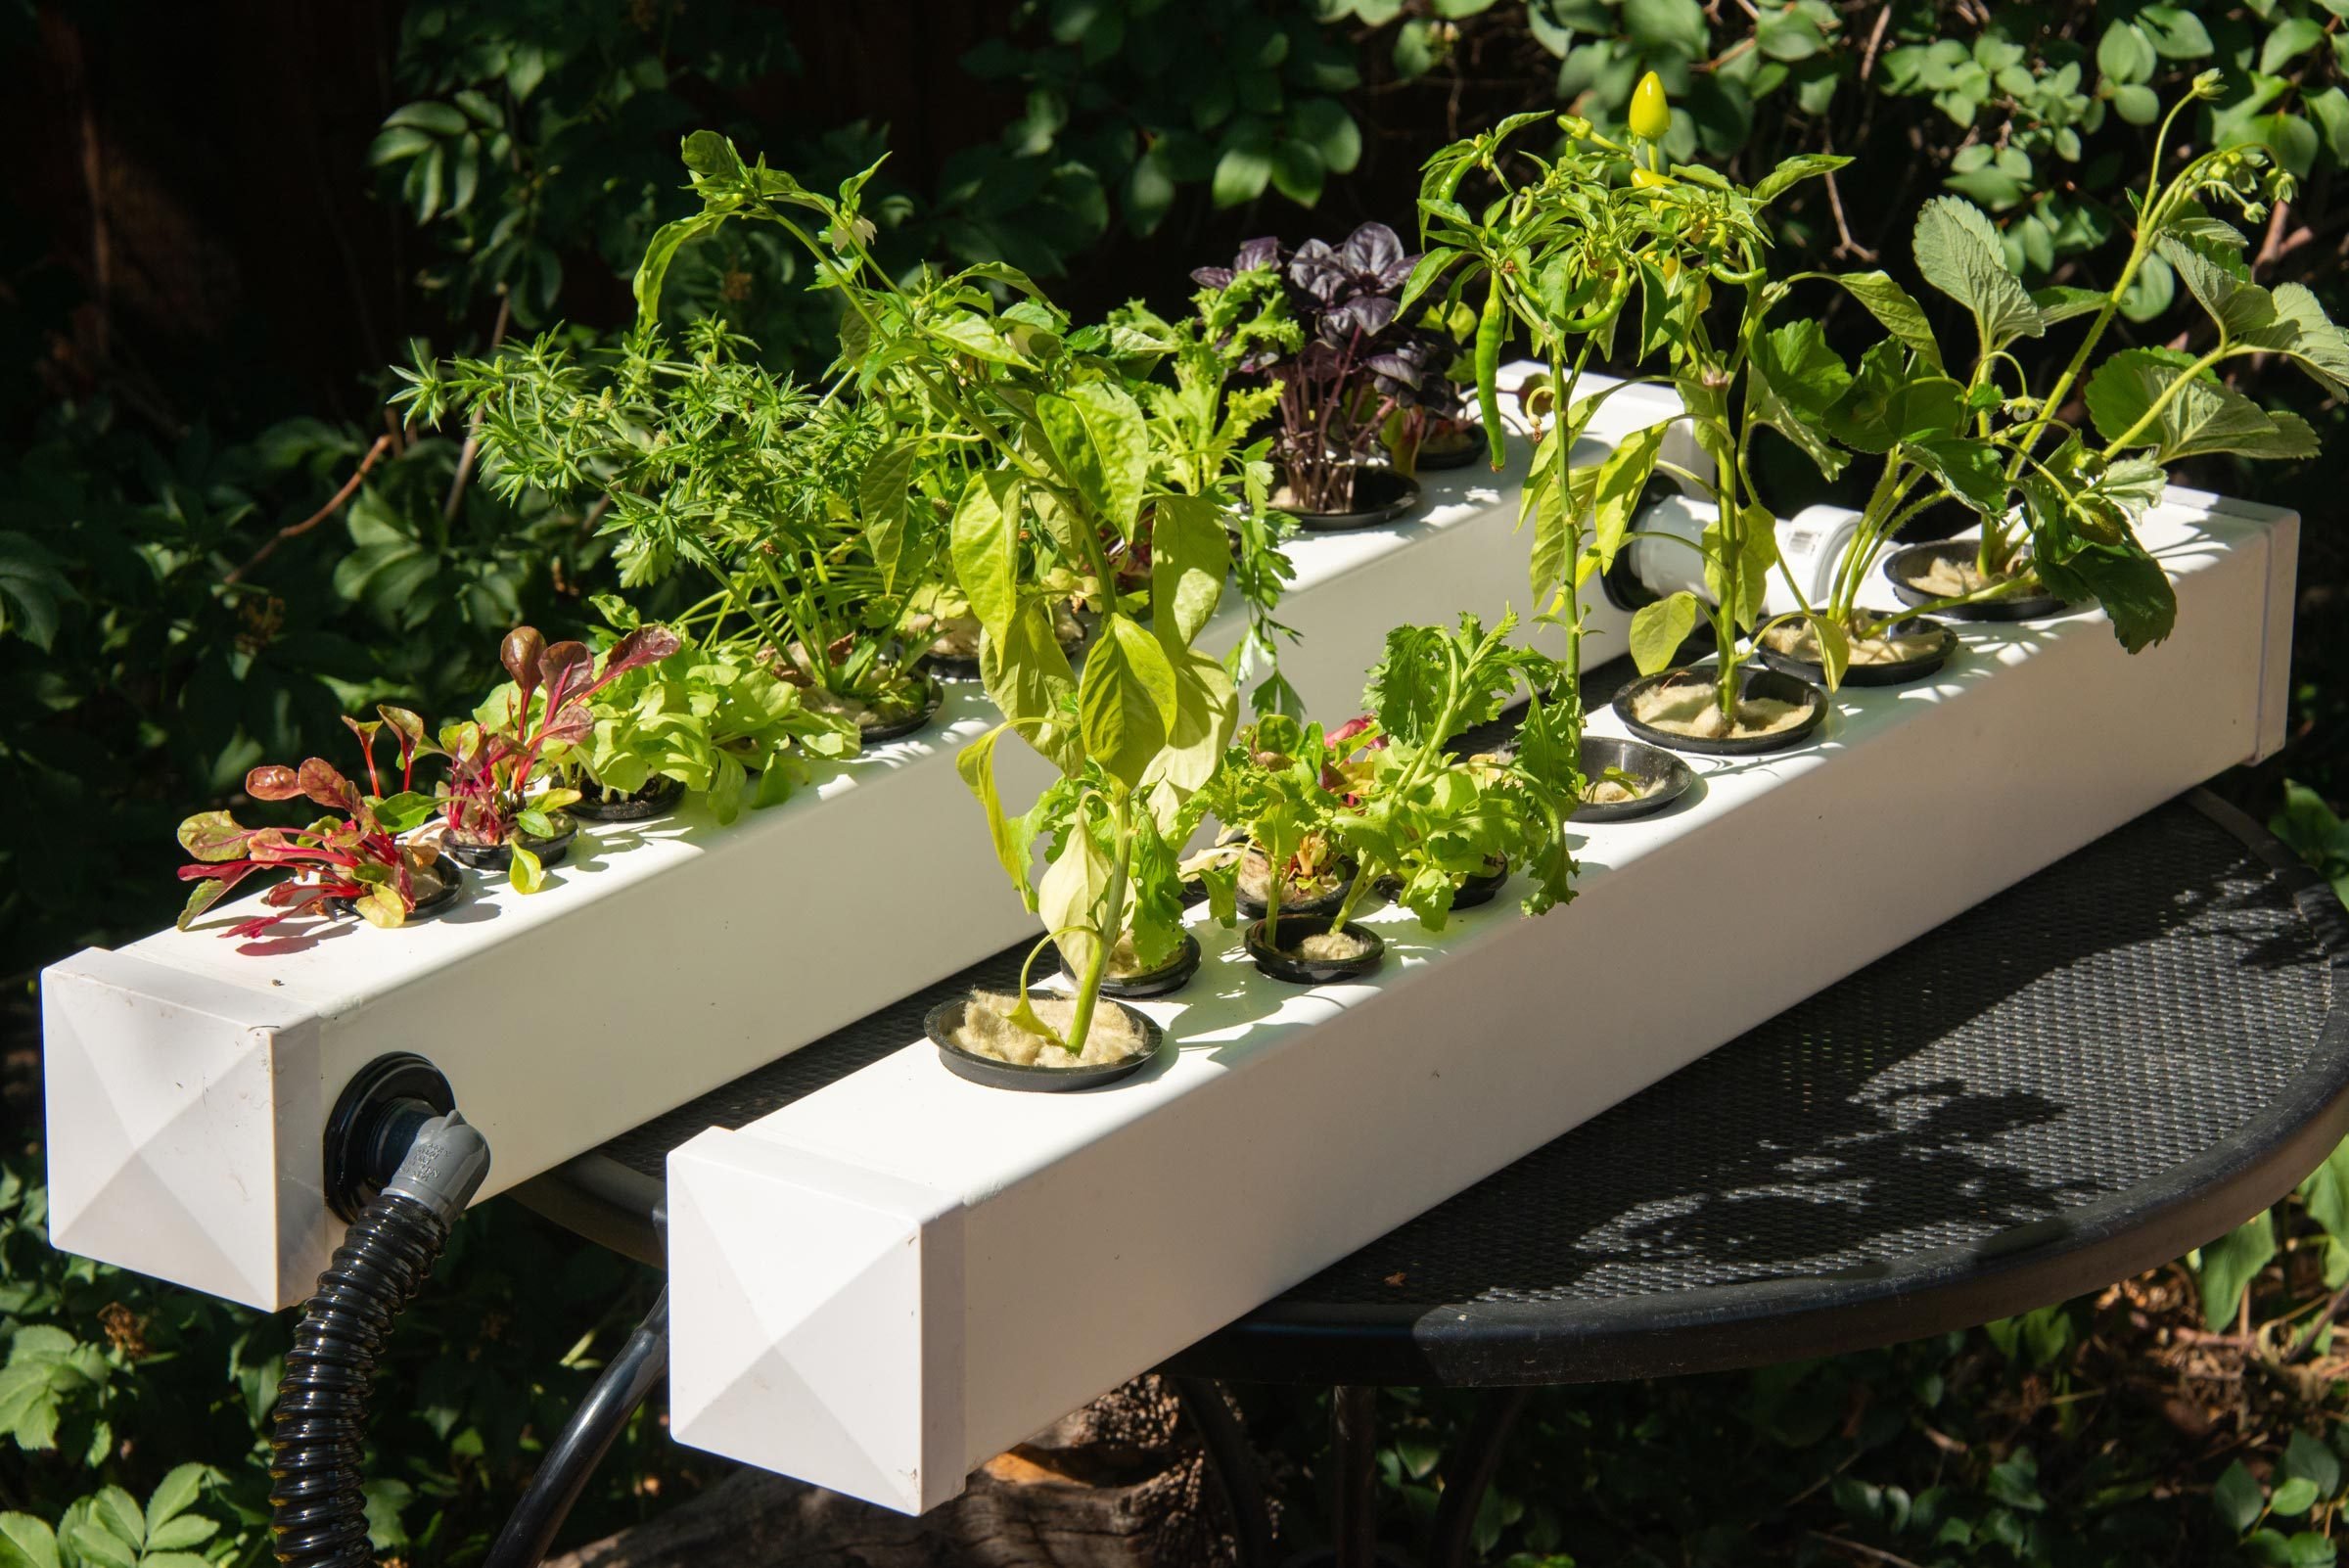
“15 Pods Hydroponics Growing System with …” from www.eaglepeak.com and used with no modifications.
The beauty of hydroponics lies in its versatility, with systems ranging from extremely simple to sophisticated automated setups. Your perfect system depends on your space, budget, and the types of plants you want to grow. While commercial options abound, many beginners find that DIY approaches provide the best combination of affordability and customization. Regardless of which system you choose, understanding the basic principles will help you succeed from the start and adapt as your experience grows.
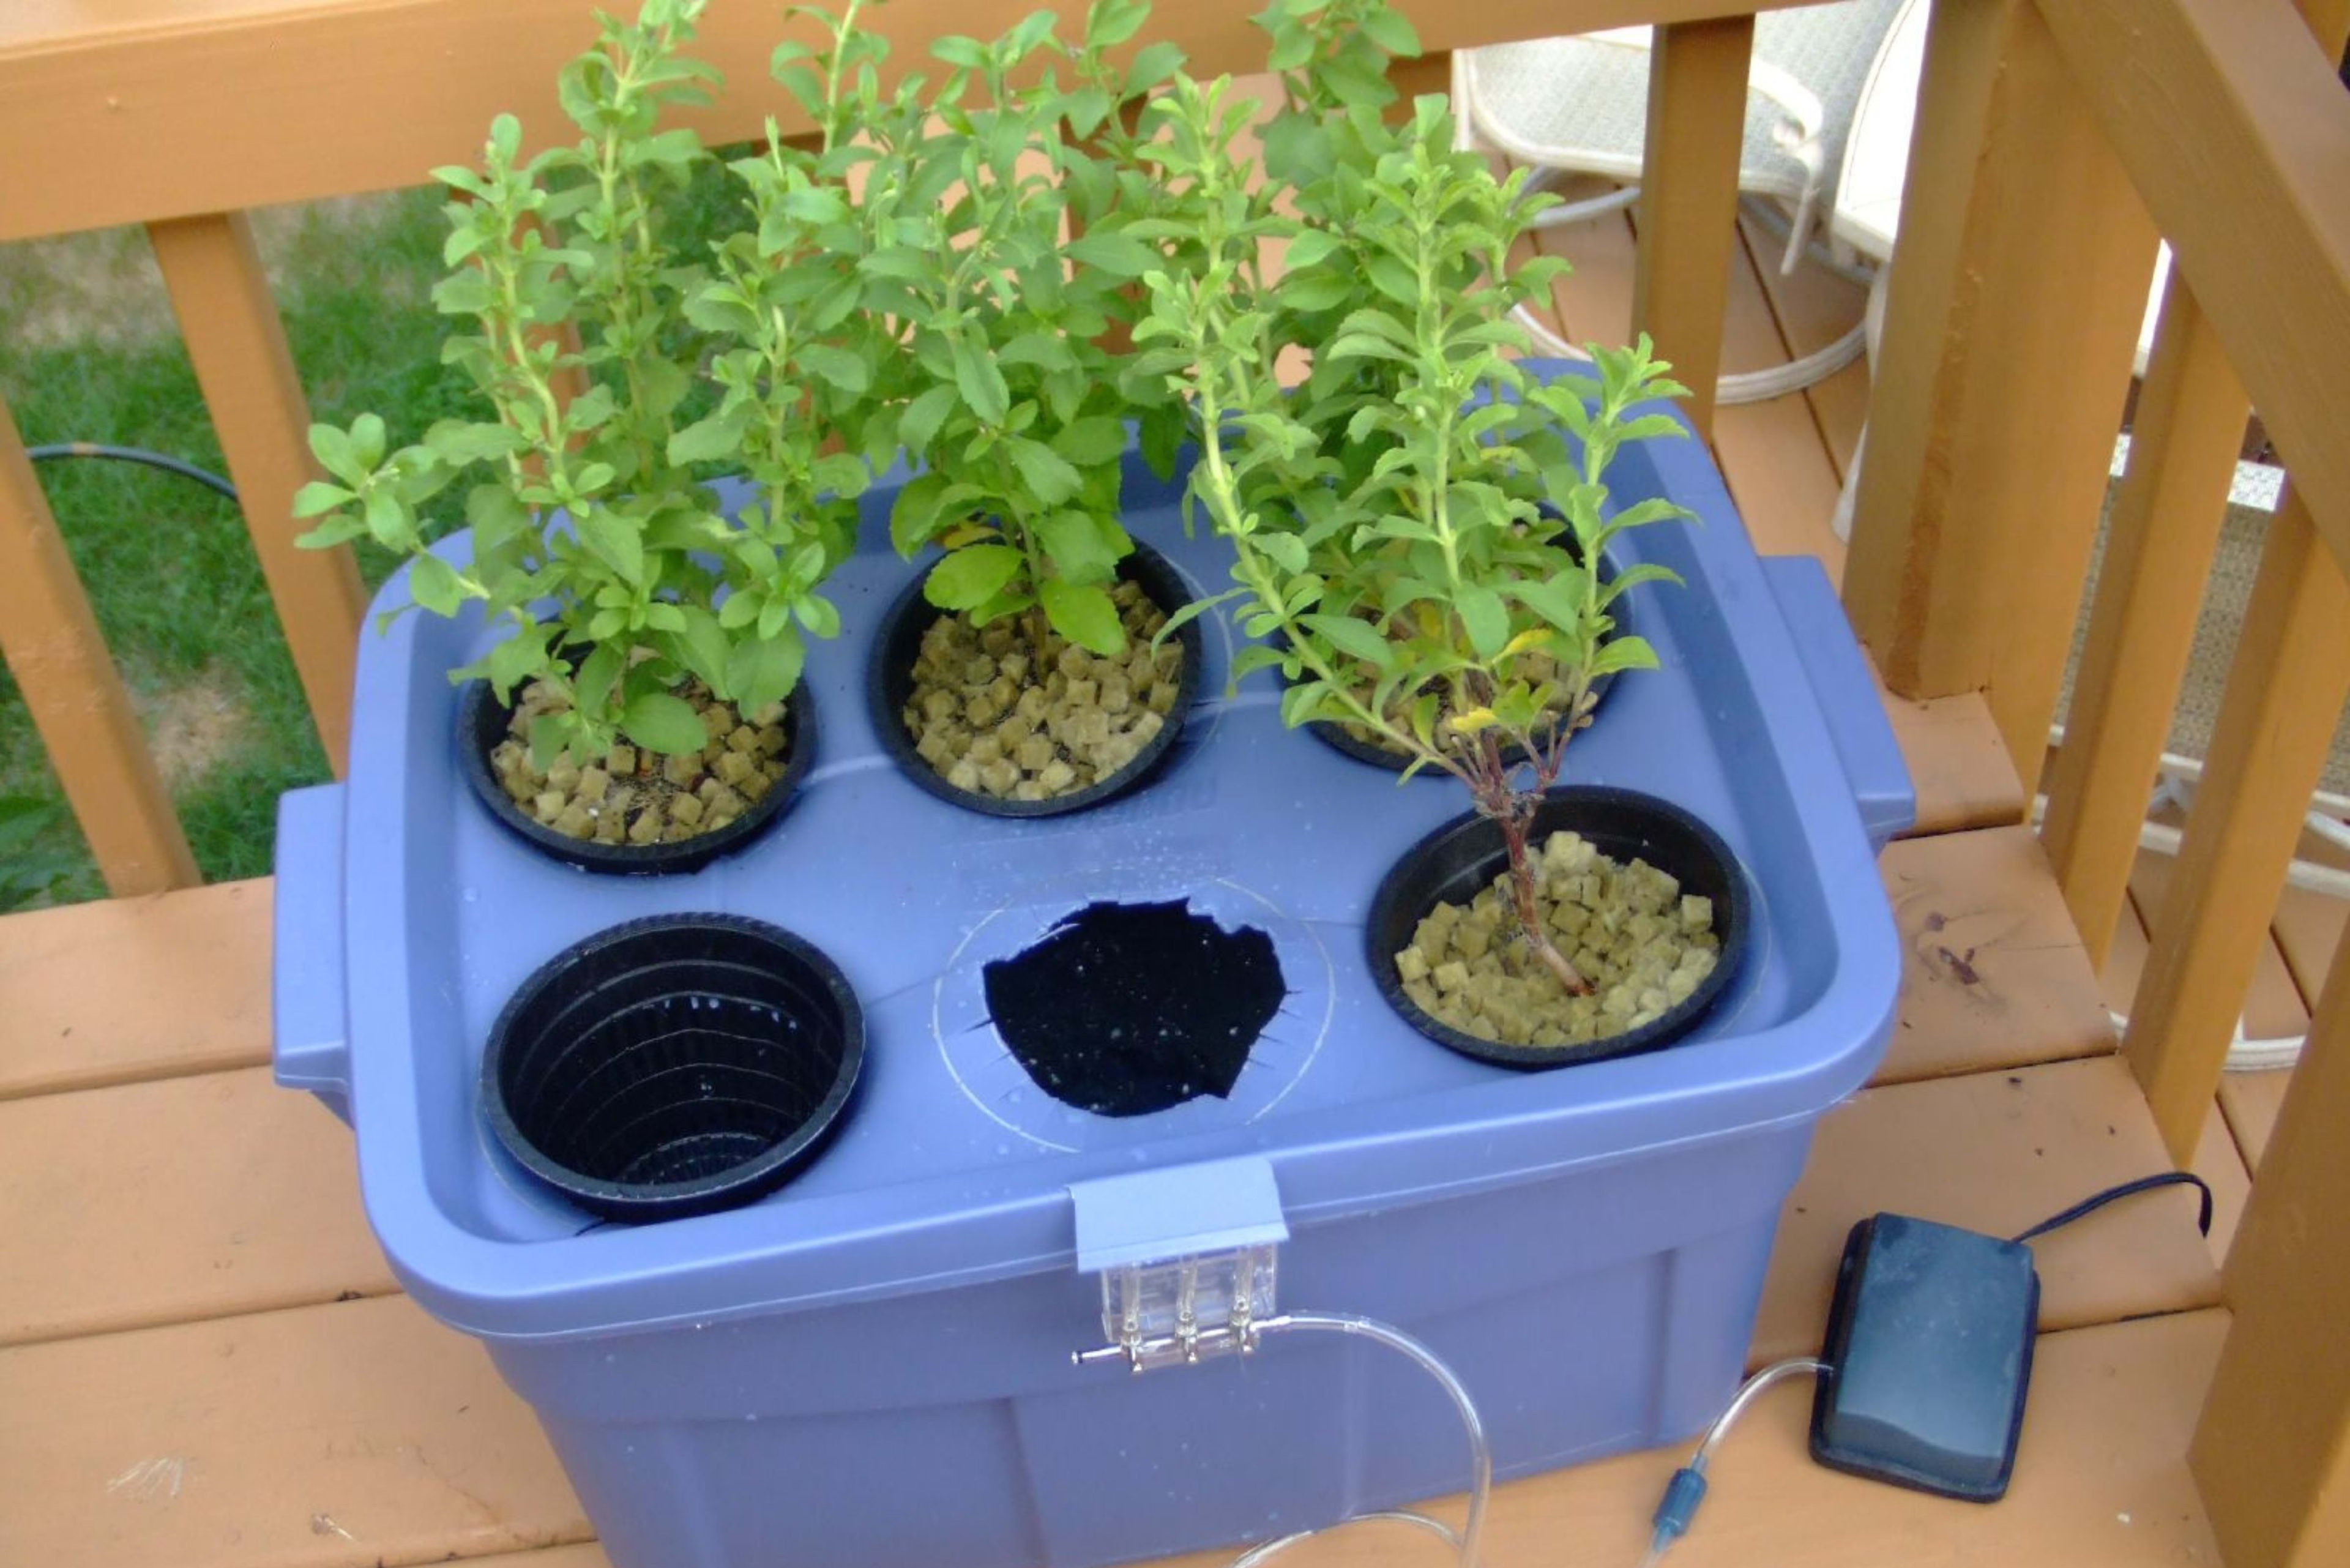
Deep Water Culture: The Simplest System for Beginners
Deep Water Culture (DWC) represents the easiest entry point into hydroponics. In this system, plant roots hang directly into nutrient-rich water that’s continuously aerated by an air pump and stone. The simplicity of DWC makes it perfect for beginners—there are no timers to set, no complex irrigation to maintain, and few components that can fail. You can create a basic DWC system with just a container, net pots, growing medium, an air pump, and air stone.
Plants like lettuce, herbs, and other leafy greens thrive in DWC systems, often reaching harvestable size in just weeks. The constant access to water, nutrients, and oxygen creates ideal growing conditions that result in lush, fast growth. While DWC isn’t ideal for all plants (particularly large fruiting varieties), it provides a perfect learning environment to master the fundamentals of hydroponics without significant investment or complexity.
Wick Systems: Passive Hydroponics for Budget Gardeners
Wick systems represent the ultimate in simplicity, requiring no electricity or moving parts. These passive hydroponic systems use capillary action through wicks (often nylon rope or felt strips) to draw nutrient solution up from a reservoir into the growing medium surrounding your plants. The wicks function much like candles, with the growing medium absorbing solution like wax absorbs melted flame. While growth rates may be slightly slower than in active systems, the reliability and simplicity make wick systems perfect for beginners or as backup systems during power outages.
Setting up a basic wick system can cost under $20, making it the most affordable entry point into hydroponics. All you need is a container for your nutrient solution, another container for your growing medium, wicks to connect them, and plants. These systems work best with smaller plants that don’t require massive amounts of water and nutrients, making them perfect for herbs and small leafy greens.

Nutrient Film Technique: For Leafy Greens and Herbs
The Nutrient Film Technique (NFT) creates a constant shallow flow of nutrient solution that runs over plant roots within a sloped channel. This thin “film” of water provides nutrients while ensuring roots receive plenty of oxygen. NFT systems excel with lightweight crops like lettuce, spinach, and herbs whose root systems won’t block the channels. The continuous flow design eliminates the need for growing media in most cases, with plants held in place by simple net pots.
Commercial growers favor NFT systems for their efficiency and scalability, but home gardeners can implement simplified versions using PVC pipes or rain gutters. The key to success lies in maintaining the proper slope (typically 1:30 to 1:40) and ensuring consistent water flow. When properly designed, NFT systems provide excellent results with minimal growing media and very efficient use of nutrients and water.
Drip Systems: Versatile Options for Most Vegetables
Drip systems represent the most versatile hydroponic method, capable of growing everything from herbs to tomatoes to full-sized cucumber plants. In these systems, nutrient solution is pumped from a reservoir to the base of each plant through small tubes and emitters. The solution then either drains back to the reservoir (recirculating) or runs to waste (non-recirculating). This flexibility makes drip systems adaptable to almost any growing situation and plant type.
For beginners interested in growing fruiting plants like tomatoes and peppers, drip systems often provide the best balance of simplicity and performance. The individual delivery of nutrients allows you to adjust flow rates for different plants with varying water needs. Additionally, the use of growing media provides stability for larger plants while still delivering the benefits of hydroponics.
Setting Up Your First Hydroponic Garden
“Hydroponic Tubs: A Build-It-Yourself …” from dengarden.com and used with no modifications.
Starting your hydroponic journey doesn’t require massive investment or technical expertise. With some basic supplies and a weekend of work, you can build a system that will provide fresh vegetables for months to come. The key is starting small, focusing on reliable crops, and learning as you grow. Your first system should prioritize simplicity and observation—providing a foundation of knowledge you’ll use for years to come.
Essential Equipment Checklist
Every hydroponic system, regardless of type, requires certain core components to function properly. At minimum, you’ll need containers for your nutrient solution and plants, a growing medium like perlite or coconut coir, and nutrient formulas specifically designed for hydroponics. For active systems, add a water pump or air pump (depending on system type), tubing for water circulation, and potentially a timer for automated operation. Lighting becomes crucial for indoor systems, with LED grow lights offering the best combination of efficiency and spectral quality for most beginners.
Don’t overlook measurement tools in your startup equipment. A pH meter or test kit and an electrical conductivity (EC) meter allow you to monitor your nutrient solution’s acidity and strength—two critical factors for plant health. Temperature gauges for both air and water provide additional insights that help optimize your growing environment. While these tools add to your initial investment, they prevent costly mistakes and plant loss in the long run.
Budget-Friendly DIY Options Under $50
A simple yet effective DWC system can be built for under $50 using materials from your local hardware store. Start with a 5-gallon bucket or storage tote as your reservoir, add an inexpensive aquarium air pump ($10-15), air stone ($3), airline tubing ($2), and net pots ($1-2 each). For growing media, expanded clay pellets or perlite work well and cost around $10-15 for enough to start several plants. Basic hydroponic nutrients might add another $15, but a single bottle of concentrate makes many gallons of solution.

Step-by-Step Weekend Build Guide
Begin your DIY hydroponic journey by gathering all materials on Friday evening so you’re ready for assembly on Saturday morning. Start by drilling holes in your container lid or tote top—these should match the diameter of your net pots. For a basic DWC system, 3-4 inch spacing between plants works well for most leafy greens. Next, connect your air pump to the air stone using airline tubing and place it in the bottom of your reservoir.
Fill your reservoir with water, leaving about 1-2 inches of space from the top to prevent overflow. Add nutrients according to package instructions, typically starting with half-strength solutions for seedlings and young plants. Test and adjust the pH using pH up/down solutions to achieve the ideal range (5.5-6.5 for most vegetables). Finally, place your growing media in the net pots, add your plants, and position the pots in your drilled holes.
With your system assembled, the final step is positioning your grow lights (if growing indoors) approximately 12-18 inches above your plants. Connect your air pump to power, ensuring it’s creating bubbles throughout the nutrient solution. By Sunday evening, your system should be stabilized and ready for plants to begin adapting to their new hydroponic environment.
First-Timer Success Tip: When building your first system, take photos at each step and keep notes on your decisions. This documentation becomes invaluable as you expand your hydroponic garden and want to replicate successful elements or avoid past mistakes.
Positioning Your System for Optimal Growth
Placement of your hydroponic system significantly impacts plant performance. For indoor setups, choose locations away from temperature extremes—avoid heating vents, air conditioners, and drafty windows. Consider water access for refilling, electrical outlets for pumps and lights, and the potential for water damage in case of leaks. A utility room, garage, or kitchen with waterproof flooring often provides ideal conditions. If using natural light from windows, south-facing exposure (in the Northern Hemisphere) provides the most consistent light throughout the day.
Best Vegetables for Beginner Hydroponic Gardeners
“How To Make a DIY Hydroponic Garden …” from www.familyhandyman.com and used with no modifications.
Success breeds enthusiasm, which is why I always recommend starting with fast-growing, forgiving crops for your first hydroponic garden. These beginner-friendly plants provide quick harvests, adapt easily to hydroponic conditions, and help you learn the fundamentals without frustration. As your confidence and knowledge grow, you can gradually introduce more challenging varieties that require greater attention to pollination, pruning, and support structures.
Troubleshooting Common Hydroponic Problems
Even the most carefully maintained hydroponic systems occasionally encounter issues. The good news is that most problems show clear visual symptoms before causing permanent damage to your plants. Learning to recognize these early warning signs allows you to make corrections before losing your crop. With hydroponics, the isolated growing environment makes diagnosis more straightforward than in soil, where multiple factors often interact.
Keeping a daily log of your system readings (pH, EC, temperature) provides invaluable data when troubleshooting. Often, problems can be traced back to gradual changes in these parameters that might otherwise go unnoticed. This systematic approach to problem-solving transforms challenges into learning opportunities that ultimately make you a more skilled hydroponic gardener.
Yellow Leaves: Causes and Solutions
Yellow leaves (chlorosis) commonly signal nutrient deficiencies, particularly nitrogen, iron, or magnesium. Start troubleshooting by checking your nutrient solution’s pH, as improper levels (outside 5.5-6.5 range) can block nutrient absorption even when those nutrients are present. If pH is correct, examine which leaves are yellowing—lower leaves typically indicate nitrogen deficiency, while yellowing between veins on newer growth suggests iron or magnesium issues. Adjust your nutrient solution accordingly, typically with a comprehensive nutrient formula or specific supplements designed to address the identified deficiency.
Root Rot Prevention and Treatment
Healthy hydroponic roots should appear white or cream-colored with vibrant growth. Brown, slimy roots indicate Pythium or other root rot pathogens, often caused by insufficient oxygen, stagnant water, or high reservoir temperatures. Immediate action is crucial: trim affected roots with sterilized scissors, increase aeration with additional air stones, and consider adding beneficial bacteria like Bacillus subtilis to your reservoir. For severe cases, a complete system cleaning with food-grade hydrogen peroxide (3%) followed by fresh nutrient solution may be necessary. Preventatively, maintain reservoir temperatures below 72°F (22°C) and ensure continuous water movement to discourage pathogen development.
Nutrient Deficiency Signs
Each essential nutrient displays characteristic deficiency symptoms in plants. Nitrogen deficiency appears as yellowing of older leaves starting at the tips, while potassium shortage manifests as brown scorching along leaf margins. Calcium deficiencies create distinctive black spots on developing fruits and distorted new growth. Phosphorus-starved plants develop purple hues on the undersides of leaves, particularly visible along veins and stems.
Comprehensive hydroponic nutrient solutions prevent most deficiencies when used correctly. However, fast-growing plants or those in fruiting stages may rapidly deplete specific nutrients, creating imbalances. Regular monitoring of plant appearance combined with periodic complete solution changes (every 7-14 days) helps maintain proper nutrition. For persistent problems, consider testing your water source, as high mineral content can interfere with nutrient uptake. For more information on hydroponics, you can explore this introduction to hydroponics.
- Nitrogen (N): Yellowing begins at leaf tips and progresses inward; plants appear pale and stunted
- Phosphorus (P): Purple or reddish coloration on undersides of leaves; slow growth and poor flowering
- Potassium (K): Brown scorching along leaf edges; weak stems and increased disease susceptibility
- Calcium (Ca): New leaves appear distorted; blossom end rot in tomatoes and peppers
- Magnesium (Mg): Yellowing between veins while veins remain green; older leaves affected first
When addressing nutrient issues, make gradual adjustments rather than dramatic changes. Add half the recommended correction amount, observe for 2-3 days, then reassess before adding more. This measured approach prevents overcorrection which can create new imbalances more damaging than the original problem.
Algae Control Strategies
Green water or slimy reservoir surfaces indicate algae growth, which competes with your plants for nutrients and oxygen. Light exposure to nutrient solution is the primary culprit, so start by covering all reservoirs and channels with light-blocking materials. For existing algae, a complete system cleaning may be necessary, using food-grade hydrogen peroxide (3%) to sanitize surfaces without harming future plant growth. Prevention remains your best strategy—maintain reservoir temperatures below 70°F (21°C), use opaque containers, and cover any transparent tubing with aluminum foil or light-blocking sleeves to create an environment where algae cannot thrive.
Harvesting and Enjoying Your Hydroponic Bounty
The reward for your hydroponic efforts comes at harvest time, when you’ll enjoy vegetables with peak freshness impossible to find in stores. Hydroponic harvests often surprise beginners with their abundance—a well-maintained system can produce significantly more than equivalent soil gardens. This productivity results from optimized growing conditions and the ability to plant more densely than traditional methods allow.
Unlike soil gardens that often mature all at once, hydroponic systems can be designed for continuous harvests. By staggering plantings or using perpetual harvest techniques, you can enjoy fresh produce year-round rather than dealing with feast-or-famine cycles. This consistent production makes hydroponics particularly valuable for everyday ingredients like salad greens and herbs that lose flavor rapidly after harvesting.
When to Pick for Maximum Flavor
Harvest timing significantly impacts the flavor of hydroponic vegetables. Leafy greens like lettuce and spinach taste sweetest when harvested in the morning before the heat of the day converts sugars to starches. Conversely, tomatoes, cucumbers, and other fruiting crops develop best flavor when allowed to ripen fully on the plant. Unlike commercial varieties bred for shipping durability, your homegrown hydroponic varieties can prioritize flavor over shelf life, allowing you to experience each vegetable at its peak. Herbs should typically be harvested just before flowering when their essential oil concentration reaches maximum levels—often identifiable by the most intense aroma.
Continuous Harvest Techniques
Many hydroponic crops can produce continuously when harvested properly. Leafy greens like lettuce and kale can be harvested by removing outer leaves while allowing the center to continue growing—a technique called “cut-and-come-again” that provides weeks of harvests from a single planting. For herbs like basil, cilantro, and mint, pinch stems just above a leaf node to encourage branching and prevent flowering, creating bushier plants that produce more usable leaves. Even indeterminate tomatoes and cucumbers can produce for months when lower leaves are pruned and fruits are harvested promptly, directing the plant’s energy toward new growth rather than seed production.
Seed-Saving from Hydroponic Plants
Contrary to some gardening myths, hydroponic plants produce viable seeds just like their soil-grown counterparts. To save seeds, simply allow a few plants to complete their life cycle by flowering and producing mature fruits. Lettuce, spinach, and herbs can be left to bolt (send up flower stalks), while tomatoes and peppers should be allowed to ripen fully beyond the eating stage. Harvest seeds when completely dry on the plant, clean them of any pulp or plant material, and store in paper envelopes in a cool, dry place. These saved seeds often produce plants well-adapted to hydroponic conditions, potentially improving your results with each generation.
Frequently Asked Questions
As hydroponics becomes more mainstream, certain questions consistently arise from beginners considering this growing method. Understanding these common concerns helps new hydroponic gardeners approach their systems with realistic expectations and proper preparation. While individual experiences may vary based on specific setups and environments, these general principles apply to most hydroponic growing situations.
Do hydroponic vegetables taste the same as soil-grown ones?
Hydroponic vegetables often taste identical or superior to soil-grown counterparts when grown properly. The key factors affecting flavor are variety selection, nutrient balance, and harvest timing rather than growing method. In blind taste tests, consumers frequently cannot distinguish between hydroponic and soil-grown vegetables of the same variety. In fact, many high-end restaurants specifically source hydroponic produce for its consistent quality and clean flavor profiles. The “freshness factor” provides hydroponics a significant advantage—vegetables harvested minutes before consumption retain peak flavors that diminish rapidly during the transportation and storage required for commercial soil-grown produce.
“I was skeptical about flavor until I grew my own hydroponic tomatoes. The intensity and sweetness surpassed anything I’d grown in soil, primarily because I could let them fully ripen before picking. Store tomatoes never get that chance.” – Maria L., hydroponic gardener for 3 years
For maximum flavor, focus on selecting varieties bred for taste rather than shipping durability. Heritage varieties often excel in hydroponic systems, offering flavor complexities that commercial varieties lack. Additionally, maintaining appropriate electrical conductivity (EC) levels in your nutrient solution directly impacts flavor intensity—slightly higher EC during fruiting stages can increase sugar content and flavor compounds in many vegetables.
How much electricity does a hydroponic system use?
Electricity usage varies significantly depending on system design and growing environment. A basic DWC system with just an air pump might consume as little as 5-10 watts continuously—about $1-2 per month at average electricity rates. Adding grow lights dramatically increases consumption; a small LED setup for herbs might use 100 watts, while lighting for fruiting plants can require 300-600 watts or more. For perspective, a typical home indoor garden under lights might add $10-30 monthly to electricity bills, comparable to running a few extra electronics.
Energy efficiency has improved dramatically in recent years, particularly with LED lighting technology. Modern grow lights produce significantly more usable light per watt than older fluorescent or HID systems, reducing operating costs by 30-50%. Additionally, smart controllers that adjust lighting intensity based on plant needs or natural sunlight availability can further reduce consumption. For the most energy-efficient setup, supplement natural lighting when possible and choose systems with DC pumps and energy-efficient components.
Can I convert my existing plants to a hydroponic system?
Most soil-grown plants can be successfully transitioned to hydroponics through a process called “bare-rooting.” Start by gently removing the plant from its soil, washing the roots thoroughly under lukewarm water to remove all soil particles. Trim any damaged roots with sterilized scissors, then place the cleaned plant in your hydroponic system with appropriate support. Expect a short adjustment period (7-14 days) during which the plant may appear stressed as it adapts to the new environment.
This conversion works best with younger, actively growing plants rather than mature specimens. Leafy greens and herbs typically transition most successfully, while established fruiting plants may struggle with the change. For best results, start with a half-strength nutrient solution for the first week to avoid overwhelming the transitioning root system, gradually increasing to full strength as new hydroponic-specific roots develop. Be patient during this process—plants that successfully adapt often show explosive growth once established in their new hydroponic environment.
What’s the minimum space needed for hydroponic gardening?
Hydroponic gardening can be adapted to virtually any space, from windowsill herb gardens to dedicated grow rooms. A basic system supporting 4-6 lettuce plants requires only about 1 square foot of surface area—small enough to fit on a kitchen counter or bookshelf. Vertical systems utilizing wall space can produce significant harvests in footprints as small as 2 square feet. Even apartment dwellers with limited space can produce meaningful amounts of fresh herbs and greens with compact systems specifically designed for urban environments. For a deeper understanding, explore this introduction to hydroponics.
| System Type | Minimum Space Required | Typical Yield |
|---|---|---|
| Windowsill Herb Garden | 6″ x 12″ | Fresh herbs for 1-2 people |
| Countertop Lettuce System | 12″ x 12″ | 4-6 heads every 30 days |
| Vertical Tower Garden | 2′ x 2′ floor space | 20+ plants in mixed varieties |
| Small DWC System | 2′ x 3′ surface | 8-12 plants depending on type |
Space efficiency remains one of hydroponics’ greatest advantages over soil gardening. The absence of sprawling root systems allows plants to be positioned much closer together, while controlled lighting and optimal nutrition support healthy growth even in dense plantings. For those with limited space, focusing on high-value crops that are expensive to purchase (fresh herbs, specialty greens) maximizes the return on your space investment.
Are hydroponic nutrients organic?
Hydroponic nutrients are available in both conventional and organic formulations. Conventional nutrients use refined mineral salts that provide precise, consistent nutrition and dissolve completely in water. Organic nutrients derive from natural sources like fish emulsion, seaweed extract, and compost tea, containing beneficial microorganisms along with core nutrients. While organic options align with natural gardening philosophies, they typically require more maintenance as they can precipitate out of solution or create biofilms that need regular cleaning.
For beginners, conventional nutrients often provide the simplest path to success, offering stable pH and predictable performance. As you gain experience, you might experiment with organic formulations or hybrid approaches that incorporate beneficial microbes alongside mineral nutrients. Both methods can produce healthy, nutritious vegetables—the choice ultimately depends on your gardening philosophy and willingness to manage the additional variables that come with organic systems.