Making Hydroponic Fertilizer: Tips And Tricks For DIY!
Key Takeaways
- Creating your own hydroponic fertilizer can reduce costs by up to 70% compared to commercial solutions while giving you complete control over nutrient profiles.
- Proper understanding of macronutrients (NPK) and micronutrients is essential for creating effective DIY hydroponic nutrient solutions.
- Maintaining the correct pH balance (typically 5.5-6.5) is crucial for nutrient absorption in hydroponic systems.
- Custom Hydro Nutrients offers specialized raw materials that can simplify the DIY fertilizer mixing process for hydroponics enthusiasts.
- With proper measuring tools and techniques, you can create professional-grade hydroponic fertilizers that rival commercial products.
Tired of paying premium prices for pre-mixed hydroponic fertilizers that don’t perfectly match your plants’ needs? DIY hydroponic fertilizer solutions are the game-changer your indoor garden deserves.
Creating your own nutrient formulations isn’t just cost-effective—it puts you in complete control of your plants’ diet. By mixing your own solutions with raw salts from suppliers like Custom Hydro Nutrients, you can fine-tune exactly what your plants receive at each growth stage. This level of customization is something commercial one-size-fits-all products simply can’t match.
The benefits extend beyond just saving money. DIY fertilizers allow you to adapt quickly to your plants’ changing needs, eliminate unnecessary additives, and achieve those picture-perfect yields you’ve been chasing. Whether you’re growing leafy greens or flowering plants, the right nutrient balance makes all the difference.
Why DIY Hydroponic Fertilizer Will Transform Your Growing Game

“DIY Hydroponic Fertilizer: A Complete …” from sensorex.com and used with no modifications.
Making your own hydroponic nutrients revolutionizes how you approach indoor gardening. Commercial solutions often contain ingredients you don’t need and may lack others your specific plants crave. When you mix your own, you eliminate this guesswork entirely. Plus, buying raw components in bulk drastically cuts costs—many growers report savings of 50-70% compared to pre-mixed solutions.
DIY fertilizers also eliminate the mystery behind your plant nutrition. Instead of trusting a manufacturer’s generic formula, you’ll develop intimate knowledge of exactly what your plants are consuming and how they respond to different nutrient profiles. This knowledge compounds over time, turning you into a more skilled and intuitive grower with each harvest.
Perhaps most importantly, creating custom nutrient solutions allows for precision adjustments throughout your plants’ growth cycle. Seedlings need different nutrition than mature plants, and flowering varieties have completely different requirements than leafy greens. With DIY solutions, these adjustments become simple tweaks rather than complete formula changes.
The Nutrient Essentials Your Hydroponic Plants Can’t Live Without
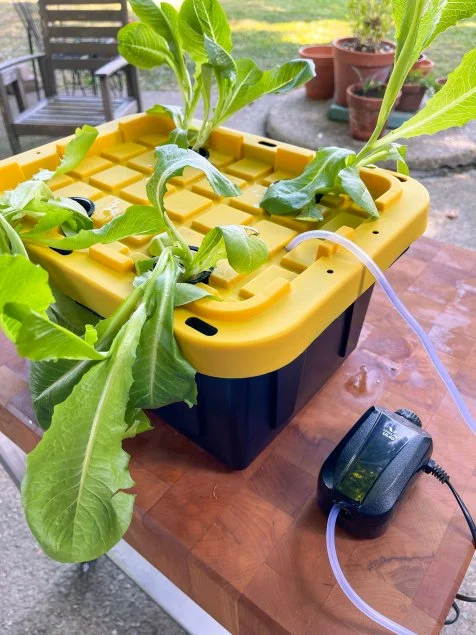
“DIY Hydroponic System …” from www.hgtv.com and used with no modifications.
Successful hydroponic growing relies on providing your plants with the perfect balance of essential nutrients. Unlike soil gardening where some nutrients naturally exist in the growing medium, hydroponics requires you to supply everything your plants need through your nutrient solution. Understanding these requirements is the foundation of creating effective DIY fertilizers.
Macronutrients: The Big Three Your Plants Need Most
Macronutrients form the backbone of any hydroponic feeding program. Nitrogen (N), phosphorus (P), and potassium (K) are required in larger quantities than other nutrients and directly influence your plants’ growth patterns. Nitrogen drives leaf and stem development—crucial for vegetative growth. Phosphorus supports root development and plays a vital role in energy transfer within the plant. Potassium regulates water movement through plant tissues and contributes to overall plant health and disease resistance.
Secondary macronutrients like calcium, magnesium, and sulfur are needed in moderate amounts. Calcium strengthens cell walls and helps new growth develop properly. Magnesium is essential for chlorophyll production and photosynthesis. Sulfur plays a role in protein formation and enzyme activity. Without adequate levels of these six macronutrients, plants will quickly show deficiency symptoms and growth will suffer dramatically.
Micronutrients: Small But Mighty Growth Boosters
Don’t let the name fool you—micronutrients may be needed in smaller quantities, but they’re absolutely essential for plant health. Iron, manganese, zinc, boron, copper, and molybdenum each play critical roles in plant metabolism. Iron is necessary for chlorophyll synthesis, while manganese activates important enzymes. Zinc influences plant hormone production, and boron affects cell division and sugar transport.
When creating DIY hydroponic fertilizers, sourcing quality micronutrients can be challenging. Many growers use chelated forms of these minerals (meaning they’re bound to organic compounds) which increases their availability to plants. Properly balanced micronutrients prevent common issues like interveinal chlorosis (yellowing between leaf veins) and stunted growth that can plague hydroponic systems.
pH Balance: The Secret Key to Nutrient Absorption
You can mix the perfect nutrient solution, but if your pH is off, your plants may still starve. pH (potential hydrogen) measures how acidic or alkaline your solution is, and it directly impacts nutrient availability. Most hydroponic plants thrive in slightly acidic conditions between 5.5 and 6.5 pH. Outside this range, certain nutrients become chemically bound and unavailable to plants, creating “nutrient lockout” despite adequate nutrients being present.
Monitoring and adjusting pH is a non-negotiable aspect of DIY hydroponic fertilizer management. Inexpensive digital pH meters make this process simple. For adjustments, food-grade phosphoric acid can lower pH, while potassium hydroxide or potassium carbonate solutions can raise it. Always make small adjustments and retest rather than attempting large pH shifts at once.
Different plants prefer slightly different pH ranges—leafy greens typically thrive toward the lower end (5.5-6.0), while fruiting plants often prefer the higher end (6.0-6.5). Keeping detailed records of how your specific crops respond to different pH levels will help you optimize your DIY solutions over time.
5 Simple DIY Hydroponic Fertilizer Recipes That Actually Work
:max_bytes(150000):strip_icc()/diy-hydroponic-systems-5093454-hero-e47eb8c4d31146ea90b44c18b7345807.jpg)
“How to Choose a DIY Hydroponic System” from www.thespruce.com and used with no modifications.
Let’s get practical with proven formulations you can mix today. These recipes have been refined by experienced hydroponic growers and deliver exceptional results across different plant types and growing systems.
1. Basic Two-Part Nutrient Solution
This foundational recipe separates calcium from phosphates and sulfates to prevent precipitation. For Part A, dissolve 12g calcium nitrate and 2.5g potassium nitrate in 1 gallon of water. For Part B, mix 6g monopotassium phosphate, 5g magnesium sulfate, 8g potassium sulfate, and 2ml micronutrient solution in a separate gallon. When using, add equal parts of A and B to your reservoir after diluting to prevent chemical reactions.
This solution provides a balanced NPK ratio of 3-1-4, making it versatile enough for most vegetable crops. I’ve found this recipe particularly effective for leafy greens like lettuce and spinach, where excessive nitrogen can lead to nitrate accumulation.
2. Modified Hoagland Solution for Leafy Greens
The Hoagland solution is a well-researched formula developed by plant nutritionists. To create a simplified version, combine 5g calcium nitrate, 3g potassium nitrate, 0.5g monopotassium phosphate, 2g magnesium sulfate, and 1ml of commercial micronutrient solution in 1 gallon of water. This nutrient-dense mixture works wonders for fast-growing leafy vegetables that thrive on nitrogen-rich solutions.
Unlike the two-part solution, this can be mixed all at once, but requires regular reservoir changes (every 7-10 days) to prevent nutrient imbalances. For best results, maintain pH between 5.8-6.2 and electrical conductivity (EC) around 1.4-1.8 mS/cm.
3. Bloom-Boosting Formula for Fruiting Plants
Flowering and fruiting plants need higher phosphorus and potassium levels to produce abundant harvests. Combine 5g calcium nitrate, 10g monopotassium phosphate, 8g potassium sulfate, 3g magnesium sulfate, and 1.5ml micronutrient mix per gallon of water. The resulting NPK ratio of approximately 2-4-8 redirects the plant’s energy from vegetative growth to flower and fruit production.
Transition to this formula when you see the first flower buds forming. The reduced nitrogen and increased phosphorus and potassium signals plants to focus energy on reproductive growth rather than producing new leaves. For tomatoes, peppers, and strawberries, this formula has consistently delivered heavier fruit sets and improved flavor profiles.

4. Organic Tea Alternative for Hydroponics
While true organic hydroponics presents challenges, this hybrid approach incorporates beneficial organic compounds. Start with a base of worm casting tea (steep 1 cup of castings in 1 gallon of water for 24-48 hours with an air stone). After straining thoroughly, add 3g calcium nitrate, 2g monopotassium phosphate, and 2g Epsom salt to provide immediately available nutrients.
The microbial life from the worm castings introduces beneficial bacteria that help break down complex nutrients and protect against root pathogens. Because of the organic material, this solution should be used immediately after mixing and not stored. Use a fine filter to prevent organic particles from clogging hydroponic systems.
5. Quick Emergency Nutrient Solution
Sometimes you need a fast solution when plants show deficiency signs or commercial nutrients run out. Mix 5ml each of liquid seaweed extract and fish emulsion with 1 teaspoon of Epsom salt in 1 gallon of water. While not optimal for long-term growth, this emergency solution provides enough nutrients to sustain plants for 7-10 days while you obtain proper ingredients.
The seaweed extract supplies trace minerals and natural growth hormones, while fish emulsion delivers readily available nitrogen. Epsom salt contributes essential magnesium and sulfur. Be aware this solution may cause some foaming and has a distinct odor, so it’s best used in well-ventilated growing areas.
Pro Tip: Always mix your DIY nutrient solutions using distilled or reverse osmosis water to prevent unknown minerals from affecting your carefully balanced formula. Municipal water often contains chlorine, fluoride, and varying levels of calcium that can skew your nutrient ratios and pH.
Gathering Your Supplies: Where to Find Affordable Ingredients

“DIY Worm Casting Nutrient Solution for …” from www.youtube.com and used with no modifications.
Sourcing quality components at reasonable prices is crucial for making DIY hydroponic fertilizer financially viable. The good news is that most ingredients are widely available once you know where to look. Agricultural supply stores, online specialty retailers like Custom Hydro Nutrients, and even some garden centers carry the base components needed for effective nutrient solutions.
Common Household Items That Double as Nutrient Sources
Several items you might already have at home can contribute to your hydroponic feeding program. Epsom salt provides magnesium and sulfur, while baking soda can help adjust pH in small amounts. Molasses contains trace minerals and can feed beneficial microorganisms if you’re incorporating biological elements. Crushed eggshells steeped in vinegar create a calcium-rich solution that can address calcium deficiencies when properly diluted and pH balanced.
Even certain food scraps can be repurposed through composting and tea-making processes. Banana peels are particularly rich in potassium, while used coffee grounds provide nitrogen and trace minerals. While these household alternatives won’t completely replace professional-grade nutrients, they can supplement your program and help reduce costs.
Best Places to Buy Raw Fertilizer Components
For serious hydroponic growers, investing in laboratory-grade nutrient salts is the most efficient approach. Specialty hydroponic suppliers offer precisely what you need without fillers or unnecessary additives. Online retailers specializing in hydroponic components typically provide comprehensive selection guides and detailed specifications for each product.
Agricultural cooperatives and farm supply stores often sell fertilizer salts in larger quantities at lower prices than garden centers, though you may need to repackage them for convenient storage. For micronutrients, specialized hydroponic retailers offer pre-mixed solutions that eliminate the need to source and measure tiny amounts of individual trace elements. When purchasing, always check the purity levels—agricultural grade is sufficient for most home growers, while technical or laboratory grade offers higher purity for those seeking absolute precision.
Mix It Right: Precise Measuring Techniques for Perfect Results

“Hydroponic Nutrient Solution …” from www.youtube.com and used with no modifications.
The difference between thriving plants and struggling ones often comes down to measuring accuracy. When dealing with hydroponic nutrients, even small variations can significantly impact plant performance. Precision is especially important with micronutrients, where the difference between beneficial and toxic levels can be remarkably narrow.
Tools You’ll Need for Accurate Measurements
Investing in quality measuring equipment is essential for DIY hydroponic fertilizer success. A digital scale capable of measuring in grams with at least 0.1g precision is non-negotiable for dry ingredients. For liquid measurements, graduated cylinders or pipettes provide much greater accuracy than kitchen measuring spoons. Digital pH and EC/TDS meters are equally important for monitoring your solution’s properties after mixing.
Storage containers also matter significantly. Use food-grade plastic or glass containers with airtight seals to prevent nutrient deterioration and moisture absorption. Amber or opaque containers protect light-sensitive nutrients from degradation. Label everything meticulously with contents, mixing dates, and any safety precautions to avoid confusion later.
Step-by-Step Mixing Process to Prevent Salt Lockout
The order in which you combine ingredients can make or break your nutrient solution. Always start with clean, room-temperature water – preferably distilled, reverse osmosis, or at least filtered to remove chlorine. Add powdered ingredients one at a time, allowing each to fully dissolve before adding the next. This patience prevents precipitation where different compounds react and form insoluble compounds that plants cannot absorb.
For two-part solutions, never mix the concentrated parts directly together. Always dilute them separately in water first. When adding to your reservoir, I’ve found that introducing Part A, stirring thoroughly, then adding Part B after several minutes of circulation prevents unwanted chemical reactions. After all ingredients are dissolved, adjust the pH last, as nutrient addition will typically lower your solution’s pH significantly.
Storage Solutions That Extend Shelf Life
Properly stored dry nutrient salts can last for years without significant degradation. Keep them in airtight containers in a cool, dry place away from direct sunlight. Mixed solutions have much shorter shelf lives – typically 7-14 days depending on storage conditions. Adding an air stone to concentrated nutrient solutions helps prevent anaerobic bacteria growth and extends usability.
For concentrated master stock solutions, refrigeration can double shelf life while preventing algae growth. Just be sure to allow cold solutions to reach room temperature before adding to your system to avoid shocking your plants. Some growers add a small amount of food-grade hydrogen peroxide (3%) to their stock solutions (about 1ml per gallon) to inhibit microbial growth, though this isn’t necessary if you’re using the solution within a week.
Tailoring Your DIY Fertilizer for Different Growth Stages

“DIY Hydroponic Fertilizer: A Complete …” from sensorex.com and used with no modifications.
One of the greatest advantages of DIY hydroponic fertilizers is the ability to customize nutrition throughout your plants’ life cycle. Each growth stage requires a different nutrient profile to optimize development and yield. Understanding these changing needs allows you to adjust your formulations accordingly.
Seedling Stage: Gentle Nutrition for Young Plants
Young seedlings have delicate root systems easily damaged by strong nutrient concentrations. During this early stage, dilute your standard vegetative formula to 25-50% strength or target an EC of 0.8-1.2 mS/cm. Focus on providing adequate calcium for cell development and moderate nitrogen to encourage root expansion without excessive foliage growth.
The seedling stage typically requires a higher humidity environment and solution pH closer to 6.0-6.3, slightly higher than later stages. This encourages easier nutrient uptake through still-developing root structures. Avoid micronutrient excesses during this phase – young plants need very little manganese, zinc, and copper compared to mature specimens. For more information on nutrient management, check out this guide to soil-less growing.
Vegetative Phase: Powering Leaf and Stem Growth
Once plants establish strong root systems, they enter the vegetative growth phase where structural development is prioritized. During this stage, nitrogen becomes the star nutrient, driving the production of foliage and stems. Increase your solution strength progressively, aiming for an EC of 1.2-2.0 mS/cm for most crops (leafy greens at the lower end, fruiting plants at the higher end).
Magnesium becomes increasingly important during vigorous vegetative growth as it’s central to chlorophyll production. A nitrogen-to-potassium ratio of approximately 1:1 works well for most plants during this phase, with phosphorus at about half that level. Monitor plant response closely – deep green leaves with short internodal spacing indicate appropriate nitrogen levels, while stretched, pale growth suggests imbalances.
Flowering and Fruiting: Boosting Your Harvest Results
As plants transition to reproductive growth, their nutrient requirements shift dramatically. Reduce nitrogen by approximately 30% while increasing phosphorus and potassium to support flower development and fruit production. Calcium remains crucial during this phase to prevent blossom end rot and other calcium-deficiency issues in fruiting crops.
The ideal EC during flowering typically ranges from 1.8-2.4 mS/cm for most fruiting plants. Tomatoes, peppers and cannabis can handle even higher concentrations (up to 3.0 mS/cm) if introduced gradually, though this requires careful monitoring to prevent salt stress. Some growers add supplemental silicon during the flowering transition, as it strengthens cell walls and helps plants support heavy fruit loads while improving stress resistance.
Troubleshooting Your Homemade Nutrient Solution
Even with careful measurement and mixing, problems can arise with DIY hydroponic fertilizers. Developing strong troubleshooting skills will help you quickly identify and resolve issues before they significantly impact plant health.
Identifying and Fixing Nutrient Deficiencies
Plant symptoms provide valuable clues about nutrient imbalances. Yellowing of older leaves typically indicates nitrogen deficiency, while purpling stems and leaves often point to phosphorus shortages. Potassium deficiency appears as browning leaf edges and weak stems. For micronutrients, interveinal chlorosis (yellowing between leaf veins) while veins remain green is classic iron or manganese deficiency.
The location of symptoms offers important diagnostic information. Issues appearing first in new growth typically indicate calcium, iron, or boron deficiencies. Problems manifesting in middle or older leaves usually point to mobile nutrient deficiencies like nitrogen, phosphorus, or potassium, as plants relocate these nutrients from older tissue to support new growth when supplies are limited.
Nutrient Deficiency Quick Guide
Nitrogen: Overall yellowing, starting with older leaves
Phosphorus: Dark green leaves with purple/red tints, stunted growth
Potassium: Brown leaf edges, weak stems, susceptibility to disease
Calcium: Distorted new growth, tip burn, blossom end rot
Magnesium: Interveinal chlorosis in older leaves
Iron: Interveinal chlorosis in newest growth
When deficiencies appear, resist the urge to make drastic nutrient increases. Instead, boost the lacking nutrient by 10-15%, wait 3-5 days, then reassess. Sometimes the issue isn’t insufficient nutrients but rather a pH imbalance locking out available nutrients. Always check and adjust pH before adding more fertilizer.
Solving Common Problems Like Precipitation and Salt Buildup
Cloudy solutions or visible residue at the bottom of your reservoir indicate precipitation problems where nutrients have formed insoluble compounds. This typically happens when calcium reacts with phosphates or sulfates, or when mixing in incorrect order. To resolve this, drain the system, flush with clean water, then remix using proper sequence and fully dissolving each component before adding the next. Using two-part solutions separating calcium from phosphates/sulfates prevents most precipitation issues.
When to Adjust EC and PPM Levels
Electrical Conductivity (EC) and Parts Per Million (PPM) readings measure the total dissolved solids in your solution, indicating nutrient concentration. As plants consume water faster than nutrients, EC naturally rises over time. When EC increases by more than 20% of your target reading, it’s time to dilute or change the solution.
Seasonal adjustments are also important – during hot weather when transpiration increases, maintaining slightly lower EC levels (10-15% below normal) helps prevent salt stress. Conversely, during cooler, darker periods when growth slows, reducing overall nutrient concentration prevents buildup of unused fertilizer in the root zone.
Each plant species has ideal EC ranges. Leafy greens typically prefer 1.0-1.6 mS/cm, while fruiting plants thrive at 1.8-2.4 mS/cm. Berries, tomatoes and cannabis may handle up to 3.0 mS/cm during peak production phases if acclimated gradually. When unsure, start at the lower end of recommendations and increase gradually while monitoring plant response.
- Check EC/PPM daily, especially in smaller systems where changes happen quickly
- Document readings alongside plant observations to identify patterns
- Top off with plain pH-adjusted water when EC rises but nutrients aren’t depleted
- Complete solution changes are typically needed every 7-14 days regardless of readings
- Maintain separate reservoirs for different plant types with varying nutrient needs
Take Your DIY Skills to the Next Level
As you gain confidence with basic DIY hydroponic fertilizers, explore advanced techniques to further optimize your growing system. Consider integrating beneficial microorganisms through products like compost teas or commercial beneficial bacteria supplements. These additions create a living root zone that enhances nutrient availability and protects against root pathogens. Experiment with supplements like humic acids, fulvic acids, and seaweed extracts that improve nutrient uptake efficiency and stimulate natural plant defenses against environmental stress.

Frequently Asked Questions
After helping countless growers develop their DIY nutrient programs, I’ve noticed certain questions arise repeatedly. Here are straightforward answers to the most common concerns about homemade hydroponic fertilizers.
Understanding these fundamentals will help you avoid the trial-and-error process that frustrates many beginners and accelerate your journey to hydroponic success.
Is making my own hydroponic fertilizer really cheaper than buying commercial products?
Yes, significantly so. DIY nutrient solutions typically cost 30-70% less than premium commercial products once you’ve invested in the basic components. The savings become more pronounced with larger systems. A 25lb bag of calcium nitrate costs roughly the same as a gallon of premium nutrient solution but makes approximately 600-800 gallons of ready-to-use fertilizer when properly diluted.
How often should I change my DIY nutrient solution?
Most hydroponic systems benefit from complete solution changes every 7-14 days, depending on plant size and system volume. Larger reservoirs with mature plants may need changes weekly, while seedlings in large reservoirs might go two weeks. Between changes, top off with pH-adjusted water to replace what’s been consumed or evaporated.
Watch for significant EC changes or solution discoloration, which signal it’s time for a change regardless of schedule. Some advanced growers use partial changes (replacing 20-30% daily) to maintain more consistent nutrient levels, though this requires more regular monitoring.
Can I use regular garden fertilizer for my hydroponic system?
Most garden fertilizers aren’t suitable for hydroponics as they contain insoluble components that can clog systems and typically lack complete micronutrient profiles. Additionally, many contain urea nitrogen which requires soil microbes for conversion into plant-available forms. Water-soluble fertilizers designed for soil-less mediums (like those for indoor plants) can work in emergencies if they’re completely soluble, but they’re rarely balanced optimally for hydroponic systems.
If you must use garden fertilizers temporarily, choose only fully water-soluble products, use at 1/4 to 1/2 the recommended strength, and supplement with calcium nitrate and Epsom salt to provide essential calcium and magnesium often missing from general fertilizers.
What’s the shelf life of homemade hydroponic nutrients?
Dry nutrient salts stored in airtight containers in cool, dry conditions last 3-5 years or longer without significant degradation. Mixed concentrated stock solutions typically remain viable for 1-3 months if kept in opaque containers and protected from heat and direct sunlight. Working nutrient solutions in your reservoir should be changed every 7-14 days as plants selectively absorb certain nutrients, creating imbalances over time.
How do I know if my DIY solution has the right nutrient balance?
The ultimate indicator is plant performance. Healthy plants with appropriate coloration, strong stems, and proper development for their growth stage indicate good nutrient balance. Specific metrics to monitor include maintaining target EC/PPM ranges for your crop and growth stage, stable pH readings (minimal drift between adjustments), and absence of deficiency or toxicity symptoms in foliage.
Keep detailed records of your formulations and plant responses. Over time, patterns will emerge showing which adjustments produce the best results for your specific crops and growing conditions. This documented experience becomes invaluable for optimizing future growing cycles.
Laboratory testing services can analyze your solution for precise nutrient content, but this is rarely necessary for home growers. Instead, follow established recipes initially, then make incremental adjustments based on plant performance and regular EC/pH monitoring.