Grow Tent Temp and Humidity Controller Review: Beginner Tips

Key Takeaways
- Temperature controllers are essential for indoor growing success, with the best models balancing affordability and functionality for beginners
- Proper controller placement and setup can prevent temperature fluctuations that stress plants and reduce yields
- Different growth stages require specific temperature and humidity ranges that must be carefully maintained
- The Inkbird ITC-308 offers the best value for beginners, while advanced growers may benefit from TrolMaster’s comprehensive systems
- London Grow’s climate control experts can help you select the perfect temperature controller for your specific growing needs
Why Your Grow Tent Climate Makes or Breaks Your Harvest
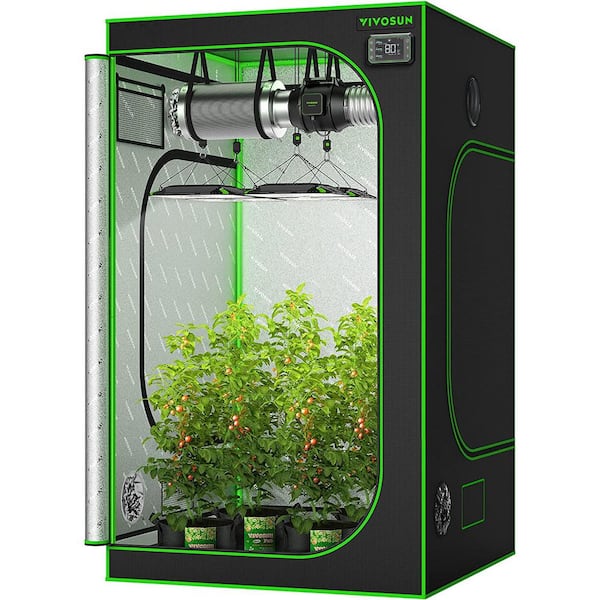
“Mylar Hydroponic Grow Tent …” from www.homedepot.com and used with no modifications.
I’ve seen countless indoor gardens fail because of one simple oversight: inconsistent climate control. Your plants might look healthy today, but temperature fluctuations create invisible stress that manifests weeks later as stunted growth, nutrient deficiencies, or pest infestations. Think of your grow tent as a miniature ecosystem where temperature and humidity work together to create either ideal or problematic growing conditions.
Temperature doesn’t just affect how plants feel – it directly impacts essential functions like photosynthesis, transpiration, and nutrient uptake. When temperatures swing wildly or sit outside the optimal range, plants divert energy away from growth and into survival mechanisms. Every degree matters, especially during critical developmental stages. A quality temperature controller eliminates these problems by maintaining consistent conditions regardless of external factors.
Humidity works hand-in-hand with temperature to create the perfect growing environment. Too humid, and you’re inviting mold and mildew. Too dry, and plants struggle to absorb nutrients properly. The relationship between these two factors (known as vapor pressure deficit) determines how efficiently your plants can breathe, grow, and produce. By the end of this guide, you’ll understand exactly how to select and use a temperature controller that keeps your grow tent in the sweet spot for maximum yields.
Best Temperature and Humidity Controllers for Beginners

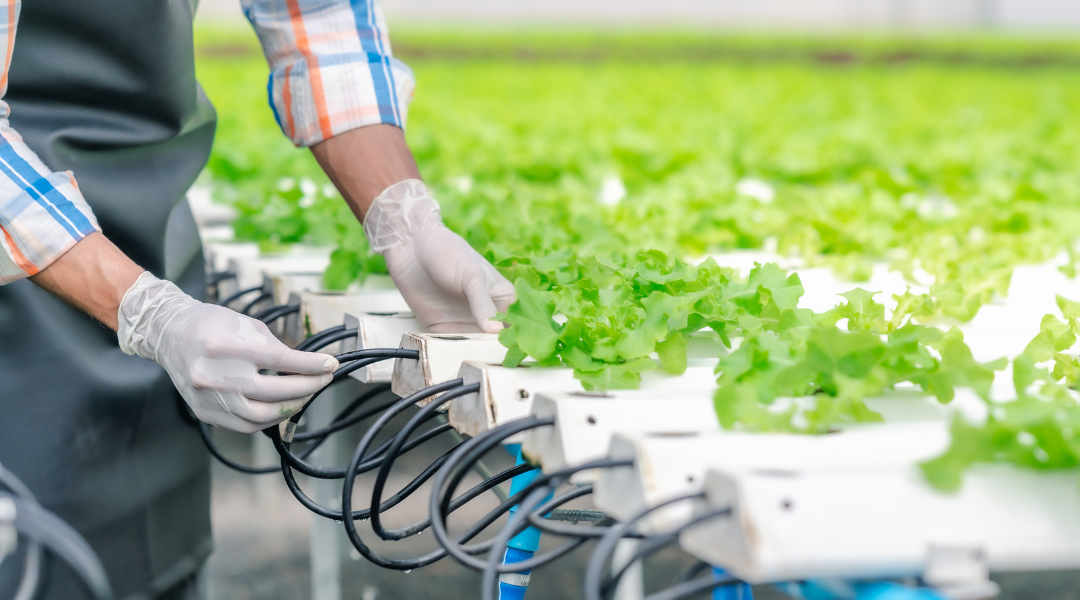
“Hydroponic Grow Tent Kit Indoor …” from www.ebay.com and used with no modifications.
After testing dozens of controllers across various price points, I’ve identified five standout options that offer the best balance of reliability, functionality, and value for indoor growers. These controllers range from simple plug-and-play devices to comprehensive environmental systems, but each provides the essential climate management capabilities needed for successful indoor growing. The right controller for you depends on your budget, technical comfort level, and specific growing goals.
Inkbird ITC-308 Digital Temperature Controller
The Inkbird ITC-308 stands as my top recommendation for beginners due to its perfect combination of simplicity, reliability, and affordability at around $35. This controller connects between your power outlet and heating/cooling equipment, automatically turning devices on and off based on your programmed temperature parameters. The dual-relay system allows you to connect both a heater and a cooling device simultaneously, making it truly versatile for year-round growing.
What sets the Inkbird apart is its impressive accuracy (±1°F) and thoughtful design features. The large, easy-to-read display shows both current and target temperatures at a glance. Programming takes seconds – just set your desired temperature, high/low alarm points, and the differential value that prevents rapid cycling of your equipment. The external temperature probe features a generous 6-foot cable, allowing flexible placement within your grow tent.
The ITC-308’s compressor delay function is particularly valuable, as it prevents damage to cooling equipment by enforcing minimum off-times. This protection extends the life of your equipment while still maintaining precise temperature control. While it lacks humidity management capabilities, its rock-solid temperature regulation makes it the perfect starting point for new indoor growers. For those needing humidity control as well, Inkbird’s separate humidity controller can be paired with this unit.
- Pre-wired plug-and-play setup requires no electrical knowledge
- Supports up to 1100W of connected equipment (10A maximum)
- Calibration function ensures readings match your reference thermometer
- Compact design takes minimal space in your growing area
- Memory function retains settings during power outages
AC Infinity Controller 67
AC Infinity’s Controller 67 represents a significant step up from basic controllers, offering integrated temperature and humidity management in a sleek, modern package. At approximately $79, it costs more than the Inkbird but delivers advanced functionality that justifies the price difference. The standout feature is its ability to control variable-speed fans rather than simply turning equipment on and off, allowing for much more nuanced climate management and quieter operation.
Honeywell TH1100DV1000 Digital Heat/Cool Thermostat
The Honeywell TH1100DV1000 brings tried-and-tested HVAC technology to indoor growing at an accessible $45 price point. Unlike controllers designed specifically for growing, this thermostat leverages Honeywell’s decades of climate control experience to provide exceptional reliability. The large backlit display makes nighttime adjustments easy, while the precision temperature control maintains settings within ±1°F – crucial for sensitive plants during crucial development stages.
What makes this unit stand out is its sophisticated cycling algorithm that prevents the rapid on/off switching that can damage equipment. The programmable differential settings allow you to customize how tightly it maintains your target temperature, balancing precision against equipment wear. Its built-in memory retains your settings during power outages, and the battery backup ensures uninterrupted monitoring even when the power goes out.
While it lacks direct humidity control capabilities, the Honeywell performs exceptionally well when paired with a separate humidity controller. The wall-mountable design keeps it away from the high humidity of your grow environment, improving accuracy and longevity. For growers who prioritize reliability over flashy features, this commercial-grade thermostat delivers consistent performance season after season.
WILLHI WH1436A Temperature and Humidity Controller
The WILLHI WH1436A stands out as one of the few budget-friendly controllers (around $40) that handles both temperature and humidity in a single unit. This versatile controller uses separate relay outputs for heating, cooling, humidification and dehumidification – effectively managing your entire grow tent climate with one device. The dual-display shows both current and target values simultaneously, making monitoring and adjustments incredibly intuitive. For those interested in optimizing their grow tent setup, understanding why use a grow tent for hydroponics can be beneficial.
What I particularly appreciate about this controller is its straightforward programming interface that doesn’t sacrifice functionality. You can set independent day/night parameters and adjust the differential settings to prevent equipment from cycling too frequently. The calibration function ensures your readings match reference instruments, critical for accurate climate management. With its compact design and included mounting hardware, it integrates neatly into any grow setup.
While it lacks the data logging and remote monitoring capabilities of premium controllers, the WILLHI delivers exceptional value for growers who need reliable climate control without complex features. The high-accuracy sensors (±2% RH, ±1°F) provide readings comparable to much more expensive units. For beginners looking to control both temperature and humidity without purchasing separate controllers, this represents the most cost-effective complete solution available.
TrolMaster Hydro-X Controller System
For serious growers willing to invest in premium climate management, the TrolMaster Hydro-X system (starting at $220) represents the gold standard. This modular controller system can be expanded to manage every aspect of your grow environment from a single interface. The base station connects with dedicated temperature, humidity, lighting and irrigation modules, allowing you to build a comprehensive system that matches your specific needs and budget.
What sets the TrolMaster apart is its sophisticated logic capabilities. Rather than simply responding to current conditions, it can analyze trends and make predictive adjustments that prevent problems before they occur. The data logging feature tracks environmental conditions over time, helping you identify patterns and optimize your growing parameters. For multiple tent setups, the ability to program different climate zones from one controller is invaluable.
While certainly the most expensive option on this list, the TrolMaster system actually delivers excellent value when you consider its expandability and precision. You can start with basic temperature and humidity control, then add modules for CO2, lighting, and irrigation as your skills and budget allow. For growers planning to continue and expand their indoor gardening, this investment quickly pays for itself through improved yields and reduced equipment problems.
Setting Up Your Controller for Perfect Growing Conditions

“CLOUDRAY S6 2-Pack, Grow Tent Clip Fan …” from acinfinity.com and used with no modifications.
Even the most advanced controller won’t perform properly if it’s incorrectly installed and configured. I’ve seen countless growers struggle with inconsistent results despite having quality equipment because they overlooked crucial setup details. Proper installation involves more than just plugging in devices – it requires strategic sensor placement, appropriate equipment connections, and thoughtful programming that accounts for your specific growing environment.
Proper Placement of Temperature and Humidity Sensors
Sensor placement makes a tremendous difference in controller performance. Position your temperature sensor at plant canopy height – this measures the actual conditions your plants experience rather than the hotter air near lights or the cooler air near the floor. Keep sensors at least 12 inches from lights, heaters, or cooling equipment to avoid false readings. For accurate humidity readings, ensure the sensor isn’t directly exposed to water from humidifiers or plant transpiration.
Most controllers include a single sensor that measures both temperature and humidity. If your growing space exceeds 4×4 feet, consider adding secondary sensors (if your controller supports them) to monitor conditions in different zones. Air circulation fans should distribute air throughout your tent, but temperature gradients can still develop in larger spaces. Never place sensors against tent walls, as this can result in readings influenced by outside conditions rather than your grow environment.
For controllers with permanently attached sensors, position the entire unit at canopy level, using zip ties or hooks to secure it to a tent pole. If using a controller with remote sensors, keep the main unit outside the tent to protect it from humidity and allow easier programming without disrupting your grow environment. The small sensor wire can exit through a port in your tent with minimal light leakage or air exchange.

Connecting Heating and Cooling Equipment
Most controllers use simple relay outputs that turn connected equipment on or off based on your settings. When connecting heating equipment (space heaters, heating mats), plug them into the “heating” or “warm” outlet of your controller. Cooling equipment (fans, air conditioners) connects to the “cooling” or “cool” outlet. Always verify that your equipment’s power requirements don’t exceed your controller’s maximum rated capacity – most household controllers handle up to 1000W per outlet.
For equipment with built-in thermostats (like some heaters and air conditioners), set their internal thermostats to maximum for heating devices or minimum for cooling devices. This ensures they respond only to your controller’s commands rather than their own internal sensors. Variable-speed equipment works best with controllers that offer proportional outputs, like the AC Infinity Controller 67, which can adjust fan speeds gradually rather than simply switching them on or off.
If your controller lacks dedicated humidity control but you need to manage moisture levels, consider using programmable timers for humidifiers and dehumidifiers as a budget-friendly alternative. By observing how your humidity changes throughout the day, you can program these devices to run at specific intervals that maintain acceptable ranges. For more precise control, dedicated humidity controllers like the Inkbird IHC-200 can be used alongside your temperature controller.
Programming Day/Night Temperature Differentials
Plants benefit from slightly cooler nighttime temperatures that mimic natural outdoor conditions. Most quality controllers allow you to program different day and night settings, typically with a 5-10°F drop at night. This temperature differential triggers important plant processes and can improve overall plant health and yield. For controllers without day/night settings, you can manually adjust your targets at lights-on and lights-off, though this requires more hands-on management.
Ideal Temperature and Humidity Settings By Growth Stage
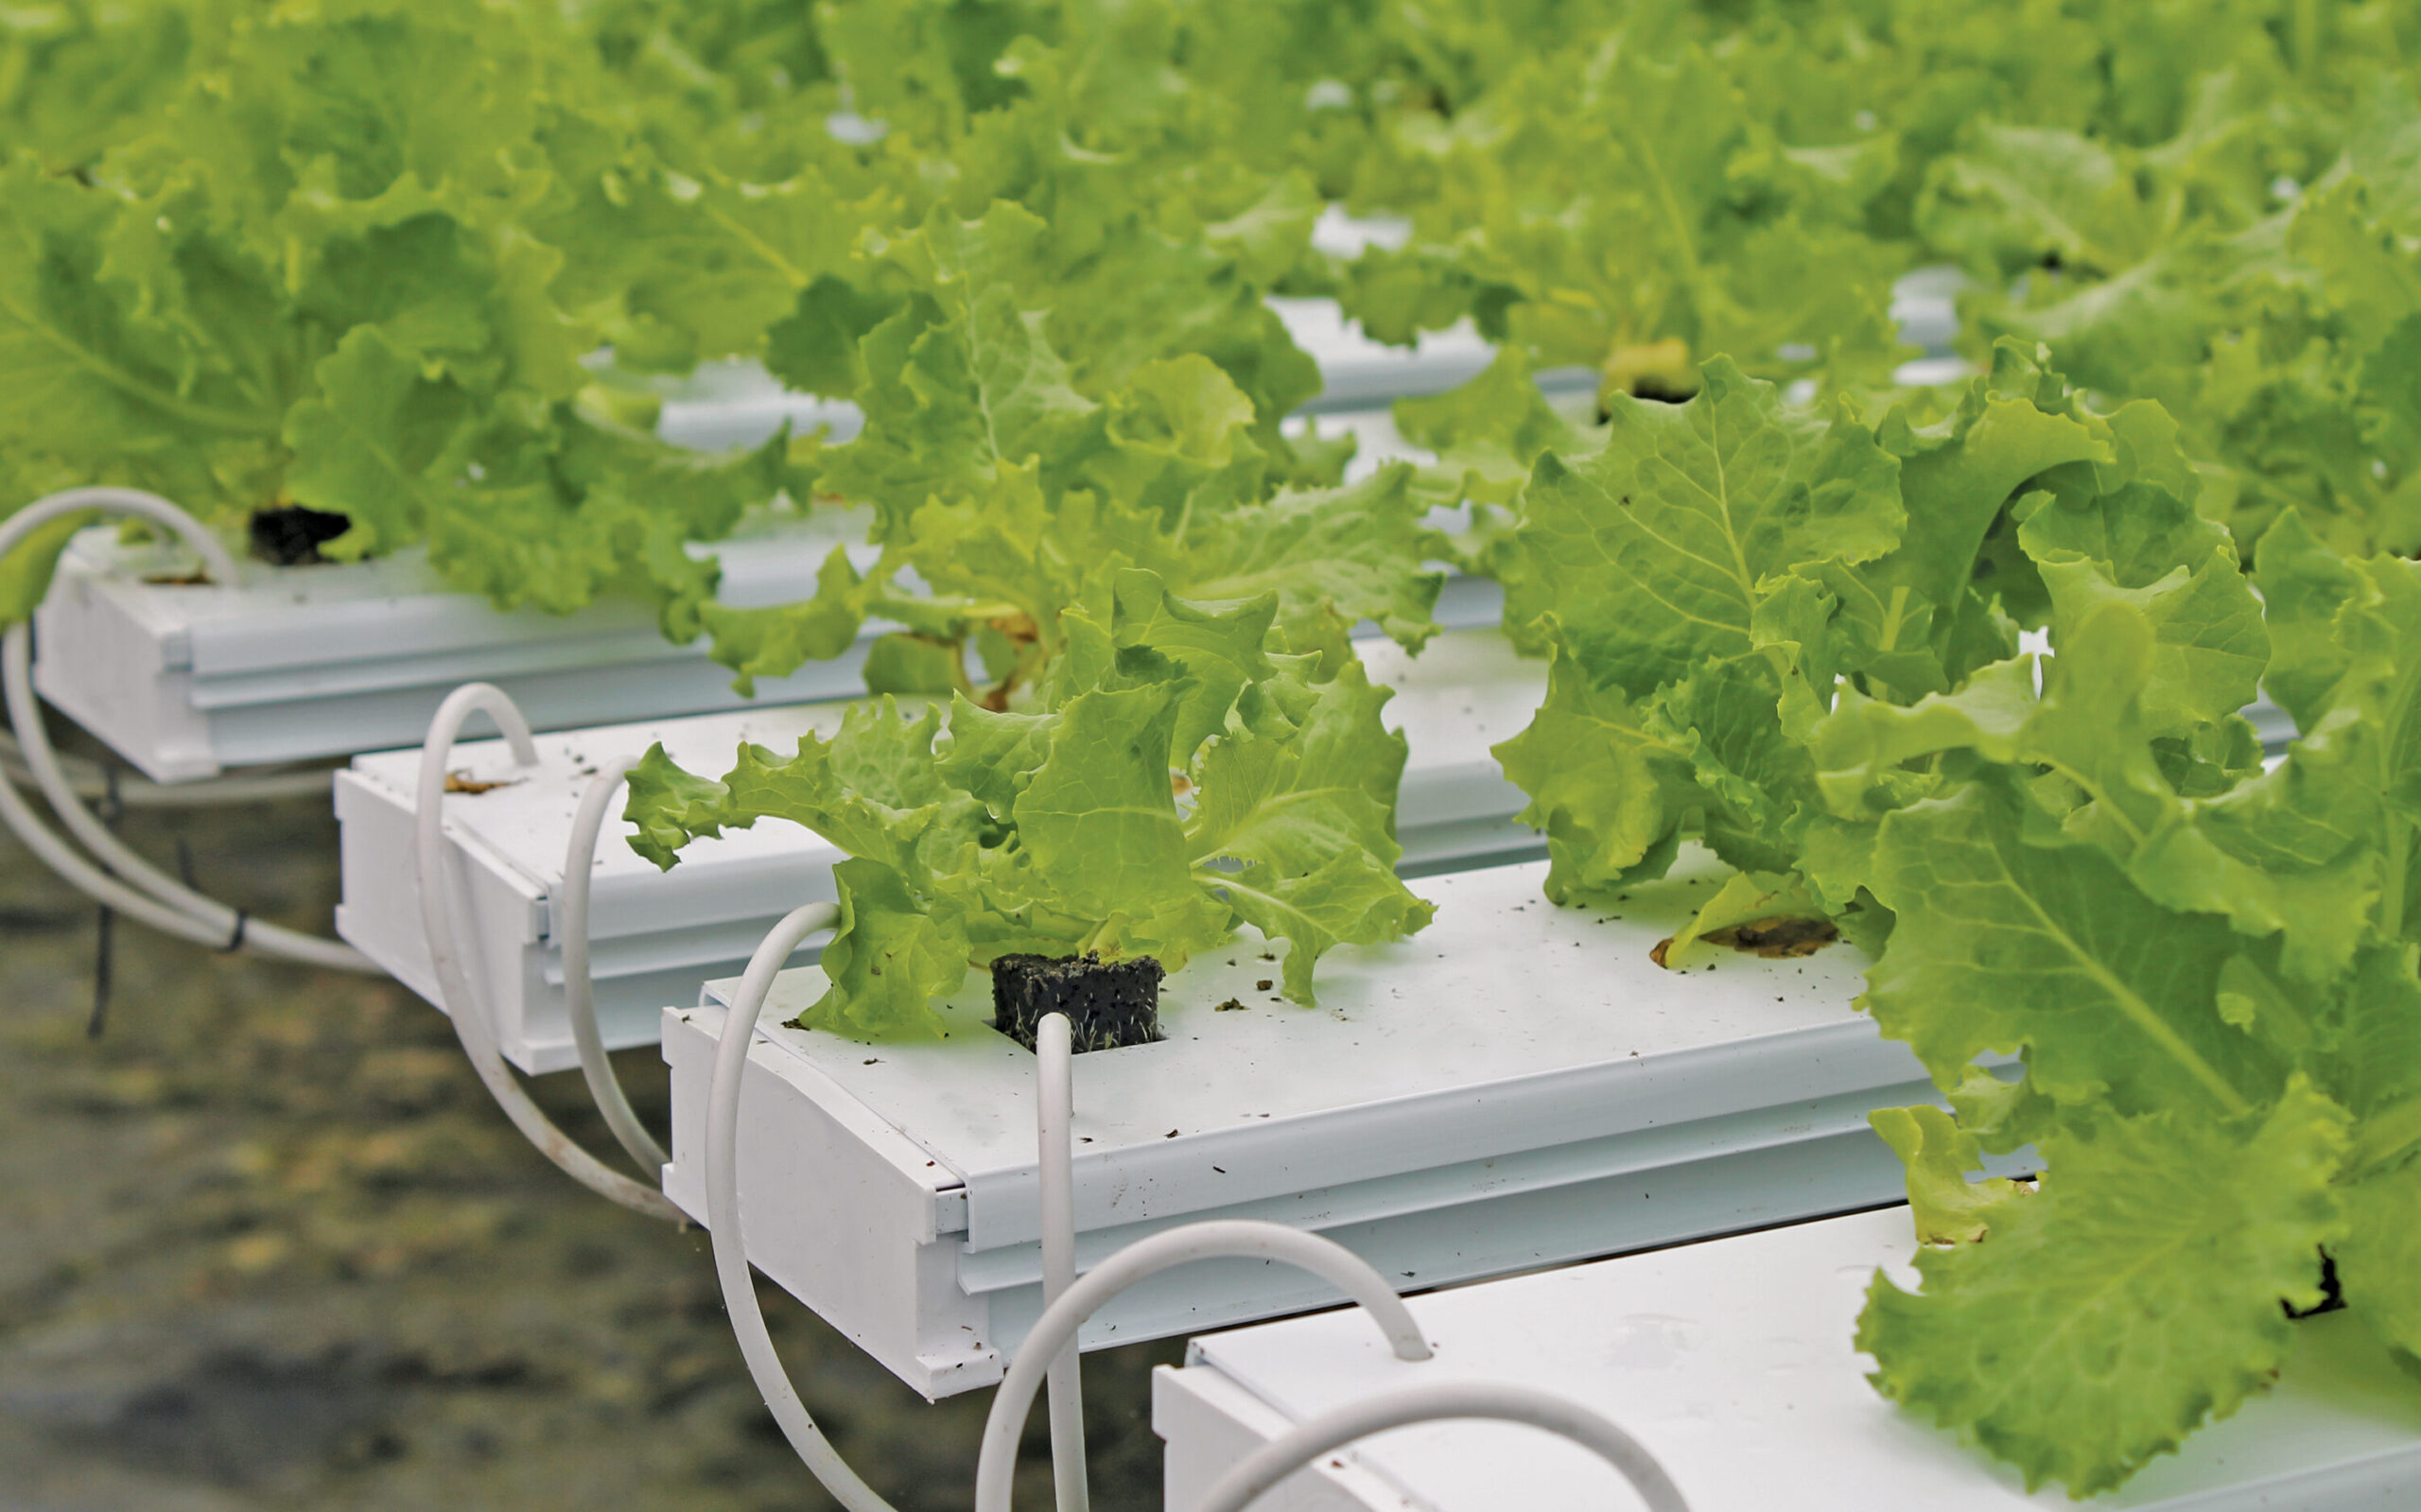
“Hydroponic Growing Systems …” from www.growspan.com and used with no modifications.
Plants have dramatically different climate needs as they develop from seedlings to mature plants. What works perfectly during the vegetative stage could seriously damage plants during flowering. By understanding these changing requirements and programming your controller accordingly, you’ll create the optimal environment for each growth phase. I’ve found that adjusting settings weekly during transitions between stages, rather than making dramatic overnight changes, helps plants adapt more successfully.
Seedling Stage (72-77°F, 65-70% Humidity)
Seedlings and young clones require warm, humid conditions that support rapid cell development and prevent moisture loss through their delicate leaves. I set my controller to maintain 75°F during lights-on periods and 72°F during darkness, with humidity steady around 70%. These conditions mimic the natural springtime environment that triggers vegetative growth. At this stage, consistency is particularly crucial – even brief temperature drops below 70°F can stunt development and extend your overall growing timeline.
Your controller’s differential setting is especially important during this phase. I recommend setting a tight differential of just 2°F to prevent temperature swings that can stress young plants. If your humidity drops below 65%, seedlings may develop slower and show signs of stress like curling leaves. Too much humidity (above 75%) can create conditions for damping-off disease. A quality controller that manages both temperature and humidity will provide the stable environment seedlings need to establish strong root systems.
During this stage, I position my temperature sensor directly beside the seedling tray rather than at the eventual canopy height. This ensures you’re measuring conditions exactly where your vulnerable young plants are developing. If you’re using heat mats beneath seedling trays, make sure your temperature probe isn’t influenced by this direct heat source – it should measure ambient air temperature around the emerging plants.
Vegetative Stage (70-85°F, 40-70% Humidity)
As plants enter vigorous vegetative growth, they can tolerate and even benefit from a wider temperature range. I program my controller for daytime temperatures between 75-85°F and nighttime temperatures 5-10°F cooler. The ideal humidity during early vegetation remains relatively high (60-70%) but should gradually decrease to 50-60% as plants grow larger. This progressive reduction in humidity helps prepare plants for the drier flowering environment while still supporting rapid leaf development.
During vegetation, plants develop their temperature resilience, but still benefit from consistency. I set my controller’s differential slightly wider at this stage (3-4°F) to reduce equipment cycling while still maintaining a comfortable range. Plants in vegetative growth typically transpire significant moisture, which can raise humidity levels above your target. Your controller should activate exhaust fans or dehumidifiers accordingly to maintain the proper vapor pressure deficit for efficient growth.
If your growing space tends to overheat during lights-on periods, program your controller to activate cooling before temperatures reach damaging levels. I’ve found that setting cooling triggers 2-3°F below your maximum acceptable temperature prevents overshooting due to residual heat. Similarly, if nighttime temperatures drop too quickly after lights-off, set heating to activate 2-3°F above your minimum acceptable temperature to maintain a gentle nighttime cooling pattern that plants prefer. For more tips, you might want to explore hydroponic herb garden tips to optimize your growing environment.

Flowering Stage (65-80°F, 40-50% Humidity)
The flowering stage demands more precise temperature and humidity control as plants develop their valuable blooms. I maintain daytime temperatures between 75-80°F during early flowering, gradually reducing to 70-75°F during mid and late flowering. Night temperatures should drop 8-10°F below daytime levels to stimulate proper bloom development and terpene production. Humidity requirements decrease significantly during this stage, with 40-50% being ideal for most plants. For more detailed guidance, consider these requirements for a hydroponic system.
Your controller’s accuracy becomes particularly important during flowering, as excessive temperatures above 85°F can reduce bloom density and potency, while humidity above 55% increases the risk of mold and mildew on dense flower structures. I program separate day and night settings with tighter differentials (2-3°F) during this critical phase. The slightly cooler temperatures help preserve volatile compounds that contribute to flavor and aroma while encouraging denser flower formation. For more tips on maintaining optimal conditions, check out our guide on how to keep hydroponic plants alive.
I’ve found that implementing a gradual temperature reduction program during the final 2-3 weeks of flowering can significantly improve quality. Many controllers allow you to set decreasing temperature targets over time, mimicking the natural seasonal cooling that triggers plants to complete their reproductive cycle. This technique, sometimes called “cold finishing,” can enhance color, density, and trichome production when managed correctly through your temperature controller.
Late Flowering/Harvest (60-75°F, 30-40% Humidity)
As plants approach harvest, their climate needs change one final time. I reduce daytime temperatures to 70-75°F and allow nighttime temperatures to drop as low as 60-65°F during the final week. Humidity should be kept intentionally low (30-40%) to reduce moisture in the developing flowers and minimize mold risk. These drier, cooler conditions help plants focus energy on ripening rather than continued growth and prepare flowers for successful harvesting and curing. For more information on maintaining plant health, you might find these tips on keeping hydroponic plants alive helpful.
Your controller should be programmed to prioritize dehumidification during this phase, even at the expense of some temperature fluctuation. Most controllers allow you to set priority hierarchies when managing multiple parameters. If humidity creeps above 45% during late flowering, the risks of mold far outweigh the minor stress of temperature adjustments needed to bring humidity back into range. I’ve saved countless harvests by programming my controller to trigger stronger ventilation whenever humidity rises, even if it temporarily cools the growing space.
For plants with particularly dense flowers or those grown in naturally humid environments, I sometimes program an even more aggressive dehumidification schedule during the final days before harvest. Setting your controller to maintain 30-35% humidity during the last 48-72 hours can significantly improve flower quality and reduce drying time after harvest. This technique requires careful monitoring to prevent excessive drying of the growing medium, but the improvement in final quality makes it worthwhile for premium crops.
Common Climate Control Problems and Quick Fixes

“Overview of Commercial Hydroponic Systems” from www.globalgarden.co and used with no modifications.
Even with quality controllers, environmental challenges inevitably arise. Understanding how to troubleshoot common issues will save you time, money, and potentially your entire crop. Most climate control problems stem from either equipment limitations, controller settings, or sensor issues. I’ve encountered nearly every possible climate control problem over years of growing, and the solutions are typically simpler than you might expect.
Temperature Swings: Causes and Solutions
If your temperature fluctuates wildly despite using a controller, check your differential settings first. A differential that’s too narrow causes equipment to cycle rapidly, while one that’s too wide allows excessive temperature swings. For most grow tents, a 3-4°F differential provides the ideal balance. Also inspect your sensor placement – if it’s too close to heating/cooling equipment or in direct light, it will trigger premature cycling. Moving the sensor to a shaded, central location at canopy height often resolves persistent temperature swings.
Another common cause of temperature fluctuations is undersized equipment. If your heater or air conditioner can’t adequately affect the entire growing space, the controller will leave it running continuously without reaching the target temperature. Calculate your BTU requirements based on your tent size and ambient conditions, then ensure your equipment provides at least 20% more capacity than the minimum requirement. For cooling in particular, remember that lights add significant heat that must be factored into your calculations.
Poor air circulation can create hot or cold spots that trigger erratic controller behavior. I always install circulation fans that move air throughout the entire growing space without blowing directly on plants. Strategic fan placement ensures your temperature sensor reads an accurate average of the entire environment rather than a localized pocket of warmer or cooler air. This simple adjustment often eliminates the frustrating temperature spikes that can occur even with perfect controller settings. For more tips, check out keeping consistent temperature and humidity in your grow tent.
Humidity Won’t Stay in Range
Humidity control challenges typically stem from inadequate equipment capacity or conflicting controller settings. If your humidity consistently runs too high despite dehumidification, you likely need either a larger dehumidifier or improved ventilation. I calculate dehumidification needs based on plant count and size – larger, more mature plants transpire more moisture and require greater dehumidification capacity. As a rule of thumb, a 4×4 tent with mature plants needs at least a 20-pint daily dehumidification capacity during peak growth. For more insights on managing plant growth in controlled environments, check out these hydroponic herb garden tips.
For persistent low humidity, check that your humidifier isn’t being defeated by excessive ventilation. Many growers make the mistake of having their exhaust fan controller and humidifier controller fighting each other. I program my controller to coordinate these functions – allowing humidity to rise slightly before triggering exhaust, or temporarily reducing exhaust while the humidifier runs. For sophisticated controllers, setting appropriate deadbands between humidity rise and exhaust activation prevents this equipment conflict.
Sometimes the simplest solution for humidity control is adjusting watering practices. Synchronized watering schedules create humidity spikes as moisture evaporates from growing media and plant transpiration increases. I stagger watering times for different plants to maintain more consistent humidity levels throughout the day. Your controller can compensate for some fluctuation, but minimizing the spikes through strategic watering makes its job much easier and results in more stable conditions.
Controller Reading Inaccuracies
If you suspect your controller is displaying inaccurate readings, verification and calibration are essential. I always keep an independent thermometer/hygrometer in my growing space to cross-reference with controller readings. Digital units with laboratory calibration certificates provide the most reliable reference. If readings differ by more than 2°F or 5% humidity, recalibrate your controller using the manufacturer’s recommended procedure. For tips on maintaining consistent temperature and humidity, check out this guide on grow tents. Most quality controllers include calibration functions specifically for this purpose.
Sensor degradation occurs naturally over time, especially in the high-humidity environment of a grow tent. Dust, mineral deposits from water vapor, and prolonged exposure to grow light spectrum can all affect sensor accuracy. I clean my sensors gently with compressed air every few months and replace them annually as preventative maintenance. This regular attention to sensor condition prevents the gradual drift in readings that can lead to suboptimal growing conditions without obvious controller failure.
For controllers that can’t be calibrated or show wildly inaccurate readings, replacement is often the most practical solution. I’ve found that attempting to “mentally adjust” for known controller inaccuracies inevitably leads to mistakes and inconsistent growing conditions. Quality controllers are relatively inexpensive insurance against crop failure – don’t hesitate to replace units that can’t be brought back to accurate operation through cleaning and calibration.
Power Outage Protection Strategies
Power interruptions can wreak havoc on growing environments, as even brief outages reset many controllers to default settings. I protect against this vulnerability by using controllers with non-volatile memory that retains settings during power loss. For critical growing operations, adding an uninterruptible power supply (UPS) provides temporary backup power that maintains controller operation during brief outages. Even a small 350VA UPS can keep a controller and small circulation fan running for hours during an outage.
Beyond preserving settings, power outage recovery requires planning for equipment restart sequences. Some cooling equipment needs delayed restart to prevent compressor damage, while heating elements may temporarily draw higher current when first powered on. Advanced controllers include programmable restart delays that prevent power surges when electricity returns. If your controller lacks this feature, consider adding simple mechanical timer delays to critical equipment to prevent tripping breakers when power is restored.
I also maintain backup battery-powered monitoring devices that continue functioning during outages. These simple thermometer/hygrometers with high/low memory help me assess the severity of climate fluctuations during an outage so I can take appropriate corrective actions when power returns. For growing operations in areas with frequent power interruptions, considering a generator with automatic transfer switch represents a worthwhile investment to protect valuable crops from climate-related damage.
Dealing with Seasonal Changes
Seasonal transitions present unique challenges for grow tent climate control as ambient conditions shift dramatically. I adjust controller settings seasonally to compensate for these changes, typically reducing cooling thresholds in summer and raising heating thresholds in winter. The most common mistake growers make is trying to maintain exactly the same growing environment year-round without accounting for how much harder equipment must work against seasonal extremes.
During summer months, nighttime cooling becomes particularly challenging. I program my controller to begin reducing temperatures earlier in the light cycle, sometimes initiating gradual cooling 1-2 hours before lights-off. This pre-cooling strategy helps achieve appropriate night temperatures without requiring excessive air conditioning. Similarly, winter growing benefits from pre-heating before lights-off to prevent the rapid temperature drops that can shock plants when lights power down in cold ambient conditions.
Seasonal humidity changes also require controller adjustments. Winter typically brings drier ambient air, necessitating more aggressive humidification settings and less dehumidification. Summer’s naturally higher humidity often requires the opposite approach. I program seasonal profiles into my advanced controllers, but even simple models can be manually adjusted between seasons. These seasonal adjustments significantly reduce equipment runtime and energy costs while maintaining ideal growing conditions throughout the year.
Saving Money While Maintaining Perfect Grow Conditions

“13 Easy Ways to Save Money” from www.nbcnews.com and used with no modifications.
The most sophisticated climate control system means nothing if operating costs make growing economically unsustainable. Fortunately, smart controller programming can significantly reduce energy consumption without compromising growing conditions. I’ve developed strategies that cut energy usage by 30-40% compared to always-on equipment or improperly configured controllers, while still maintaining ideal environments for plant development. For those interested in optimizing their setup, understanding hydroponic system requirements can be a great start.
Energy-Efficient Controller Settings
The differential setting on your controller directly impacts energy usage. While tight differentials (1-2°F) provide very stable conditions, they cause equipment to cycle frequently, increasing power consumption and wear. I’ve found that slightly wider differentials (3-5°F) during less sensitive growth stages dramatically reduces energy usage with minimal impact on plant development. This small adjustment can save hundreds of kilowatt-hours over a growing cycle while still keeping plants within their comfort zone. For additional tips on maintaining plant health, check out our guide to keeping hydroponic plants alive.
For humidity control, using deadband settings prevents simultaneous operation of humidifiers and dehumidifiers. I program a humidity “dead zone” of 10-15% where neither humidification nor dehumidification equipment activates. For example, with a target of 50% humidity, humidifiers might activate below 45% while dehumidifiers only run above 55%. This prevents the energy waste of competing equipment while maintaining acceptable humidity ranges for healthy growth.
Many controllers offer equipment minimum run-time settings that improve efficiency by preventing short cycling. I configure heating and cooling equipment to run for at least 5 minutes once activated, rather than switching on and off rapidly to maintain exact temperatures. This approach reduces the high-energy startup phase of motors and compressors, allowing equipment to operate in its more efficient steady-state mode. The slight temperature variation this creates is actually beneficial for plants, mimicking natural environmental fluctuations.
Smart Scheduling to Reduce Power Usage
Aligning your environmental controls with natural daily patterns can substantially reduce energy consumption. I program my controller to allow slightly higher temperatures during peak afternoon hours when cooling is most energy-intensive, then reduce temperatures during evening hours when ambient conditions naturally assist cooling. This approach works with natural temperature cycles rather than fighting against them, reducing cooling equipment runtime during the most expensive hours of operation.
For dehumidification, which often consumes significant electricity, I coordinate operation with lighting schedules. Running dehumidifiers primarily during lights-on periods takes advantage of the natural dehumidification effect of higher temperatures. The slight increase in temperature from dehumidifier operation becomes beneficial rather than problematic during this time. Conversely, I minimize dehumidification during cooler dark periods when it would force additional heating to maintain temperature targets.
Advanced controllers allow customized equipment schedules that optimize energy usage based on your local electricity rates. In areas with time-of-use billing, I program less critical climate adjustments to occur during lower-cost periods. For example, allowing humidity to rise slightly during peak-rate hours, then running dehumidifiers more aggressively during off-peak hours can substantially reduce electricity bills without negatively impacting plant health. This time-shifting approach requires more sophisticated controllers but delivers significant cost savings for larger growing operations. For those considering expanding their setup, understanding why use a grow tent for hydroponics can also contribute to efficient energy use and optimal plant growth.
DIY Insulation Tips for Your Grow Tent
Proper insulation dramatically reduces the workload on heating and cooling equipment, allowing your controller to maintain stable conditions with less energy. I line the floor beneath my grow tents with 1-inch foam insulation board to prevent heat loss through conduction. For tents in particularly cold environments, adding a layer of reflective bubble insulation to the exterior walls provides significant thermal improvement without reducing interior space. These simple modifications typically pay for themselves within a single growing cycle through reduced heating costs.
Advanced Features Worth the Extra Money
:max_bytes(150000):strip_icc()/cropped-image-of-hand-putting-coins-in-jars-with-plants-755740897-5ab88ee1875db9003759d390.jpg)
“Get Tips on How to Save Money in Your …” from www.thebalancemoney.com and used with no modifications.
As your growing skills advance, certain premium controller features deliver benefits that justify their higher cost. These capabilities extend beyond basic temperature and humidity management to provide insights, convenience, and precision that can significantly improve both efficiency and results. I’ve found that growers who plan to continue for multiple seasons typically recoup the investment in advanced controllers through improved yields and reduced crop losses.
The decision to upgrade should be based on your specific growing challenges and goals rather than simply chasing features. Each of these advanced capabilities addresses particular needs that may or may not apply to your situation. I recommend starting with a basic controller like the Inkbird ITC-308, then upgrading selectively as you identify specific limitations in your current setup.
Remote Monitoring via Smartphone Apps
Cloud-connected controllers that allow smartphone monitoring have transformed my approach to indoor growing. These systems continuously monitor your grow environment and send real-time alerts when conditions fall outside acceptable parameters. I receive immediate notifications if temperatures spike during a summer heatwave or if humidity rises dangerously during lights-off periods, allowing me to intervene before plants experience stress. This early warning system has prevented countless potential crop losses that would have gone unnoticed until my next scheduled tent check. For more tips on maintaining optimal conditions, check out this guide on heating a grow tent.
Data Logging and Growth Analysis
Controllers with data logging capabilities record environmental conditions throughout your growing cycle, creating valuable insights for improvement. I analyze these logs between grows to identify patterns and optimization opportunities that wouldn’t be apparent from spot checks. For example, discovering that humidity consistently spikes three hours after lights-off might indicate excess irrigation before dark periods. These subtle patterns become clear when viewing graphed data over time, allowing targeted adjustments that gradually perfect your growing environment. To further enhance your setup, consider exploring the 7 requirements for a hydroponic system that can complement your data-driven insights.
Automated Fan Speed Control
Variable-speed equipment control represents one of the most significant advances in grow room climate management. Rather than simply turning fans on or off, controllers with proportional outputs adjust fan speeds incrementally based on conditions. I’ve found this capability dramatically improves stability while reducing noise and energy consumption. As temperatures approach your target, fans gradually reduce speed instead of shutting off completely, maintaining gentle air movement that prevents hotspots without causing temperature swings. This smooth operation creates a more natural environment that plants respond to positively. For more insights on maintaining optimal conditions, check out our guide on how to keep hydroponic plants alive.
Take Control of Your Growing Environment Today
“Exploring Hydroponics’ Pros and Cons …” from hydronov.com and used with no modifications.
Investing in a quality temperature controller represents the single most important step you can take to improve your indoor growing results. The difference between struggling plants and thriving ones often comes down to the stability and precision of their environment. I’ve seen countless growers transform their results simply by implementing proper climate control, even without changing their lighting, nutrients, or growing medium. Your plants can only reach their genetic potential when given consistently optimal conditions throughout their life cycle.
Start with a controller that matches your current needs and budget, focusing on reliability over fancy features. As your experience grows, you can upgrade to more sophisticated systems that offer additional capabilities. Remember that even the most basic temperature controller, properly installed and programmed, will dramatically outperform manual management or no control at all. Your plants will reward your attention to environmental detail with improved growth rates, better resistance to pests and diseases, and ultimately, more abundant harvests.
Frequently Asked Questions
After helping hundreds of growers implement climate control systems, I’ve encountered certain questions that arise consistently. These practical concerns often aren’t addressed in product manuals or general growing guides, yet their answers can make the difference between successful implementation and frustrating failures. I’ve compiled the most common questions below, with straightforward answers based on real-world experience rather than theoretical ideals.
Can I use the same controller for both temperature and humidity?
Yes, dual-function controllers like the WILLHI WH1436A or AC Infinity Controller 67 can manage both temperature and humidity from a single unit. These controllers use separate relay outputs for heating, cooling, humidification, and dehumidification equipment. The advantage of integrated control is that these systems can intelligently coordinate temperature and humidity management, preventing conflicts between functions. For example, they can prioritize dehumidification during flowering even if it temporarily affects temperature, or reduce ventilation during vegetative growth to maintain higher humidity levels. This coordinated approach typically delivers more stable growing conditions than using separate controllers for each function.
How often should I calibrate my climate controller?
I recommend verifying controller accuracy monthly and performing calibration whenever readings deviate by more than 2°F or 5% humidity from a reference instrument. Most digital controllers include calibration functions that allow you to adjust displayed values to match a reference thermometer or hygrometer. This regular verification becomes especially important as sensors age or accumulate dust in the growing environment. For critical applications or when growing particularly sensitive plants, quarterly calibration provides additional assurance of accuracy. Always perform calibration with your growing space at stable conditions, allowing at least 30 minutes for both reference instruments and controller sensors to acclimate before making adjustments.
What’s the difference between a basic controller and a complete environmental control system?
Basic controllers like the Inkbird ITC-308 simply turn equipment on and off based on single-parameter thresholds, while complete environmental systems like the TrolMaster Hydro-X offer integrated management of multiple parameters with sophisticated logic. Basic controllers operate independently from each other, potentially creating conflicts when separate temperature and humidity controllers work against each other. Complete systems coordinate all environmental factors, making intelligent decisions that prioritize the most critical parameters at different growth stages. Advanced systems also typically include data logging, remote monitoring, and the ability to create detailed schedules and profiles for different growth stages. For beginners or small-scale growers, basic controllers provide excellent value, while larger operations or critical growing applications benefit from the comprehensive capabilities of complete environmental systems.
Will a controller work with any grow tent size?
Controllers themselves are compatible with any tent size, but their effectiveness depends on proper equipment sizing and sensor placement. In larger tents (above 4×8 feet), you may need multiple sensors to accurately monitor conditions throughout the space, as temperature and humidity can vary significantly from one area to another. The controller’s capacity to handle your equipment is determined by its relay ratings – most consumer controllers handle up to 1000W per outlet, sufficient for typical tent equipment. For larger spaces requiring multiple heaters, air conditioners, or industrial dehumidifiers, look for controllers with higher amperage ratings or the ability to control external relays. When expanding to multiple tents, consider controllers with multi-zone capabilities that can manage separate environments from a central interface rather than requiring individual controllers for each space.
Controller Selection Guide by Grow Tent Size
Small (2×2 to 3×3): Basic single-parameter controllers like Inkbird ITC-308 with properly sized equipment work perfectly for these spaces. Temperature differentials can be set tighter (2-3°F) due to the small volume of air.
Medium (4×4 to 5×5): Dual-parameter controllers like WILLHI WH1436A provide better coordination between temperature and humidity in these moderately sized spaces. Consider controllers with programmable day/night settings, especially if you’re using a grow tent for hydroponics.
Large (8×8 or larger): Complete environmental systems like TrolMaster with multiple sensor support and higher-capacity relays become necessary for consistent conditions throughout larger spaces. Look for controllers with fan speed modulation for better air distribution. For optimal results, consider why using a grow tent can enhance your hydroponic setup.
Advanced growers can further customize their control systems by incorporating multiple sensors in different zones of larger tents. Some controllers allow you to average readings from multiple sensors or respond to the highest/lowest reading, depending on your priorities. This multi-sensor approach is particularly valuable in tall tents where vertical temperature stratification can create significantly different conditions at different canopy heights.
Can climate controllers help prevent mold and mildew?
Absolutely – proper climate control is the most effective prevention against mold and mildew in indoor growing environments. By maintaining appropriate temperature and humidity levels, particularly during dark periods when condensation risk is highest, controllers directly reduce conditions that promote fungal growth. The most critical function is preventing the high humidity (above 60%) that mold spores require for germination and growth. Advanced controllers that can maintain appropriate vapor pressure deficit (the relationship between temperature and humidity) provide even better protection by ensuring plant surfaces remain inhospitable to fungal development even when absolute humidity measurements seem acceptable.
For maximum mold prevention, I program my controller to prioritize dehumidification during the critical lights-off period when temperatures naturally drop and relative humidity rises. Setting lower humidity targets (40-45%) during this time compensates for the natural humidity increase that occurs as air cools. Some advanced controllers include dew point calculations that automatically adjust humidity targets based on current temperature to maintain a safe margin above the condensation point. This intelligent approach provides superior protection against the microscopic water film formation on plant surfaces that enables mold establishment.
The data logging capabilities of advanced controllers provide an additional layer of mold prevention by revealing patterns that might otherwise go unnoticed. By reviewing humidity trends over several days, you can identify potential risk periods and adjust equipment or controller settings proactively. London Grow’s climate control experts can help analyze these patterns and recommend specific controller settings that minimize mold risk based on your particular growing environment and plant selection.