Hydroponic Microgreens Guide: How to Grow Fresh Greens at Home

Key Takeaways
- Hydroponic microgreens can be grown without soil and provide up to 40 times more nutrients than their mature counterparts
- With minimal equipment and space, you can harvest fresh microgreens in just 7-14 days, providing year-round access to nutritious greens
- Hydroponic systems eliminate soil-borne diseases and use up to 90% less water than conventional soil growing
- Seeds contain all the nutrients needed for microgreen growth, making this an ideal system for beginners with no fertilizers required
- MicroFarm’s hydroponic growing kits are designed to simplify the microgreen growing process for beginners and experienced gardeners alike
Hydroponic Microgreens: Nutrient-Dense Greens in Just Days
“Hydroponic Microgreens Year Round …” from www.instructables.com and used with no modifications.
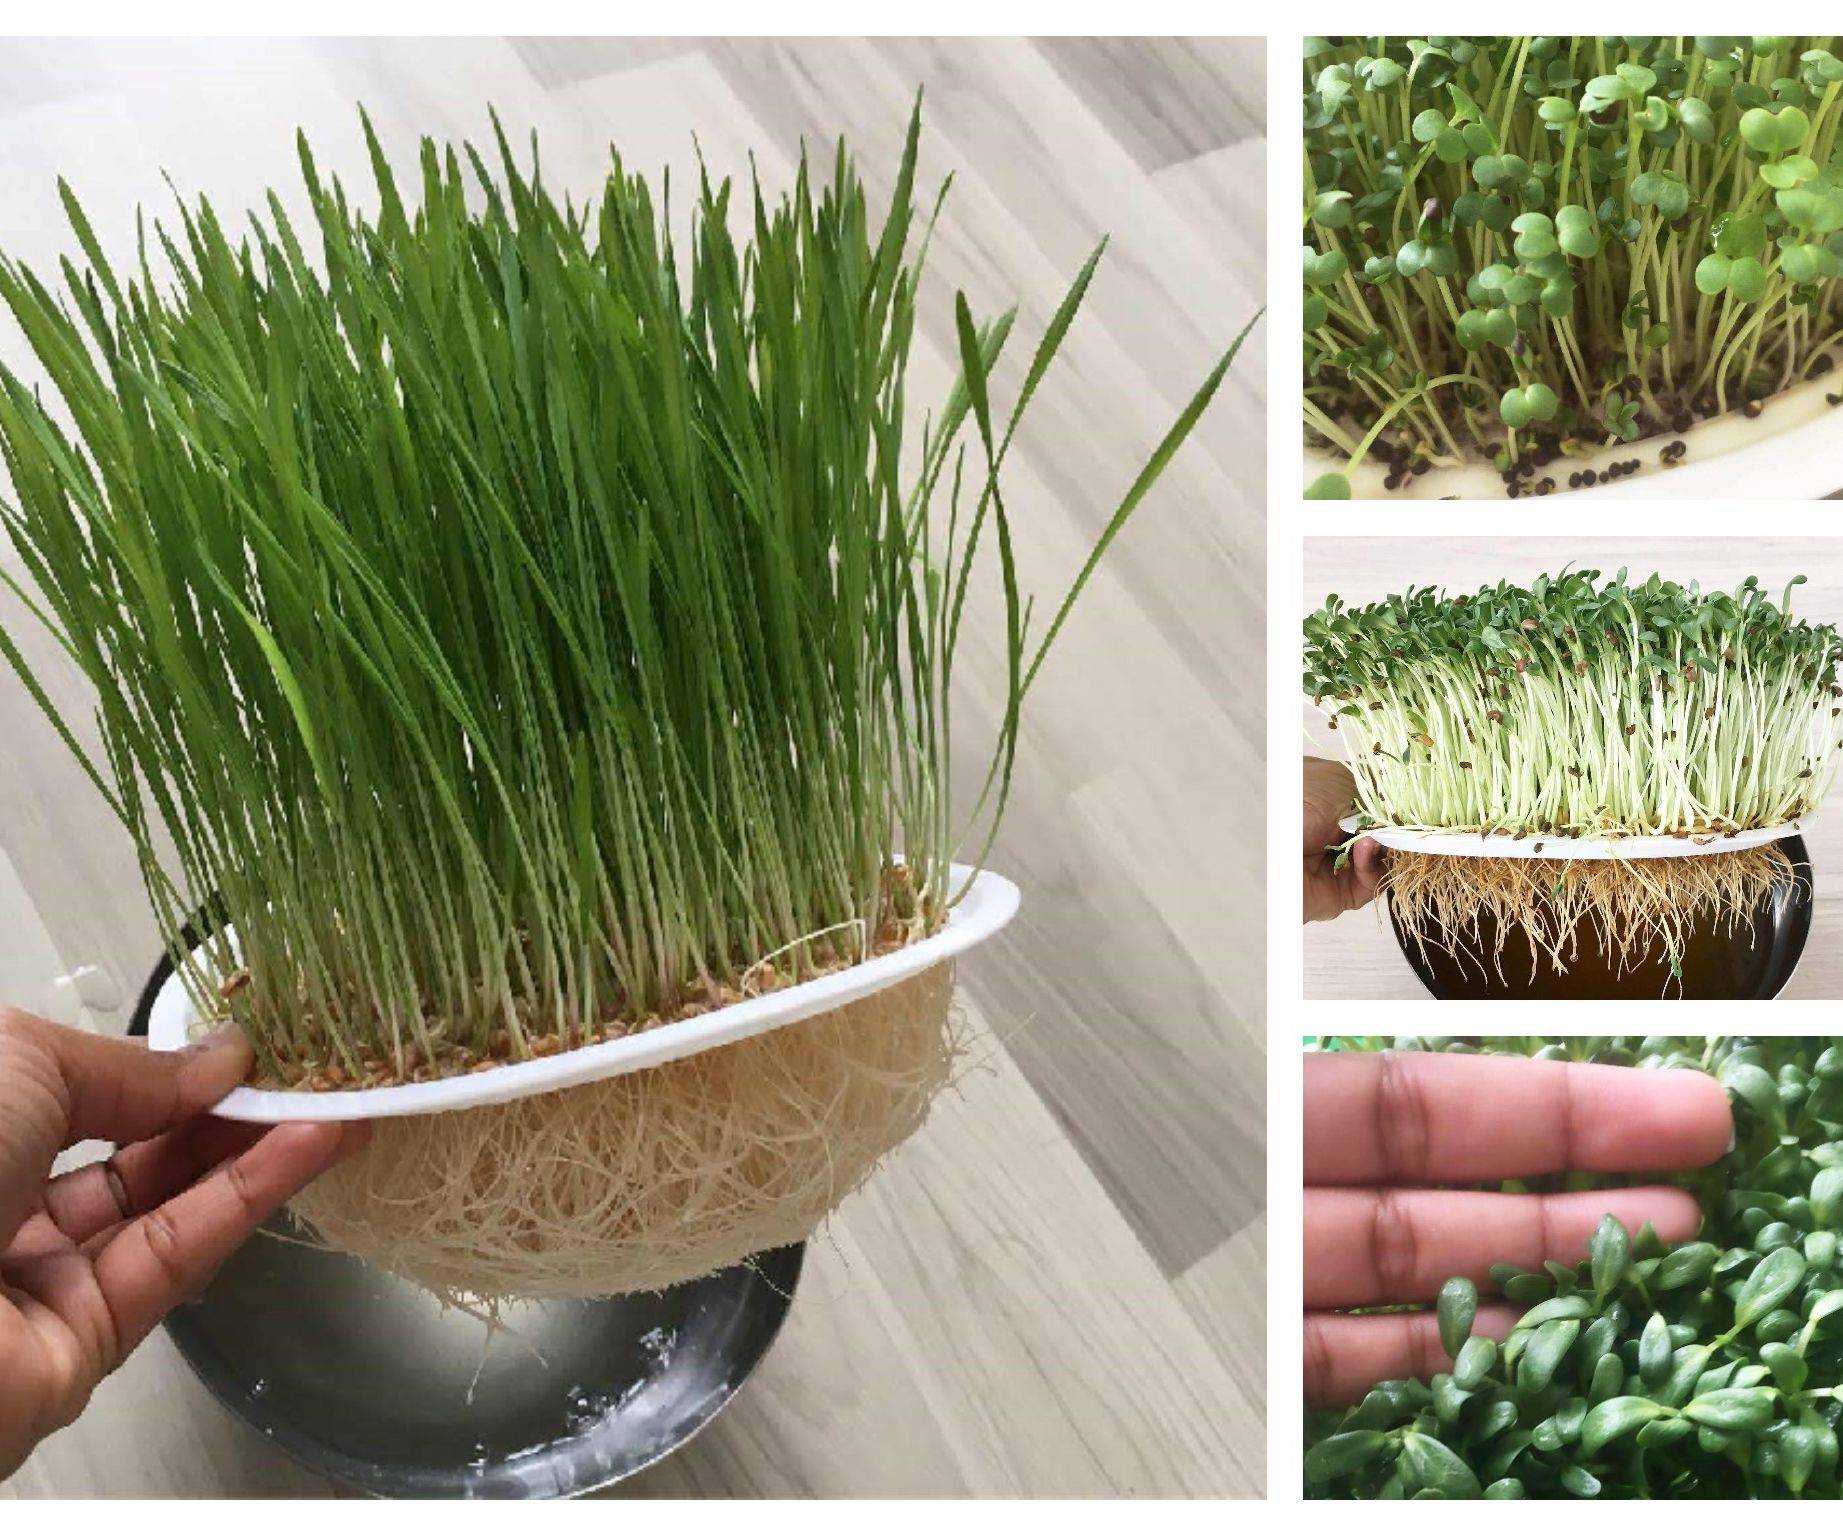
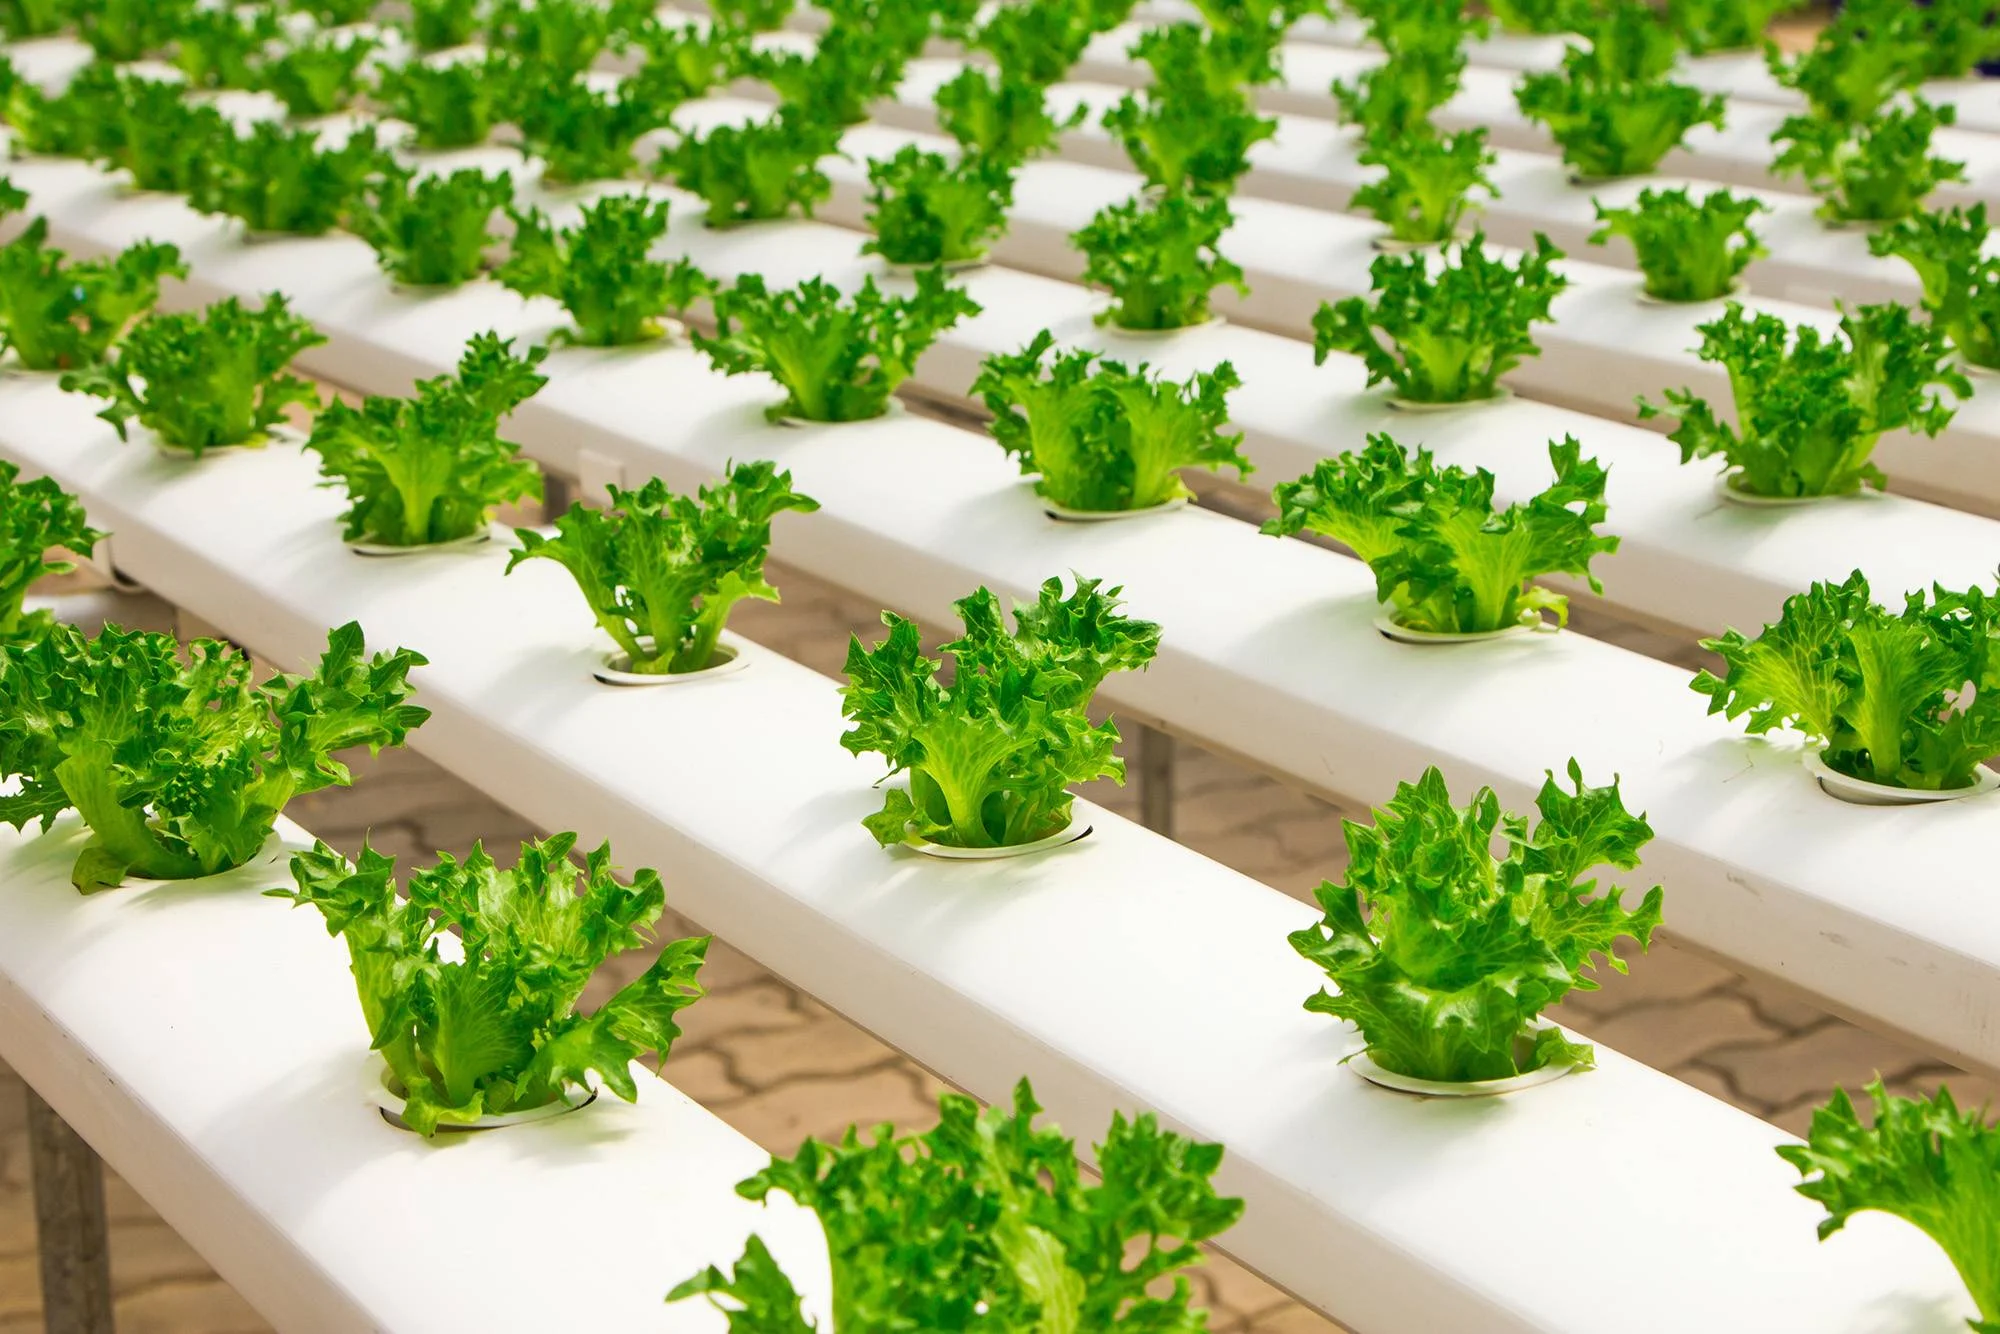
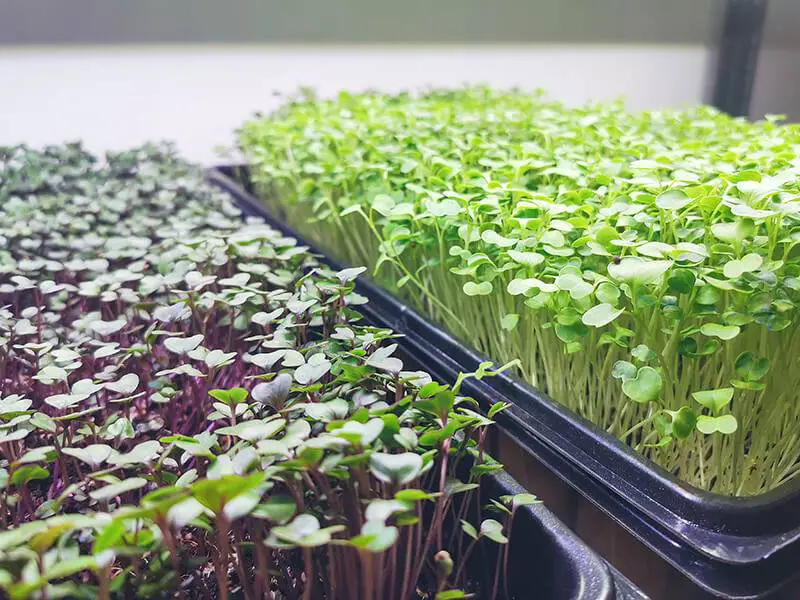
Growing hydroponic microgreens at home has transformed my kitchen into a mini garden that produces incredibly nutritious greens in just days. These tiny powerhouses are essentially the seedlings of vegetables and herbs, harvested just after they’ve sprouted their first true leaves. The best part? They require minimal space, almost no equipment, and can be grown year-round regardless of your climate. MicroFarm’s hydroponic growing systems have made it even easier to get started with everything you need in one place, perfect for both beginners and experienced gardeners looking to expand their indoor growing capabilities.
My journey with microgreens began when I was looking for ways to add fresh greens to my meals during winter. What I discovered was a simple growing method that delivers incredible results with minimal effort. Unlike traditional gardening, hydroponic microgreens don’t require soil, take up just a fraction of the space, and can be harvested in as little as 7-14 days depending on the variety. This quick turnaround means you can have a constant supply of fresh, nutrient-dense greens whenever you want them.
“Microgreens contain up to 40 times more nutrients than their mature counterparts. They pack an incredible nutritional punch in their small size, making them one of the most efficient foods you can grow at home.” – Oregon State University Extension Service
What Makes Microgreens Nutritional Powerhouses
The nutritional density of microgreens is what first drew me to growing them. These tiny plants contain concentrated levels of vitamins, minerals, and antioxidants that far exceed those found in their fully-grown counterparts. Research has shown that microgreens can contain up to 40 times the nutrients of mature plants, making them true superfoods. This nutritional concentration happens because the young seedlings are harvested during their peak growth stage when they’re channeling all their energy into producing those first few leaves.
Broccoli microgreens, for instance, contain significant amounts of sulforaphane, a compound with potential cancer-fighting properties. Sunflower microgreens are loaded with protein and healthy fats, while red cabbage microgreens pack incredible amounts of vitamin C and antioxidants. By growing a variety of microgreens, I’ve been able to add a rainbow of nutrients to my diet that would be difficult to achieve otherwise. The flavor profiles are equally impressive – from spicy radish to nutty sunflower and mild, sweet pea shoots, each variety brings its own distinctive taste that can transform ordinary meals into culinary experiences. If you’re interested in enhancing your garden, consider exploring organic strawberry seeds for additional success.

Why Hydroponics Beats Soil for Indoor Growing
After trying both soil and hydroponic methods, I’m convinced that hydroponics is the superior approach for growing microgreens indoors. Hydroponic growing eliminates the mess of soil, reduces the risk of soil-borne diseases, and creates the perfect environment for rapid, healthy growth. The system works by providing water directly to the roots while supporting the plants with a soilless growing medium like coconut coir or hemp mats. This direct access to water and oxygen results in faster growth rates and often higher yields than traditional soil methods.
Everything You Need to Start Growing Hydroponic Microgreens
“LED Grow Light, 200W, 5000K Full …” from sunco.com and used with no modifications.
Getting started with hydroponic microgreens requires surprisingly little equipment. Unlike complex hydroponic systems for larger plants, microgreen setups are simple, affordable, and can fit on any kitchen counter. I’ve found that the minimal investment pays for itself quickly when you consider the cost of store-bought microgreens, which can run $30-50 per pound. My home-grown varieties cost just a fraction of that amount and taste infinitely fresher.
My first setup was incredibly basic – just a few plastic containers, some growing mats, and seeds. As I’ve expanded, I’ve refined my system but still maintain the simplicity that makes microgreens so accessible. The beauty of hydroponic microgreens is that they don’t require fancy equipment or technical knowledge – just a few basic supplies and some attention to detail.
The seeds themselves contain all the nutrients needed for the initial growth stage of microgreens, which means you don’t need to worry about complex nutrient solutions or fertilizers. This self-contained growth cycle makes hydroponics even simpler for microgreens than for full-sized plants, as you’re essentially just providing water and light while the seed does all the hard work.
- Growing trays (with and without drainage holes)
- Hydroponic growing medium (coconut coir, hemp mats, or grow pads)
- Quality microgreen seeds (non-treated, food-grade)
- Spray bottle or gentle watering can
- Clean water
- Bright light source (window or grow light)
- Sharp scissors or knife for harvesting
- Optional: heat mat for cold environments
Basic Equipment List for Beginners
When I first started growing hydroponic microgreens, I was amazed at how little I actually needed to get going. The core components of a basic setup include growing trays, a growing medium, quality seeds, a light source, and water – that’s it! I recommend starting with two 10″x20″ standard growing trays per crop – one with drainage holes for the growing medium and seeds, and one without holes to serve as a water reservoir underneath. This “flood tray” system allows for bottom watering, which keeps the growing environment humid while preventing over-watering. Sharp scissors for harvesting and a spray bottle for gentle top watering complete the essential equipment list. For more on maintaining the right conditions, check out this guide on controlling humidity in your grow tent.

Best Growing Mediums for Hydroponic Microgreens
After experimenting with various growing mediums, I’ve found that coconut coir, hemp mats, and specialized grow pads offer the best results for hydroponic microgreens. Coconut coir has become my go-to choice because it retains moisture beautifully while allowing roots to breathe. Made from coconut husks, this sustainable medium is naturally anti-fungal and can often be reused for multiple crops. Hemp mats are another excellent option, especially for smaller seeds like broccoli or amaranth, as they provide consistent moisture without becoming waterlogged.
Specialized microgreen grow pads are worth the investment if you plan to grow regularly. These food-safe, biodegradable mats are specifically designed for microgreens and provide the perfect balance of moisture retention and drainage. They’re also incredibly convenient – simply place them in your tray, add water, and sow your seeds. When harvest time comes, you can compost the entire mat along with the remaining roots, making cleanup a breeze.
Lighting Requirements: Natural vs. Artificial
Sufficient light is crucial for developing vibrant, flavorful, and nutritionally dense microgreens. While a sunny south-facing window can work well during summer months, I’ve found that supplementing with grow lights provides more consistent results year-round. When using natural light, rotate your trays daily to prevent the seedlings from leaning too much in one direction. If your microgreens start appearing pale or stretched (leggy), it’s a clear sign they need more light intensity. For more tips on growing microgreens at home, you can check out this guide from Purdue Extension.
For artificial lighting, I recommend LED grow lights specifically designed for plants. These provide the perfect spectrum for photosynthesis while generating minimal heat and using less electricity than fluorescent options. Position your lights 6-12 inches above your growing trays and provide 12-16 hours of light daily. This consistent light exposure ensures sturdy stems, vibrant colors, and optimal flavor development across all varieties. The investment in proper lighting pays dividends in the quality of your harvests.
Seed Selection: Top 5 Easiest Varieties for Beginners
When I first started growing hydroponic microgreens, I discovered that some varieties are significantly easier to grow than others. For beginners, I always recommend starting with these five foolproof options: sunflower, pea shoots, radish, broccoli, and buckwheat. Sunflower microgreens grow quickly and produce large, nutty-flavored greens that are perfect in salads and sandwiches. Pea shoots are equally forgiving, offering a sweet flavor reminiscent of fresh garden peas while being nearly impossible to mess up.
Radish microgreens add a spicy kick to dishes and typically mature in just 5-7 days, making them perfect for impatient gardeners. Broccoli microgreens are not only packed with health benefits but also grow reliably with minimal fuss. Buckwheat rounds out my top five with its mild flavor and impressive resilience – it’s particularly forgiving of inconsistent watering, making it perfect for those just learning the ropes. Begin with these varieties to build your confidence before experimenting with more finicky options like cilantro or basil.

Setting Up Your Hydroponic System in 6 Simple Steps
“What Are Hydroponic Systems and How Do …” from www.freshwatersystems.com and used with no modifications.
Setting up your first hydroponic microgreen system is surprisingly straightforward. I’ve refined this process through countless growing cycles to create a foolproof method that consistently produces vibrant, healthy greens. The beauty of this system lies in its simplicity – no pumps, timers, or complex equipment required. Let me walk you through my step-by-step approach that transforms seeds into nutrient-packed greens in just days.
1. Prepare Your Growing Trays
Start by thoroughly cleaning your growing trays with a mild soap and water solution to remove any manufacturing residues or contaminants. This sanitation step is crucial for preventing mold and disease issues later. Once clean, nest your drainage tray (with holes) inside your solid reservoir tray, creating a simple but effective two-tray system. This setup allows for bottom-up watering which encourages strong root development while keeping the seed surface drier to prevent mold growth.
Pre-moisten your growing medium by soaking it in clean water for about 10 minutes before placing it in the drainage tray. For coconut coir or soil-like mediums, ensure they’re evenly distributed at a depth of about ½ inch. If using grow mats, simply place them flat on the bottom of your drainage tray after soaking. The medium should be thoroughly wet but not swimming in water – when you press gently, a few drops should come out, not a stream.
2. Add Your Growing Medium
Place your pre-soaked growing medium evenly across the bottom of your drainage tray. For coconut coir, I recommend spreading it to a depth of approximately ½ inch, pressing gently to create a level surface without compacting it too firmly. If using hemp or microgreen grow mats, simply lay them flat, ensuring they cover the entire bottom of the tray. The medium should be thoroughly moist but not waterlogged – you’re aiming for the consistency of a wrung-out sponge.
Before adding seeds, take a moment to ensure your growing medium is level and smooth. Any significant dips or mounds can lead to uneven water distribution and germination problems. I like to use a clean piece of cardboard or a bench scraper to gently level the surface. This simple step makes a surprising difference in the evenness of your final crop and helps prevent dry or overly wet patches that can compromise overall growth.
3. Soak and Distribute Seeds
Different seeds benefit from different pre-soaking treatments. Larger seeds like sunflower and peas should be soaked in water for 8-12 hours before planting to jump-start germination. I place them in a jar with room-temperature water, changing the water once halfway through. Smaller seeds like broccoli or radish can be sown directly without pre-soaking. After draining pre-soaked seeds, distribute them evenly across your growing medium, aiming for a dense but single layer coverage – seeds should be touching but not piled on top of each other.
Seed density is crucial for successful microgreen growing. Too sparse, and you’ll waste growing space while allowing more opportunity for mold to develop. Too dense, and your greens will compete for light and air circulation, potentially leading to weak, spindly growth. As a general guideline, aim to cover about 75-80% of your growing medium with seeds. For most varieties, this works out to approximately 1-2 tablespoons of seed per 5″x5″ growing area, though larger seeds like sunflower or pea will require more by volume.
4. Create the Perfect Growing Environment
After sowing, gently press the seeds into contact with the growing medium – good seed-to-medium contact is essential for proper germination. Most microgreen varieties benefit from a blackout period during the first 3-5 days of growth. This darkness encourages the seeds to send roots downward into the medium while stretching upward in search of light, creating longer stems that will be easier to harvest later. I create this dark environment by simply inverting another tray on top of my seeded tray, making sure it doesn’t crush the seeds.
During this blackout phase, check your seeds daily to monitor moisture levels and progress. You’ll be amazed at how quickly germination occurs – usually within 24-48 hours for most varieties. Once your seeds have germinated and grown to about 1-2 inches tall (typically by day 3-5), remove the covering tray and expose them to light. This transition marks the beginning of the greening phase, where the seedlings will develop chlorophyll and transform from pale yellow to vibrant green. For more information on the light requirements, check out how many hours of light hydroponic plants need.
5. Watering Technique: Bottom-Up Approach
Proper watering is perhaps the most critical aspect of successful microgreen growing. After years of experimentation, I’ve found that bottom watering produces the best results with minimal risk of fungal issues. Simply add about ¼ inch of water to your reservoir tray (the solid one without holes) and allow the growing medium to wick moisture upward. This approach keeps the seed and stem area relatively dry while ensuring the roots have access to all the water they need.
6. Position Your Light Source
Once your microgreens have emerged from their blackout period, proper lighting becomes essential for developing robust flavor and nutritional content. Position your grow light about 6-12 inches above the trays, ensuring even coverage across all your growing space. For window-grown microgreens, place them as close to the glass as possible without touching it, as glass can get quite cold in winter. Rotate trays daily if using natural light to prevent leaning.
The intensity and duration of light directly impact the quality of your microgreens. I provide 12-16 hours of light daily, which mimics the natural growing season and provides enough energy for photosynthesis without stressing the plants. If you notice your microgreens looking pale or stretching toward the light source (becoming “leggy”), they need either more intense light or closer proximity to the current light source. Adjusting accordingly will result in shorter, stockier greens with more vibrant color and better flavor.
Daily Care and Maintenance Schedule
“Exploring Hydroponics’ Pros and Cons …” from hydronov.com and used with no modifications.
Caring for hydroponic microgreens requires minimal but consistent attention. I check my trays once daily, typically in the morning, to assess moisture levels and monitor growth. This quick daily check prevents most common problems before they start and ensures optimal growing conditions. The beauty of microgreens is that their short growing cycle means you’ll quickly learn the rhythm of care through observation.
Proper Watering Techniques
After the initial setup, watering is the most crucial aspect of microgreen care. I maintain the bottom-watering approach throughout the growing cycle, adding water to the reservoir tray whenever the growing medium begins to feel slightly dry to the touch. For most varieties and growing conditions, this means adding water every 1-2 days. Avoid overhead watering after seedlings have emerged, as this can promote fungal issues and damage delicate stems.
Different microgreen varieties have slightly different water requirements. Pea and sunflower shoots, with their larger seed mass and vigorous growth, typically need more frequent watering than smaller-seeded varieties like broccoli or radish. Learning to read the subtle signs of your growing medium’s moisture level takes practice but soon becomes second nature. If the growing medium feels cool and slightly damp, it likely has sufficient moisture. If it feels dry or the plants begin to droop slightly, it’s time to add water.
Light Duration and Intensity
Maintaining consistent light exposure is vital for developing flavorful, nutritious microgreens. I keep my grow lights on a simple timer set for 14 hours of light daily, which provides ample energy for photosynthesis while allowing a rest period. This consistent light cycle helps develop deeper flavors and richer colors in your microgreens, translating to both visual appeal and nutritional value.
Watch for signs that your light intensity might need adjusting. Pale, yellowish greens typically indicate insufficient light, while browning leaf edges might suggest light burn from too much intensity. The sweet spot produces vibrant, richly colored greens with compact growth rather than excessive stretching. Adjusting your light height by just a few inches can make a significant difference in the quality of your harvest. For more information on optimizing your setup, check out this guide on how many hours of light hydroponic plants need.
Temperature and Humidity Control
Microgreens thrive in typical indoor temperatures between 65-75°F (18-24°C), making them perfect for growing in most living spaces. Maintaining moderate humidity around your trays helps with germination and prevents the growing medium from drying out too quickly. I’ve found that the natural evaporation from bottom watering creates an ideal microclimate right around the plants without requiring humidifiers or other equipment.
If growing in a particularly dry environment, you might benefit from loosely covering your trays with a clear dome during the first few days after removing the blackout cover. This transition period helps prevent shock while maintaining adequate humidity. Remove any covering once the plants are established to promote air circulation, which is essential for preventing mold and fungal issues. Always ensure your growing area has some airflow – even a small fan on low speed can make a significant difference.
Troubleshooting Common Hydroponic Microgreen Problems
“Overview of Commercial Hydroponic Systems” from www.globalgarden.co and used with no modifications.
Even with the best setup and care, occasional challenges can arise when growing microgreens. Fortunately, most issues have simple solutions, especially when caught early. The fast-growing nature of microgreens means that each new tray is an opportunity to apply lessons learned and refine your approach. Here are the most common problems I’ve encountered and how I’ve successfully addressed them.
Mold and Fungus Prevention
White fuzzy growth on your growing medium or seeds is typically mold, one of the most common challenges in microgreen growing. To prevent mold, ensure proper air circulation around your trays, avoid overwatering, and don’t overseed. I keep a small fan running near my growing area to maintain gentle air movement, which significantly reduces mold issues. If you do spot mold beginning to form, immediately improve air circulation and reduce watering frequency. For more tips on growing microgreens, check out this guide on hydroponic collard greens microgreens.
Not all white growth is harmful – root hairs often appear as fine white fuzz extending from the base of seedlings and are completely normal. To distinguish between beneficial root hairs and problematic mold, note that root hairs are uniform, straight, and appear primarily on the stem and root zone. Mold, in contrast, appears patchy, tends to be fuzzy or web-like, and may have a musty odor. When in doubt, increasing air circulation benefits both scenarios without harming your crop.
Dealing with Leggy or Pale Seedlings
Spindly, stretched seedlings with excessive space between the growing medium and cotyledons indicate insufficient light. This “legginess” creates weak stems that may flop over before harvest time. To correct this issue, increase light intensity by moving your grow light closer to the trays or investing in a stronger light source. For future crops, ensure adequate light immediately after removing the blackout cover to encourage compact, sturdy growth.
Pale or yellowish greens similarly indicate light deficiency or occasionally nutrient issues. Since microgreens rely primarily on seed reserves rather than external nutrients, paleness is almost always a light issue. Providing more intense light usually resolves the problem within 24-48 hours as the plants increase chlorophyll production. For particularly pale crops, extending the light period by a few hours can help restore vibrant color before harvest.
Slow Growth Issues and Solutions
If your microgreens seem to be developing more slowly than expected, temperature is often the culprit. Most varieties prefer temperatures between 65-75°F (18-24°C) and will grow sluggishly in cooler environments. During winter months, I sometimes place a seedling heat mat under my reservoir trays to maintain ideal soil temperatures, which dramatically improves growth rates. Just be aware that warmer temperatures require more frequent watering, so adjust your schedule accordingly.
Another common cause of slow growth is seed quality. Always purchase high-quality seeds specifically marketed for microgreen growing when possible. These seeds typically have higher germination rates and more vigorous growth than standard garden varieties. I’ve found that investing in quality seeds pays dividends in faster growth, better flavor, and more reliable harvests – especially for crops like cilantro, basil, and other herbs that can be finicky as microgreens.
Preventing Root Rot
Root rot appears as brown, slimy roots and often produces an unpleasant odor. This condition results from excessive moisture around the root zone without adequate oxygen. To prevent root rot, avoid overwatering and ensure your growing medium provides adequate drainage. I’ve found that maintaining the “damp sponge” moisture level – wet enough to provide hydration but not soggy – effectively prevents root issues. For more insights on maintaining healthy plants, check out this guide on how plants get nutrients in hydroponics.
If you notice signs of root rot developing, immediately reduce watering and increase air circulation. In severe cases, it’s often best to harvest what you can and start fresh, as root rot can spread quickly through a tray. For future plantings, consider adding more drainage holes to your growing trays or mixing in a small amount of perlite with coconut coir to improve aeration. These simple adjustments can make a significant difference in root health.
Harvesting Your Microgreens for Maximum Flavor and Nutrition
“Growing Microgreens – Curriculum Matrix …” from agclassroom.org and used with no modifications.
Harvesting at the perfect moment maximizes both flavor and nutritional content in your microgreens. This critical timing varies by variety, but most microgreens reach their peak when the first true leaves begin to emerge between the cotyledons (seed leaves). This stage typically occurs 7-14 days after planting, depending on the variety and growing conditions. Learning to recognize this optimal harvest window takes practice but soon becomes intuitive. For a detailed guide on growing specific varieties, check out our hydroponic collard greens guide.
Knowing Exactly When to Harvest
Visual cues provide the best indication of harvest readiness. For most varieties, I look for fully developed cotyledons with the first true leaves just beginning to form. At this stage, the microgreens have reached their nutritional peak while maintaining tender texture and optimal flavor. Sunflower microgreens, for example, are ready when their first true leaves appear and are about 3-4 inches tall. Radish is typically ready when its characteristic serrated true leaves begin to develop, usually around day 7-10.
Morning harvesting yields the best flavor and longest shelf life. Plants accumulate sugars and nutrients overnight, making early morning the ideal time to cut your greens. I’ve found that microgreens harvested in the morning remain crisp and flavorful significantly longer than those cut later in the day. This small timing adjustment makes a noticeable difference in both taste and storage longevity, especially for delicate varieties like cilantro and basil.
Proper Cutting Techniques
Use clean, sharp scissors or a knife to cut your microgreens just above the growing medium. I hold a handful gently with one hand while cutting with the other, working my way across the tray in sections. Clean cuts minimize damage to the delicate stems and help maintain freshness. Avoid pulling or tearing the greens, which can crush cell walls and accelerate spoilage.
Harvest only what you plan to use within a few days, as microgreens are at their peak quality immediately after cutting. If your trays have reached harvest stage but you don’t need all the greens at once, you can harvest portions of the tray over several days. Just be aware that once microgreens reach their optimal harvest stage, they quickly begin developing more true leaves and stems become tougher. Most varieties have a harvest window of about 2-3 days before quality begins to decline.
Storage Tips to Extend Shelf Life
Proper storage significantly extends the usable life of your freshly harvested microgreens. I gently wrap unwashed microgreens in paper towels, place them in a reusable container or zip-top bag, and store them in the refrigerator crisper drawer. This method maintains humidity while absorbing excess moisture, preventing the soggy conditions that lead to rapid deterioration. When stored this way, most varieties remain fresh for 5-7 days.
Always wait to wash microgreens until just before use, as moisture accelerates spoilage. When ready to use, rinse them gently under cool running water and pat dry with a clean towel. For maximum nutrition and flavor, consume microgreens as soon as possible after harvesting – their delicate nature means their peak quality is fleeting, but the nutritional benefits and incredible taste make the brief harvest window well worth the effort.
Growing Microgreens Year-Round: Maintaining Continuous Harvests
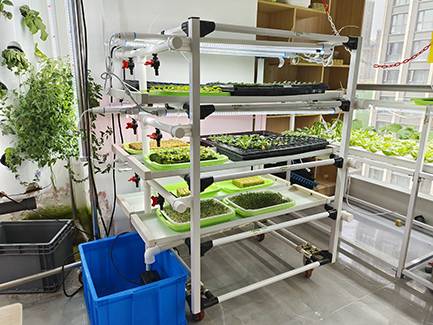
“4-Tier Nursery & Microgreen System …” from www.theaquaponicsource.com and used with no modifications.
One of the greatest advantages of growing hydroponic microgreens is the ability to maintain continuous harvests regardless of outdoor conditions. By staggering your plantings and making seasonal adjustments, you can ensure a steady supply of fresh greens even in the darkest winter months. This consistent production has transformed my cooking and nutrition throughout the year, providing access to garden-fresh flavors during seasons when outdoor growing is impossible.
Staggering Planting Schedules
To maintain continuous harvests, I start new trays every 5-7 days in a rotating schedule. This staggered approach ensures I always have microgreens at different growth stages – some just germinating, others reaching their peak, and some ready for harvest. For a family of four, I typically maintain 3-4 trays in rotation, which provides plenty of microgreens for daily use while keeping the workload manageable. If you’re interested in expanding your indoor garden, you might want to learn to grow hydroponic collard greens as well.
I keep a simple growing calendar noting when each tray was planted and which varieties are growing where. This record-keeping helps optimize my rotation and reminds me when to start new trays. After a few months of consistent growing, you’ll develop an intuitive sense of timing, but the calendar remains useful for trying new varieties or adjusting your schedule around travel or busy periods.
Seasonal Adjustments for Temperature Fluctuations
Indoor temperatures can fluctuate significantly with the seasons, affecting germination rates and growing speed. During winter months when indoor heating creates drier conditions, I monitor moisture levels more frequently and sometimes cover newly germinated trays with a humidity dome for a day or two. Conversely, summer’s higher temperatures accelerate growth and evaporation, often requiring more frequent watering and sometimes additional air circulation to prevent mold issues in the more humid conditions.
From Garden to Table: Creative Ways to Use Your Microgreens
“Indoor Automated Microgreen System: The …” from www.hydroponicsfactory.com and used with no modifications.
Microgreens deserve to be more than just a garnish pushed to the side of the plate. These nutrient powerhouses can transform ordinary meals into nutritional superstars while adding complex flavors and visual appeal. I’ve incorporated microgreens into virtually every meal of the day, from breakfast smoothies to midnight snacks, and continue to discover new ways to enjoy their benefits.
Beyond Garnishes: Making Microgreens the Star
Treat microgreens as a key ingredient rather than an afterthought by building dishes around their unique flavors and textures. I create stunning microgreen-centered salads by combining several varieties with a light vinaigrette and perhaps a sprinkle of seeds or nuts. Pea shoot and sunflower microgreen salads with lemon vinaigrette make a delicious light lunch, while spicy radish microgreens add a kick to grain bowls or roasted vegetable dishes. For an impressive appetizer, try microgreen bruschetta – toast topped with ricotta, a generous pile of microgreens, a drizzle of good olive oil, and flaky salt.
Nutrient-Boosting Combinations for Smoothies
Microgreens blend beautifully into smoothies, adding nutrition without overwhelming other flavors. I regularly add a handful of mild varieties like sunflower, pea, or buckwheat microgreens to my morning smoothies for an effortless nutrition boost. For beginners, start with a simple combination of banana, frozen berries, a handful of mild microgreens, and your liquid of choice. As you get accustomed to the flavors, you can incorporate more assertive varieties like broccoli or radish, which pair surprisingly well with tropical fruits like pineapple and mango to balance their sharpness.
Scaling Up: Taking Your Microgreen Growing to the Next Level
“Growing Microgreens Indoors – It’s …” from fifthseasongardening.com and used with no modifications.
As your microgreen journey progresses, you might find yourself wanting to expand beyond a few trays on the kitchen counter. Scaling up brings both challenges and rewards, from increased production to potential opportunities for sharing or selling your harvest. My own operation gradually expanded from two trays to a dedicated growing shelving unit that produces enough for my family with surplus to share with neighbors and friends.
Before expanding, consider your goals carefully. Are you looking to produce more variety for personal use, create a small side business, or simply optimize your current setup? Each path requires different considerations in terms of space, equipment, and time investment. The beauty of microgreen growing is its flexibility – you can scale up incrementally as your interest and experience grow. If you’re interested in expanding your variety, you might want to explore growing hydroponic parsley microgreens for a crisp, fresh addition to your home garden.
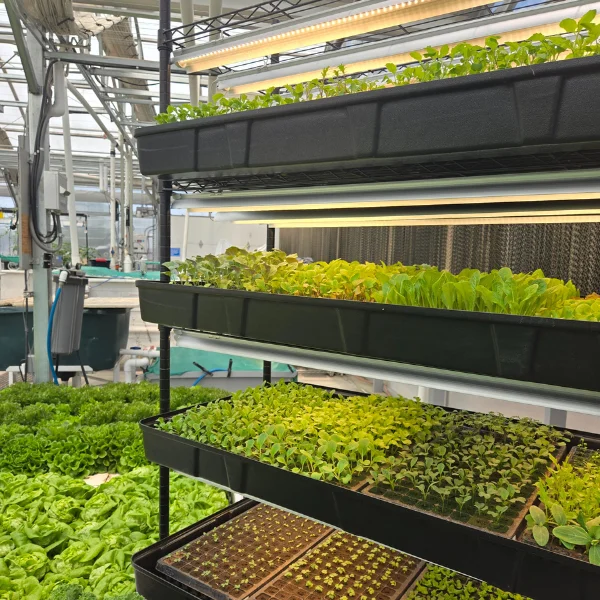
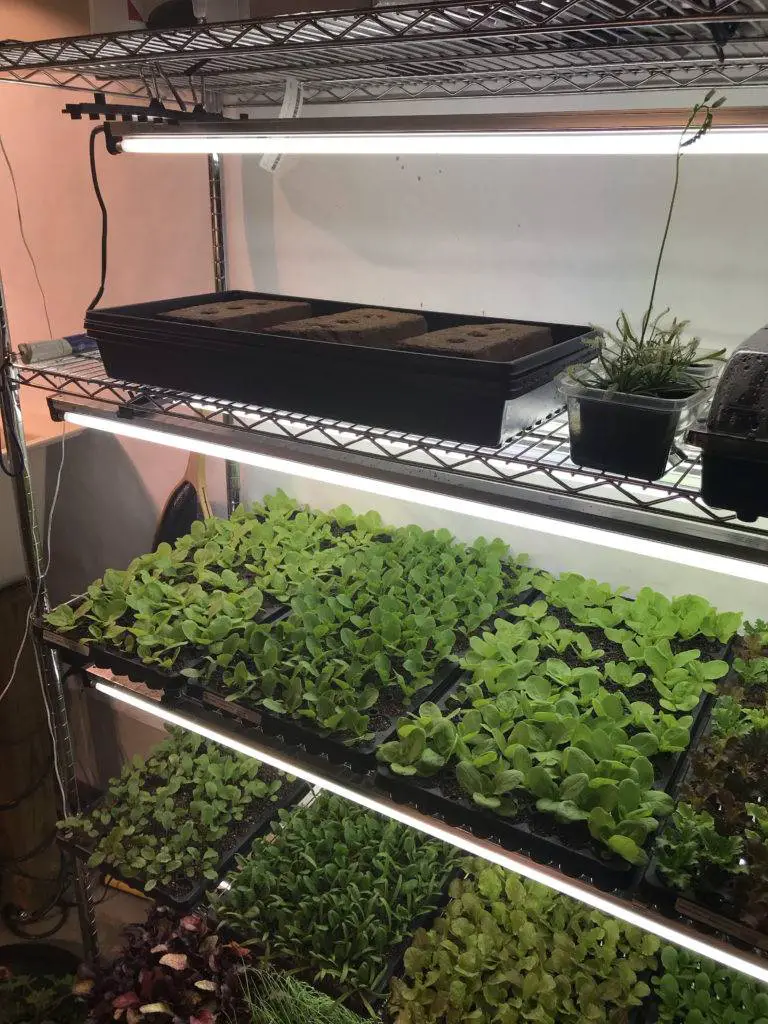
Multi-Tier Growing Systems
Vertical space offers the most efficient way to expand your microgreen production without requiring additional floor space. I use a simple wire shelving unit with LED grow lights mounted under each shelf, creating a compact growing system that occupies just a few square feet yet produces several pounds of microgreens monthly. This multi-tier approach maximizes output while minimizing the footprint, making it ideal for apartment dwellers or those with limited space.
When setting up a multi-tier system, ensure adequate spacing between shelves for plant growth and air circulation. I allow approximately 12-15 inches between each shelf, which accommodates the growing trays, light fixtures, and a few inches of growing space. Position your shelving unit near an electrical outlet for the grow lights but away from heating vents or cold drafts that could create inconsistent growing conditions. This balanced environment creates a microgreen production powerhouse in minimal space.
Automating Your Watering Process
As you add more growing trays to your rotation, manual watering becomes increasingly time-consuming. Simple automation can significantly reduce this workload while improving consistency. I’ve implemented a basic wicking system using cotton rope that connects reservoir trays to larger water containers, maintaining consistent moisture levels with minimal intervention. This passive system requires no pumps or electricity yet effectively keeps multiple trays perfectly watered for days at a time.
For those comfortable with slightly more complex systems, small aquarium pumps on timers can deliver water to multiple trays on a preset schedule. The initial setup requires some planning and investment, but the time savings quickly justify the effort, especially if you’re growing more than 4-6 trays simultaneously. Whatever automation method you choose, always maintain regular visual checks of your growing operation – technology assists but doesn’t replace the observant eye of an experienced grower. For more insights on nutrient delivery, check out how plants get nutrients in hydroponics.
Frequently Asked Questions
Throughout my years of growing and teaching others about hydroponic microgreens, certain questions arise consistently. These common queries reflect the practical concerns most new growers share and addressing them can smooth the path to successful microgreen growing. While each growing environment has its unique characteristics, these answers provide reliable guidance for most situations.
Remember that microgreen growing is both science and art – the scientific principles remain constant, but you’ll develop your own artistic approach as you gain experience. Don’t be afraid to experiment and adapt these recommendations to your specific conditions and preferences.
How much do I need to spend to start growing hydroponic microgreens?
Starting a basic hydroponic microgreen setup is surprisingly affordable. For under $50, you can purchase everything needed for your first harvests: growing trays, seeds, growing medium, and a spray bottle. If you already have a sunny window, you can begin without investing in grow lights, though adding basic LED grow lights would add approximately $30-50 to your startup costs. This minimal investment can produce microgreens that would cost $20-30 to purchase at specialty markets, meaning your setup often pays for itself within just 2-3 growing cycles.
As you gain experience and expand your operation, you might choose to invest in higher-quality equipment or automation systems, but these are entirely optional upgrades. Many successful growers maintain simple setups indefinitely, focusing on mastering techniques rather than accumulating equipment. The beauty of microgreen growing lies in this accessibility – you can start simply and expand gradually as your interest and skills develop.
For multiple harvests can I reuse my growing medium?
Most growing mediums like coconut coir can technically be reused, but I generally recommend fresh medium for each crop for optimal results. The root systems of harvested microgreens leave behind organic matter that can decompose and potentially harbor pathogens in subsequent crops. If you do choose to reuse your growing medium, remove as much root matter as possible and sterilize it by baking in the oven at 200°F (93°C) for 30 minutes before reusing. For more tips on growing microgreens, check out our guide on hydroponic dill microgreens.
Do microgreens regrow after harvesting?
Unlike mature plants or cut-and-come-again crops, most microgreens don’t regrow effectively after harvest. They’re typically cut at such an early growth stage that they lack the energy reserves and developed leaf nodes needed for regeneration. While you might see some regrowth from certain varieties like peas or sunflowers, the second growth is usually sparse and lower quality than the initial harvest. For more information on growing microgreens, you can explore this guide on growing microgreens at home.
For the best results, I recommend starting fresh trays rather than attempting to regrow harvested microgreens. This approach ensures consistent quality and productivity while minimizing potential disease issues. The spent growing medium and root mass can be composted, completing the growing cycle naturally while creating a resource for future garden projects.
How do hydroponic microgreens compare nutritionally to soil-grown varieties?
- Hydroponic microgreens typically contain comparable or slightly higher levels of most nutrients compared to soil-grown varieties
- Research has shown they often develop higher concentrations of certain antioxidants when grown hydroponically
- The controlled environment of hydroponics can result in more consistent nutritional profiles across harvests
- Hydroponic growing eliminates concerns about soil-borne contaminants while maintaining nutrient density
The nutritional quality of microgreens is primarily determined by seed quality, light exposure, and harvest timing rather than growing medium. Since microgreens are harvested at such an early stage, they draw most of their nutrients from the seed itself rather than from external sources. This means that properly grown hydroponic microgreens deliver the same impressive nutritional profile as their soil-grown counterparts, often with added benefits of cleanliness and consistency.
Some studies suggest that certain environmental stressors in hydroponic systems might actually increase the production of beneficial compounds in plants as a defense mechanism. This means your hydroponic microgreens might contain even higher levels of certain antioxidants and phytonutrients than soil-grown alternatives. Regardless of growing method, all microgreens offer exceptional nutritional density compared to their mature counterparts. For more information on how to grow microgreens at home, you can check out this guide by Purdue Extension.
What’s the difference between sprouts and microgreens?
Though often confused, sprouts and microgreens represent different stages of plant development and are grown using distinctly different methods. Sprouts are germinated seeds grown in water without growing medium, harvested within 2-5 days when they’ve just developed their initial root and shoot. They’re typically consumed whole – seed, root, and shoot together. The rapid growing conditions and consumption of the entire sprout create potential food safety concerns, particularly regarding bacterial contamination.
Microgreens, by contrast, are grown in a medium (hydroponic or soil), exposed to light for photosynthesis, and harvested at 7-21 days when they’ve developed their cotyledon leaves or first true leaves. Only the stem and leaves are harvested, leaving the roots and growing medium behind. This growing method and selective harvesting significantly reduce food safety concerns while allowing the plants to develop more complex flavors and higher nutrient levels through photosynthesis