DIY Hydroponic Herb Garden: Five Easy Steps For Beginners!

Key Takeaways: Fresh Herbs at Your Fingertips
- A DIY hydroponic herb garden uses 90% less water than traditional gardening while growing herbs up to 30% faster.
- You can start with simple systems like the Kratky method that require no electricity or pumps—perfect for beginners.
- Most common kitchen herbs thrive in hydroponic systems, with basil, mint, and cilantro being among the easiest to grow.
- Your indoor hydroponic garden can produce fresh herbs year-round regardless of outdoor weather conditions.
- With proper maintenance, your hydroponic herbs will provide multiple harvests, giving you fresh flavors for months from a single planting.
Fresh herbs transform ordinary dishes into culinary masterpieces, but buying them at the store gets expensive and they spoil quickly. A DIY hydroponic herb garden solves this problem by providing a constant supply of fresh herbs right in your kitchen. With NT Hydroponics’ simple growing systems, you can harvest your own herbs in as little as 30 days, saving money while enjoying better flavor than store-bought alternatives.
Article-at-a-Glance: Growing Fresh Herbs Year-Round
Hydroponic gardening might sound complicated, but it’s actually one of the easiest ways for beginners to start growing their own food. By growing plants in nutrient-rich water instead of soil, you’ll eliminate many common gardening challenges while creating the perfect environment for herbs to thrive. This method allows anyone to grow fresh herbs regardless of available outdoor space or gardening experience.
In this guide, we’ll walk through five straightforward steps to create your own hydroponic herb garden. You’ll learn which systems work best for beginners, what materials you need, and how to maintain your garden for continuous harvests. Even if you’ve never successfully grown a plant before, hydroponics can change that with minimal effort.
Whether you have a spacious kitchen or a tiny apartment windowsill, there’s a hydroponic solution that will fit your space and lifestyle. The best part? Many hydroponic systems can be built using materials you might already have at home.
Fresh Herbs on Your Windowsill Any Time of Year
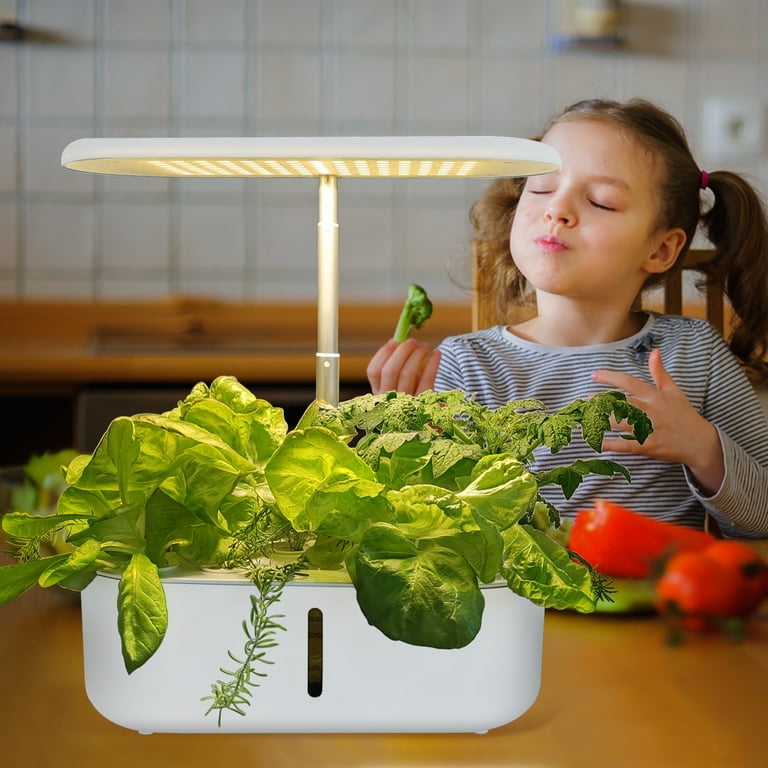
“Hydroponic Herb Garden Kit …” from www.walmart.com and used with no modifications.
Imagine snipping fresh basil for your pasta sauce in January, when outdoor gardens are dormant under snow. Or harvesting cilantro for tacos without battling summer heat that causes traditional garden herbs to bolt. With a hydroponic herb garden, seasonal limitations disappear. These indoor systems create perfect growing conditions year-round, ensuring you always have fresh herbs at your fingertips.
Most herbs reach harvestable size within 3-4 weeks in a hydroponic system, compared to 6-8 weeks in soil. This rapid growth means you’ll be enjoying your first harvest while traditional gardeners are still waiting for seedlings to establish. Plus, since you’re controlling all the growing conditions, your herbs will be consistently flavorful and abundant.
Why Start a Hydroponic Herb Garden?
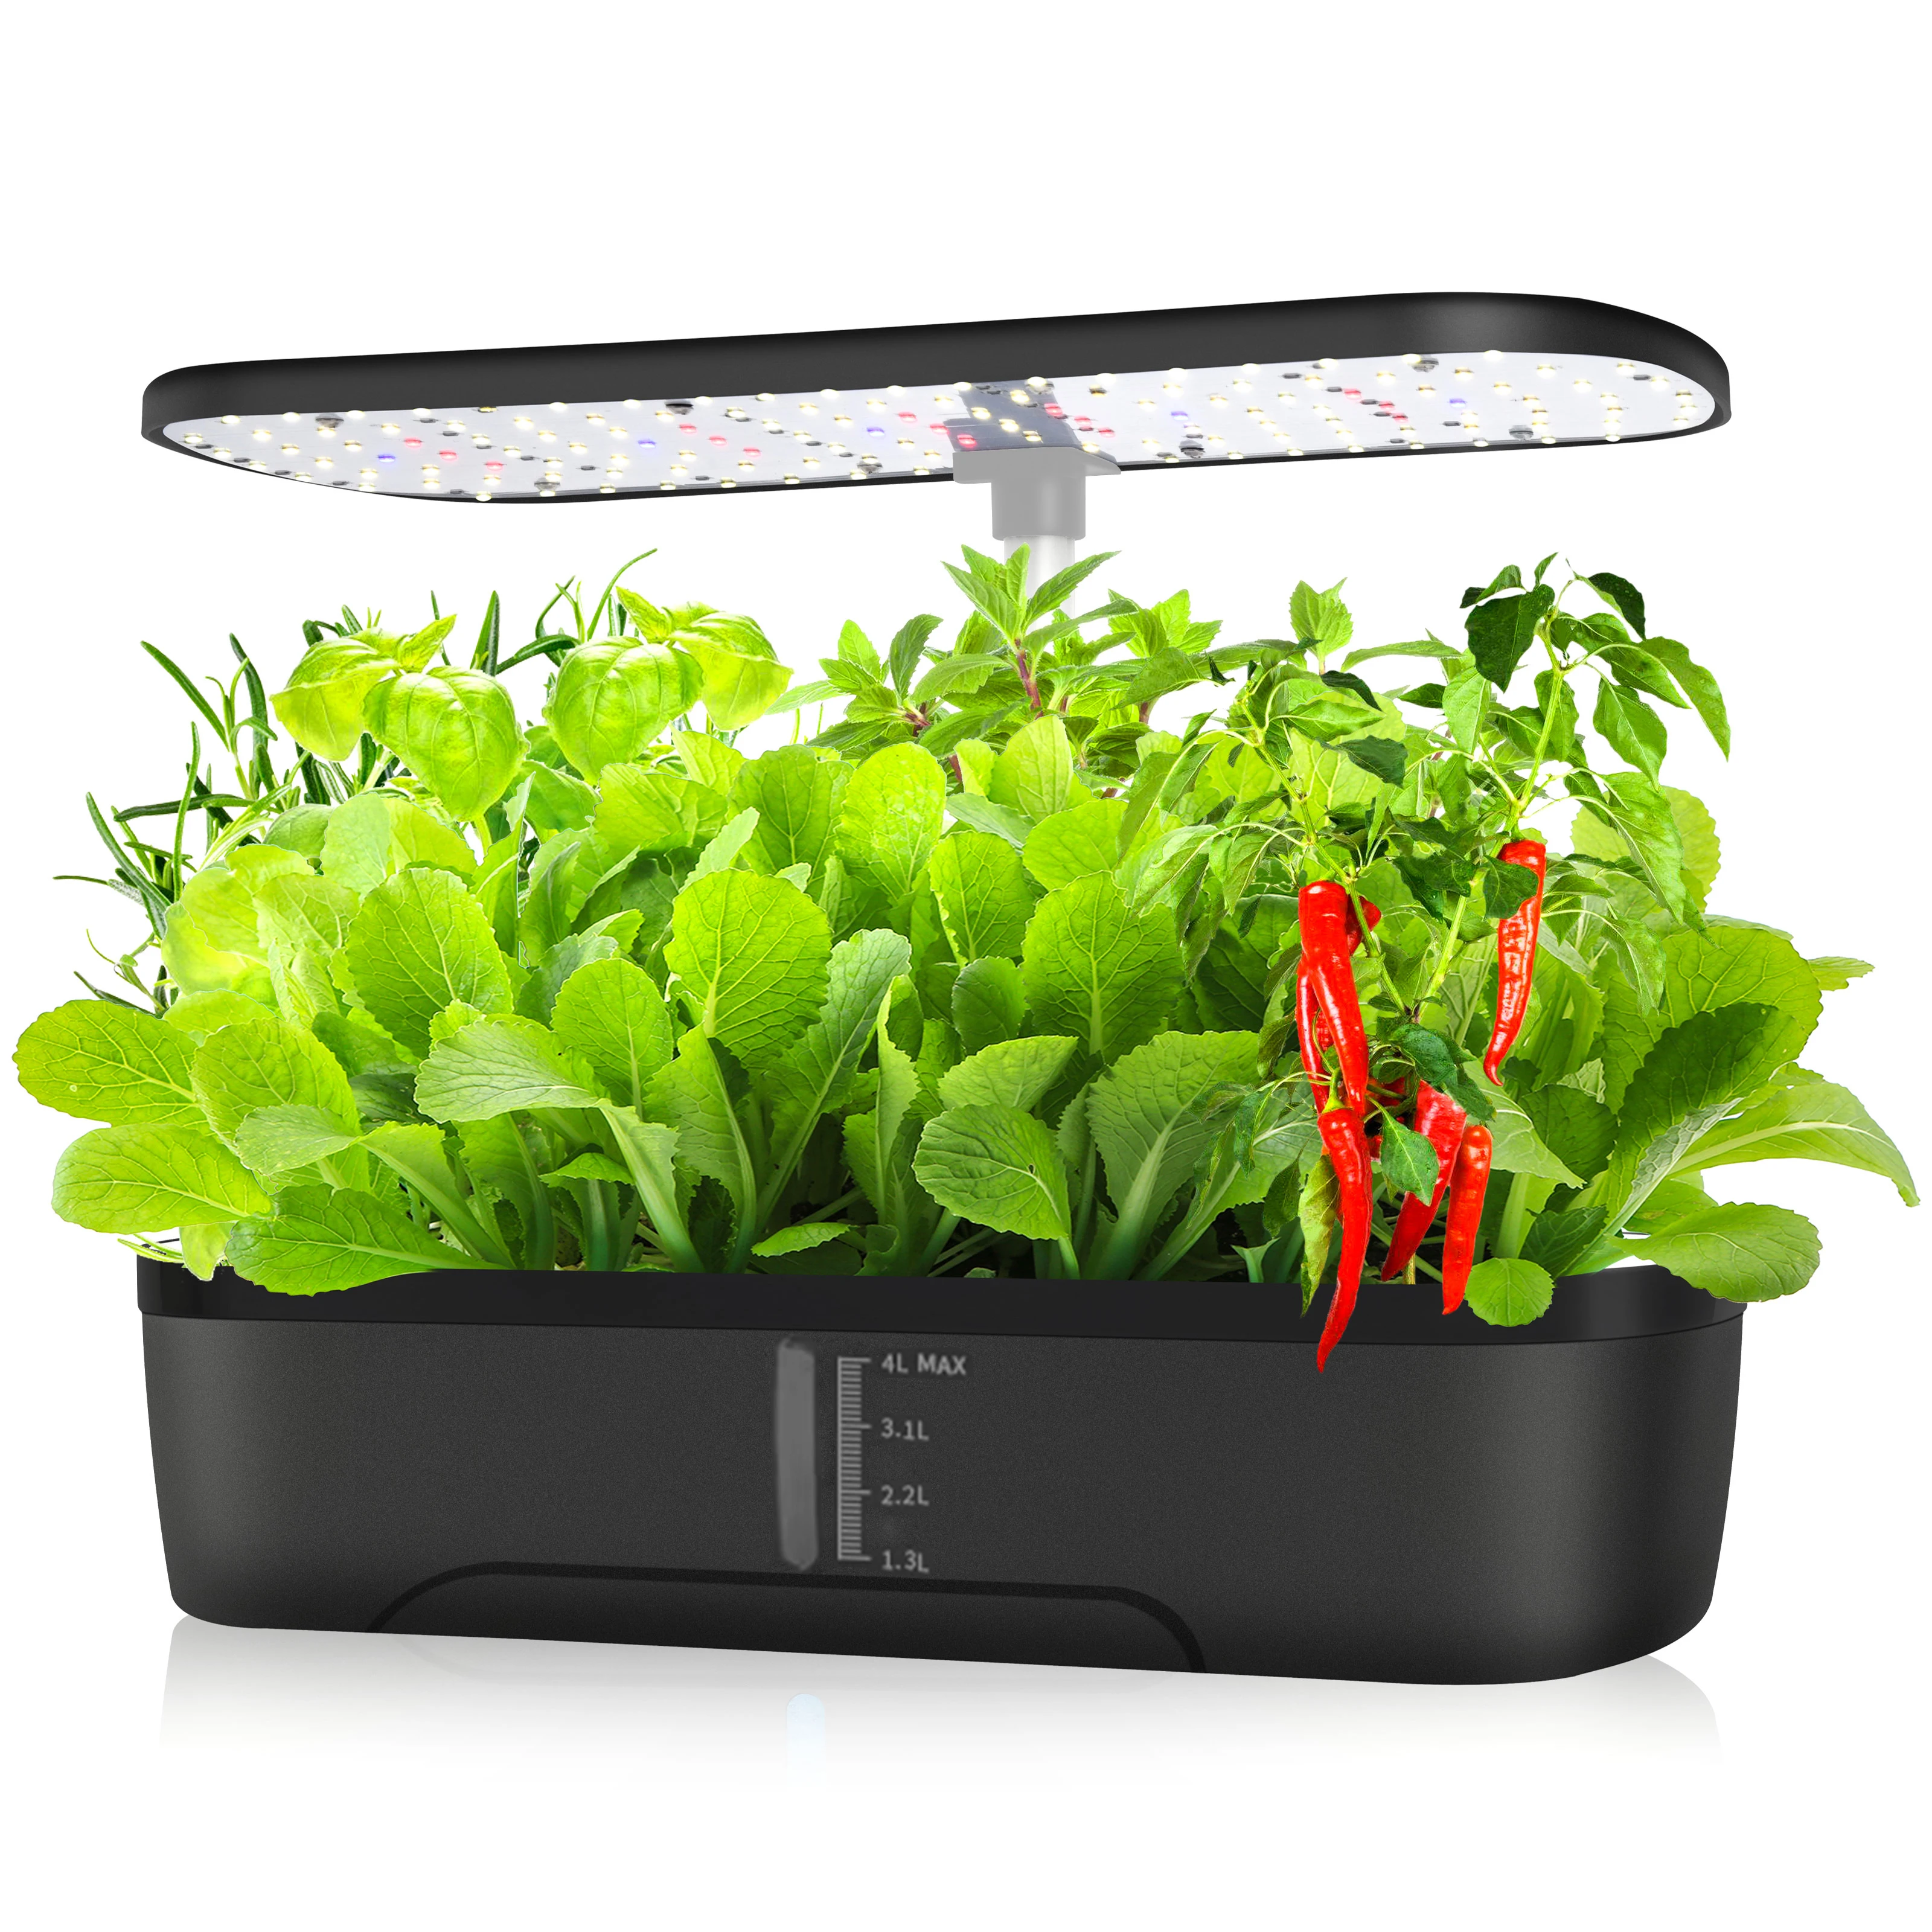
“12 Pods Hydroponics Growing System …” from www.aliexpress.com and used with no modifications.
Hydroponic gardening offers significant advantages that make it particularly appealing for herb growing. Unlike outdoor gardens that demand extensive weeding, watering, and pest management, hydroponic systems virtually eliminate these time-consuming tasks. For busy people who still want the benefits of homegrown food, hydroponics provides the perfect balance of minimal effort and maximum results.
Beyond convenience, hydroponic herbs simply taste better. Without soil as an intermediary, plants absorb nutrients directly, developing stronger flavors and aromas. Many chefs prefer hydroponically grown herbs for their consistent quality and intense flavor profiles. You’ll notice the difference immediately in your cooking.
Perhaps most importantly for beginners, hydroponic gardens are significantly more forgiving than soil gardens. By controlling water, nutrients, and light precisely, you eliminate many variables that cause traditional gardens to fail. This controlled environment creates ideal growing conditions that dramatically increase your chances of success.
Hydroponic vs. Traditional Gardening: The Numbers
Water usage: 90% less water
Growing speed: 30-50% faster growth
Space efficiency: Up to 10x more plants in the same space
Success rate for beginners: Nearly 3x higher than soil gardening
Uses 90% Less Water Than Traditional Gardening
In traditional gardening, much of the water you apply evaporates or drains away before plants can use it. Hydroponic systems create a closed loop where water recirculates, dramatically reducing waste. This water efficiency makes hydroponics not only environmentally friendly but also economical, especially in areas with water restrictions or high utility costs.
The water savings become even more significant over time. A small hydroponic herb garden might use just a few gallons of water per month, compared to dozens of gallons for the same herbs grown in soil. For environmentally conscious gardeners, this water conservation represents a major benefit alongside the convenience of indoor growing.
Grows Herbs Up to 30% Faster
The direct delivery of nutrients to plant roots eliminates the energy plants typically expend searching for nutrients in soil. This efficiency allows herbs to redirect their energy toward leaf and stem growth, dramatically accelerating development. What might take months in an outdoor garden often requires just weeks in a hydroponic system, meaning you’ll enjoy multiple harvests in the time traditional gardeners wait for one.
This accelerated growth becomes particularly valuable with herbs like basil and cilantro that gardeners frequently harvest. Instead of waiting for plants to recover after cutting, hydroponic herbs bounce back quickly, often ready for another harvest in just 7-10 days. This continuous production cycle ensures you always have fresh herbs available when cooking.
No Soil Means Fewer Pests and Cleaner Herbs
Many common garden pests live in or emerge from soil, making soil-free hydroponic systems naturally resistant to these problems. Indoor hydroponic gardens rarely experience issues with aphids, slugs, or soil-borne diseases that plague outdoor herb gardens. This natural pest resistance means you can grow your herbs without pesticides, ensuring they’re as clean and healthy as possible.
The absence of soil also means no mud splashing onto leaves during watering, keeping your herbs pristine. When it’s time to harvest, you’ll simply snip what you need without washing off dirt—a small but satisfying advantage of hydroponic growing. This cleanliness extends to your kitchen too, with no soil to spill during indoor gardening activities.
Perfect for Small Spaces and Apartments
Traditional gardening requires significant space, putting it out of reach for many apartment dwellers. Hydroponic systems can thrive in tiny spaces—even on a kitchen counter or windowsill. Vertical hydroponic setups maximize this space efficiency further, allowing you to grow a dozen or more herb plants in the footprint of a microwave.
This space efficiency makes hydroponics ideal for urban living. A single wall-mounted hydroponic unit can produce enough herbs for a family of four while adding a vibrant splash of green to your living space. Many urban gardeners find that their hydroponic herbs become both a practical food source and an attractive design element in their homes.
1. Choose Your DIY Hydroponic System Type

“Amazon.com : Hydroponic Site Grow Kit 2 …” from www.amazon.com and used with no modifications.
The foundation of your hydroponic journey begins with selecting the right system. While commercial options abound, DIY systems offer more customization and significant cost savings. The ideal system for beginners balances simplicity, effectiveness, and budget considerations while matching your available space and the specific herbs you want to grow.
Deep Water Culture: The Simplest Starter System
Deep Water Culture (DWC) systems suspend plant roots directly in nutrient-rich water, using an air pump to provide oxygen. This setup requires minimal materials—typically just a container, air pump, air stone, growing medium, and net pots. Many beginners start with a DWC system using a plastic storage bin or bucket, creating a functional hydroponic garden for under $30.
The beauty of DWC systems lies in their simplicity and effectiveness. With just one moving part (the air pump), there’s little that can malfunction, making this ideal for those new to hydroponics. Herbs like basil, mint, and oregano thrive in these systems, often growing twice as fast as they would in soil.

Kratky Method: No Electricity Required
The Kratky method represents the absolute simplest approach to hydroponics, requiring no electricity, pumps, or moving parts. Plants are suspended above a nutrient solution with their roots partially submerged. As plants consume the solution, an air gap forms, providing oxygen to the roots while they continue drawing up nutrients from the water below.
This electricity-free approach makes the Kratky method perfect for windowsill herbs or locations without convenient power outlets. While slightly slower than aerated systems, Kratky setups can be created using nothing more than a Mason jar, making them the most affordable entry point into hydroponics. For beginners concerned about technical complexity, this method eliminates virtually all moving parts and maintenance requirements.
Wick System: Low-Maintenance Option
Wick systems use passive capillary action to deliver nutrients to plants, eliminating the need for pumps entirely. Simple cotton strings or strips of felt serve as wicks, drawing nutrient solution from a reservoir below to the growing medium above. This elegant simplicity makes wick systems excellent for beginners or those who travel frequently.
While slightly less efficient than active systems, wick setups require minimal monitoring and can sustain plants for weeks with little attention. They work particularly well for smaller herbs with modest water requirements like thyme and rosemary. Many gardeners appreciate the wick system’s blend of traditional container aesthetics with hydroponic growing principles.
2. Gather Essential Materials and Tools
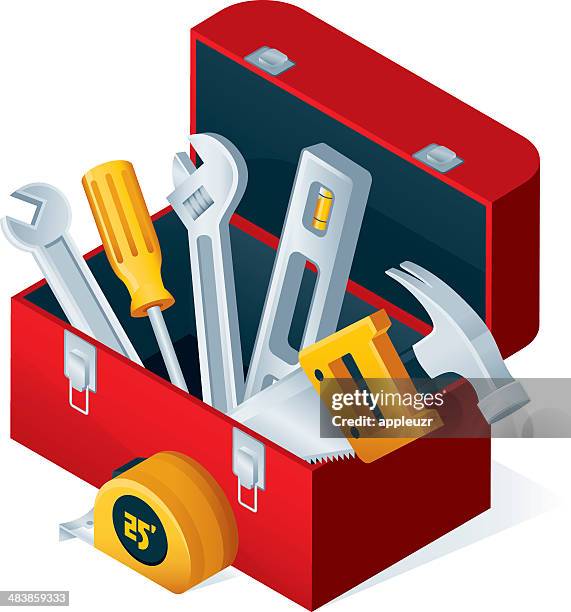
“Illustrations – Getty Images …” from www.gettyimages.com and used with no modifications.
Once you’ve selected your system type, gathering the right materials becomes your next step. Fortunately, most hydroponic supplies can be found at hardware stores, garden centers, or even repurposed from household items. The fundamental components remain consistent across most systems, though specific requirements vary based on your chosen method and scale.
Container Options for Every Budget
Your hydroponic reservoir doesn’t need to be fancy—it just needs to hold water without leaking and block light to prevent algae growth. Food-grade plastic containers like 5-gallon buckets or storage totes make excellent reservoirs for beginners. Mason jars work perfectly for small Kratky setups, while plastic coffee containers can be upcycled for individual plants.
If aesthetics matter in your living space, consider containers designed to blend with home decor. Black plastic reservoirs offer the best algae prevention, but any opaque container will work when wrapped in aluminum foil or painted. Whatever container you choose, ensure it’s never held toxic chemicals and has a lid that can be modified to hold your plants.
Growing Medium Choices
Unlike soil gardening, hydroponic systems use inert growing media that provide physical support without contributing nutrients. Expanded clay pellets (often called LECA or hydroton) remain the most popular option, offering excellent drainage and reusability. Rockwool cubes provide outstanding water retention and root development, making them ideal for starting seeds, though they’re less environmentally friendly than some alternatives.
Budget-conscious gardeners can use perlite, vermiculite, or even clean gravel as growing media. Each medium has different properties regarding water retention and aeration, so consider your specific plants’ needs. For most herb gardens, a combination of rockwool for starting seeds and clay pellets for mature plants offers an ideal balance of performance and convenience.

Lighting Requirements
Natural sunlight remains the gold standard for plant growth, making a south-facing window ideal for your hydroponic herb garden. However, most indoor locations don’t receive sufficient light intensity or duration for optimal growth, necessitating supplemental lighting. LED grow lights have become the preferred option for home hydroponics, offering excellent energy efficiency and customized light spectrums for different growth stages.
For a small herb garden, a simple 20-30W LED grow light provides sufficient illumination without significantly impacting your electricity bill. Position lights 12-18 inches above plants and provide 14-16 hours of light daily for herbs. Many growers use inexpensive outlet timers to automate their lighting schedule, ensuring consistent growth even when they’re away from home.
Nutrient Solution Basics
Hydroponic nutrients provide all the essential elements plants normally extract from soil. These pre-mixed solutions come in liquid or powder form, typically offering complete nutrition in a simple two-part formula. For beginners, pre-formulated hydroponic nutrients eliminate guesswork, though they cost slightly more than mixing your own. A quality hydroponic nutrient solution will cost about $15-25 and last several months for a small herb garden.
Different herbs have varying nutrient preferences, but most thrive with a general-purpose hydroponic formula diluted to half the manufacturer’s recommended strength. This lighter concentration prevents nutrient burn while providing ample nutrition for leafy herbs. Always mix nutrients in fresh water rather than adding directly to your reservoir, and follow the manufacturer’s instructions regarding which components to mix first.
Optional Equipment for Better Results
While not strictly necessary for success, a few additional tools significantly improve your hydroponic experience. A basic pH test kit helps maintain the ideal acid-alkaline balance (5.5-6.5 for most herbs), while a simple TDS (Total Dissolved Solids) meter measures nutrient concentration. Together, these tools help prevent common problems before they affect your plants, and both can be purchased for under $25.
For those interested in system monitoring, simple digital thermometers provide valuable data about water temperature, which should ideally remain between 65-75°F (18-24°C). Small clip-on fans improve air circulation, reducing the risk of fungal issues and strengthening stems. While entirely optional, these additions enhance results with minimal investment.
3. Set Up Your Hydroponic Garden
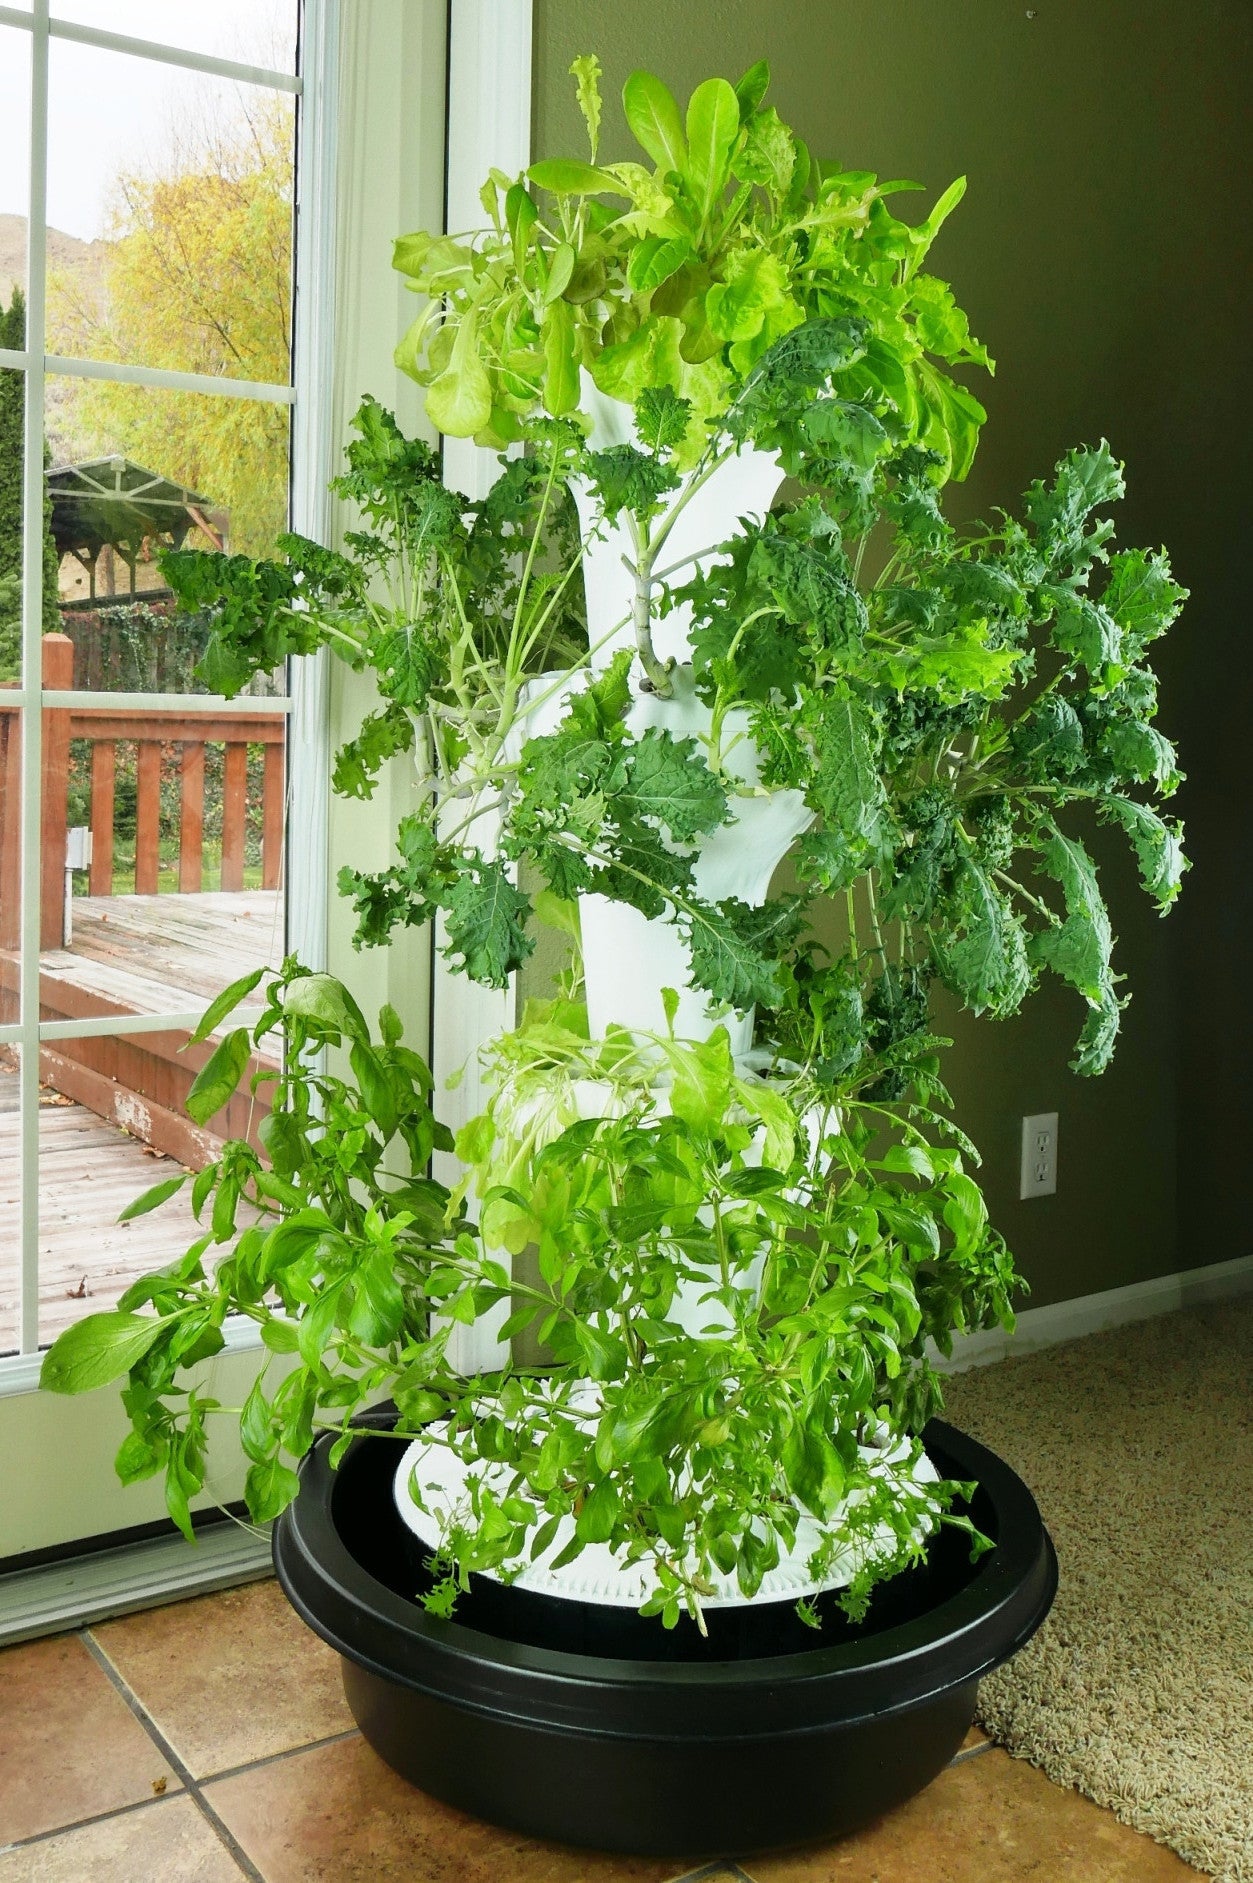
“Foody 12 Hydroponic System | Foody …” from foodyverticalgarden.com and used with no modifications.
With materials in hand, system assembly becomes your next step. The setup process varies by system type but generally involves preparing containers, arranging growing media, and establishing water and nutrient circulation. Most DIY hydroponic systems can be assembled in an afternoon, requiring only basic tools like scissors, a drill, and measuring cups.
Step-by-Step Assembly Instructions
For a basic DWC system, begin by drilling holes in your container lid sized to fit net pots. Position holes with sufficient spacing for mature plants (4-6 inches for most herbs). Insert an air stone connected to your pump at the bottom of the reservoir, ensuring the tubing reaches outside the container without kinks. Fill the container with water to about 1-2 inches below where the net pots will sit when the lid is placed.
For Kratky systems, simply cut holes in jar lids sized for net pots, or use plastic cups with bottoms removed as holders. Fill containers with nutrient solution so the bottom of the net pot will contact the water, leaving room for an air gap to develop as plants consume water. With wick systems, thread your wicking material through the bottom of containers and into the nutrient reservoir below, ensuring good contact with both growing medium and solution.
Regardless of system type, rinse all growing media thoroughly before use to remove dust and debris. For clay pellets, several rinses may be needed until water runs clear. This simple preparation step prevents cloudy reservoirs and potential plant problems.
Finding the Perfect Location
Position your hydroponic garden where it receives adequate light while remaining accessible for maintenance. South-facing windows provide ideal natural light, though supplemental grow lights expand your location options considerably. Consider temperature stability as well—avoid areas near heating vents or air conditioners that create fluctuating conditions.
For systems using electrical components like pumps or lights, proximity to outlets matters. Water-resistant surge protectors provide additional safety for your electrical connections. Remember that your system will require periodic maintenance, so ensure you can easily access all components without disturbing plants.
Water and Nutrient Preparation
Fill your reservoir with room temperature water and allow it to sit overnight before adding nutrients. This simple step allows chlorine to dissipate from tap water, creating a healthier environment for your plants. Alternatively, use filtered water to eliminate this waiting period. After preparing water, add nutrients according to package directions, typically at half-strength for herbs.
Measure and adjust pH after adding nutrients, as the solution often becomes more acidic. Most herbs prefer slightly acidic conditions (pH 5.5-6.5), easily achieved with pH adjustment solutions available at garden centers. Complete your preparation by covering all exposed water surfaces to prevent evaporation and algae growth, using light-blocking materials like aluminum foil if your reservoir isn’t already opaque.
4. Plant Your Favorite Herbs

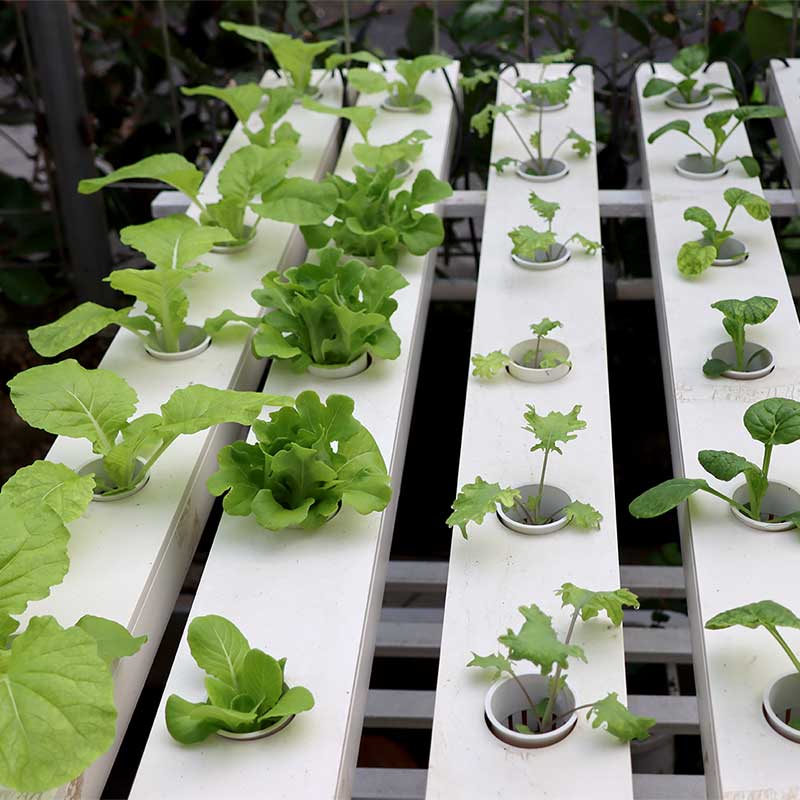
“My hydroponic herb garden 34 days in …” from www.reddit.com and used with no modifications.
With your system assembled and nutrient solution prepared, you’re ready for planting. This stage transforms your technical project into a living garden, bringing the satisfaction of watching seedlings develop into productive plants. The planting process differs slightly from traditional gardening but quickly becomes second nature.
Best Herbs for Beginners
Some herbs adapt to hydroponic growing more readily than others, making them ideal for beginners. Basil stands as perhaps the perfect starter herb, growing rapidly with minimal issues while producing abundant harvests. Mint varieties also thrive hydroponically, often growing too vigorously for traditional gardens but perfectly contained in hydroponic systems. Cilantro, which typically bolts quickly in soil gardens, remains productive longer in controlled hydroponic environments.
Other excellent choices include parsley, dill, and chives, all of which adapt well to water culture. Mediterranean herbs like thyme and oregano can succeed hydroponically but prefer slightly drier conditions, making them better suited for wick systems rather than deep water culture. For most beginners, starting with 3-5 different herb varieties provides diverse harvests while remaining manageable.
- Easiest herbs for hydroponic beginners: Basil, Mint, Cilantro, Chives, Parsley
- Moderate difficulty herbs: Dill, Oregano, Thyme, Sage
- More challenging herbs: Rosemary, Lavender, Bay Leaf
Starting from Seeds vs. Seedlings
While starting from seeds offers the widest variety options and lowest cost, beginning with purchased seedlings provides a significant head start. For first-time hydroponic gardeners, a mix of both approaches often works best—perhaps starting easy growers like basil from seed while using purchased seedlings for slower-developing herbs like rosemary.
When starting from seeds, pre-germinate by placing seeds between damp paper towels until sprouts appear (typically 3-7 days for most herbs). Transfer sprouted seeds to rockwool cubes or other starter media kept consistently moist until seedlings develop true leaves. For purchased seedlings, gently rinse all soil from roots before placing in your hydroponic system, being careful not to damage delicate root structures.
Proper Planting Technique
Place growing medium in net pots, creating a small depression in the center for seedlings or seeds. For pre-sprouted seeds, position them so the root points downward, barely covering with a thin layer of growing medium. With seedlings, arrange roots to spread naturally through the medium, ensuring they extend into the nutrient solution or contact wicking material.
Initially position net pots so plant roots touch the nutrient solution, promoting rapid adaptation to hydroponic conditions. Once plants establish (typically within a week), you can allow greater air space between solution and roots in DWC systems, though Kratky systems maintain this air gap naturally as plants consume water. During the first week after planting, check daily to ensure roots remain moist as they transition to their new environment.
5. Maintain Your Hydroponic Herb Garden
“Outdoor Hydroponic Herb Gardens …” from www.solariverusa.com and used with no modifications.
Maintaining a hydroponic herb garden requires less effort than traditional gardening but demands more consistent attention. Regular monitoring prevents small issues from becoming significant problems, while proper maintenance ensures continuous harvests for months. Establishing a simple care routine quickly becomes second nature, requiring just minutes per day.
Daily and Weekly Care Routine
Daily maintenance involves little more than observing plant appearance and checking water levels. Wilting leaves, yellowing, or unusual growth patterns signal potential problems requiring attention. In systems with air pumps, verify proper operation with a quick glance at bubble production. For systems without automatic top-off, add water as needed to maintain proper levels, especially during warm weather when evaporation increases.
Weekly tasks include testing and adjusting pH and nutrient levels, which naturally drift as plants consume nutrients and water evaporates. Complete nutrient solution replacement typically occurs every 2-4 weeks, though small systems may require more frequent changes. This regular refreshing prevents nutrient imbalances and removes any accumulated compounds that could hinder growth.
Monitoring pH and Nutrient Levels
Maintaining proper pH represents perhaps the most technical aspect of hydroponics, yet it’s crucial for nutrient availability. Most herbs prefer slightly acidic conditions between 5.5-6.5 pH, easily measured with inexpensive test strips or digital meters. Adjustments require small amounts of pH up or down solutions added gradually, with retesting after each addition to prevent overcorrection.
Nutrient concentration, measured as EC (electrical conductivity) or TDS (total dissolved solids), indicates solution strength. For leafy herbs, maintaining levels between 800-1200 ppm (parts per million) provides adequate nutrition without risk of nutrient burn. As plants grow and solution evaporates, concentration naturally increases, potentially requiring dilution with fresh water. Conversely, rapid growth may deplete nutrients faster than water, necessitating additional nutrient solution.
Harvesting Tips for Continuous Growth
Proper harvesting techniques stimulate continued production rather than depleting plants. For most herbs, harvest no more than one-third of the plant at once, allowing adequate foliage for photosynthesis and regrowth. Cut just above leaf nodes (where leaves attach to stems) to encourage branching and bushier growth, creating more harvest points for future cuttings.
Begin harvesting most herbs when plants reach 6-8 inches tall, typically 3-4 weeks after transplanting to your hydroponic system. Morning harvests generally provide the highest concentration of flavorful oils, though any time before flowering yields excellent results. Regular harvesting prevents flowering in most herbs, maintaining vegetative growth and flavor quality throughout the growing cycle.
Troubleshooting Common Issues
Even well-maintained systems occasionally develop problems, though most have straightforward solutions. Yellowing lower leaves often indicate nitrogen deficiency or pH imbalance preventing nutrient absorption, easily corrected by adjusting solution strength or pH. Leggy, stretched growth typically signals insufficient light, remedied by repositioning plants or supplementing with grow lights.
Brown leaf tips commonly result from nutrient burn (excessive concentration), resolved by diluting your solution. Conversely, pale leaves with green veins suggest iron deficiency, often caused by pH levels above 7.0 rather than actual iron shortage. For fungal issues or powdery mildew, improving air circulation with small fans provides natural prevention and treatment.
Root health remains particularly important in hydroponic systems. Healthy roots appear white or cream-colored with abundant growth. Brown, slimy roots indicate root rot, usually caused by insufficient oxygen or temperatures above 75°F (24°C). Address this by increasing aeration, lowering water temperature, or adding hydrogen peroxide solution (1 tablespoon 3% H₂O₂ per gallon of water) to increase oxygen availability.
- Yellow leaves: Check pH (5.5-6.5 ideal) and nutrient concentration (800-1200 ppm)
- Leggy growth: Increase light intensity or duration (14-16 hours daily)
- Wilting despite wet roots: Root issues—increase oxygen with additional air stones
- Leaf curl or spotting: Temperature stress—maintain ambient temperatures 65-75°F (18-24°C)
- White fuzzy growth on leaves: Powdery mildew—improve air circulation and reduce humidity
Your First Harvest and Beyond
The first harvest from your hydroponic herb garden represents a significant milestone, transforming your technical project into a productive food source. Most fast-growing herbs like basil and cilantro become ready for initial harvest 3-4 weeks after system setup, providing your first taste of truly fresh herbs. This initial success often inspires gardeners to expand their systems or experiment with different herb varieties.
With proper care, most hydroponic herbs continue producing for 4-6 months before productivity naturally declines. Rather than replacing entire plants, consider propagating new ones from cuttings taken from your healthiest specimens. Simply place 4-inch stem cuttings (with lower leaves removed) in water until roots develop, then transfer to your hydroponic system. This propagation cycle creates a perpetual garden with continuous harvests year-round.
Frequently Asked Questions
As hydroponic gardening grows in popularity, beginners naturally have questions about getting started and maintaining their systems. The following answers address the most common inquiries, providing practical guidance for new hydroponic gardeners. Remember that experimentation remains part of the journey, with each system developing its own unique characteristics based on your specific environment and care routine.
Many gardening challenges have multiple solutions, so don’t hesitate to adapt these recommendations to your particular situation. The hydroponic community continues to innovate, with new approaches regularly emerging to simplify and enhance indoor growing. Your own experience will become your best guide as you develop your hydroponic gardening skills.
How much does it cost to build a basic hydroponic herb garden?
A simple DIY hydroponic herb garden can be assembled for as little as $30-50 using repurposed containers and basic components. Kratky method setups using Mason jars cost even less, often under $20 total for a system that grows 3-4 herb plants. Commercial kits offer greater convenience at higher prices, typically $100-200 for beginner systems. Ongoing expenses remain minimal, with electricity for small LED grow lights averaging just $2-5 monthly and nutrient solutions costing approximately $3-5 per month for a small herb garden.
How long does it take for herbs to grow in a hydroponic system?
- Basil: Harvestable in 3-4 weeks from transplant
- Mint: First harvest 3-4 weeks after transplanting
- Cilantro: Ready for cutting in 3-5 weeks
- Parsley: Initial harvest at 4-6 weeks
- Thyme: First harvest 5-7 weeks after transplanting
Hydroponic herbs typically grow 30-50% faster than their soil-grown counterparts, with most reaching harvestable size within 3-6 weeks from transplant. Starting from seeds adds approximately 1-2 weeks to this timeline as seedlings establish. Environmental factors significantly influence growth rates, with optimal light, temperature, and nutrient conditions producing the fastest results.
After initial harvest, most herbs regenerate quickly in hydroponic systems. Fast-growing varieties like basil often produce enough new growth for additional harvests every 1-2 weeks when properly maintained. Slower-growing herbs like rosemary and thyme typically require 2-3 weeks between harvests, gradually increasing production as plants become established.
For planning purposes, expect your first significant harvest approximately one month after system setup, assuming you begin with small seedlings rather than seeds. This timeline allows for system stabilization and plant adaptation to hydroponic conditions before productive growth begins in earnest.
Can I use tap water in my hydroponic system?
Tap water works perfectly well for most hydroponic systems, though allowing it to sit uncovered for 24 hours before use helps dissipate chlorine. In areas with particularly hard water (high mineral content), mixing tap water with filtered water creates an ideal balance of essential minerals without excessive calcium or magnesium buildup. If your tap water exceeds 400 ppm in TDS (total dissolved solids) measurements, diluting with distilled or reverse osmosis water helps prevent nutrient imbalances while maintaining beneficial mineral content.
Do I need special lights for my indoor hydroponic herbs?
While herbs can grow in bright indirect sunlight, dedicated grow lights dramatically improve results for most indoor setups. LED grow lights have become the standard for home hydroponics, offering excellent energy efficiency and appropriate light spectrums for plant growth. For herb gardens, choose lights providing full spectrum illumination with enhanced blue wavelengths that promote leafy growth. Small LED grow lights suitable for 4-6 herb plants typically consume just 20-40 watts while providing ideal light intensity.
Position lights 12-18 inches above plants initially, adjusting height as plants grow to maintain similar intensity. Most herbs thrive with 14-16 hours of light daily, easily automated with inexpensive outlet timers. This consistent light schedule, combined with proper nutrition, creates ideal growing conditions regardless of natural light availability in your home.
What are the easiest herbs to grow hydroponically for absolute beginners?
Basil stands as the champion beginner herb for hydroponic growing, adapting readily to water culture while growing rapidly with minimal issues. Its pronounced response to proper conditions provides immediate feedback on system performance, allowing new gardeners to quickly recognize healthy growth patterns. Additionally, basil’s frequent harvesting requirements (to prevent flowering) create regular interaction with your garden, building confidence and experience. For more tips, you can explore easy steps for harvesting your hydroponic herbs.
Mint varieties offer similarly forgiving growth habits with exceptional vigor even when conditions aren’t perfect. Their natural resistance to most pests and diseases prevents common beginner frustrations, while their aggressive growth provides visible progress that reinforces your gardening efforts. Chives also excel in hydroponic systems, growing steadily with minimal care while providing months of continuous harvests from a single planting.