Hydroponic Dill Microgreens: Fresh Flavor Grown at Your Home
Introduction
Welcome to our comprehensive exploration of hydroponic soilless agriculture, where we delve into the world of growing plants without traditional soil. In this article, we will focus our attention on the captivating realm of hydroponic dill microgreens. We will cover the benefits, the process of setting up a hydroponic system, maintenance tips, and much more. Get ready to embark on an informative journey that will equip you with the knowledge to successfully grow hydroponic dill microgreens.
Answer to the Question
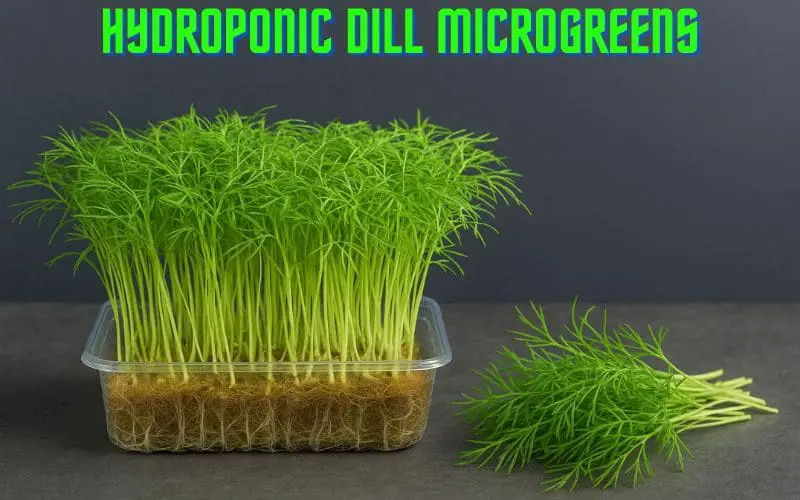
Before we delve into the specifics of hydroponic dill microgreens, let’s address the fundamental question: What are hydroponic dill microgreens? Hydroponic dill microgreens are the young seedlings of dill plants that are grown using a hydroponic system. They are known for their intense flavor and are packed with essential nutrients. As we progress through this article, you will gain a deeper understanding of the wonderful world of hydroponic dill microgreens.
Benefits of Hydroponic Dill Microgreens
Nutritional Value
Hydroponic dill microgreens are nutrition powerhouses, offering a concentrated source of vitamins, minerals, and antioxidants. With their vibrant green color, they provide an abundance of chlorophyll, which is essential for detoxification and promoting overall well-being. These microgreens are also a rich source of essential nutrients such as vitamin C, vitamin A, and vitamin K, making them a valuable addition to a healthy diet.
-
🌿 Rich in vitamin C – boosts immune function
-
🧠 High in antioxidants – helps combat oxidative stress
-
💪 Good source of vitamin A – supports vision and skin health
-
💓 Contains essential minerals – like calcium, iron, and manganese
-
🧬 Anti-inflammatory compounds – may support overall wellness
-
🥗 Low in calories – nutrient-dense without added bulk
Growth Process
The growth process of hydroponic dill microgreens is a captivating journey that involves several fascinating stages, each contributing to the eventual transformation of dill seeds into vibrant and nutrient-packed microgreens. Let’s delve into the detailed growth process of hydroponic dill microgreens:
- Seed Selection: The growth process begins with the careful selection of high-quality dill seeds. These seeds are chosen for their purity, germination rate, and ability to produce flavorful microgreens.
- Hydroponic Medium Preparation: The chosen dill seeds are then carefully placed in a specialized hydroponic medium, providing the ideal environment for germination and growth. This medium is meticulously prepared to ensure optimum nutrient delivery and support for the delicate roots of the emerging microgreens.
- Germination and Sprouting: Under controlled environmental conditions, the dill seeds begin to germinate and sprout, initiating the growth process. The emergence of tiny shoots marks the beginning of the transformation from seeds to delicate greens.
- Growth and Development: As the dill microgreens continue to grow, they undergo profound developmental changes, expanding their tender green leaves and developing their characteristic flavor profile. This stage involves monitored nutrient delivery and optimal light exposure to support healthy and vigorous growth.
- Harvesting: Finally, the fully developed dill microgreens are carefully harvested at the peak of their nutritional value and flavor intensity. This marks the culmination of the growth process and the beginning of their contribution to culinary creations and nutritional enrichment.
The growth process of hydroponic dill microgreens exemplifies the efficient, sustainable, and flavorful nature of cultivating microgreens using hydroponic techniques, offering a continuous supply of fresh and vibrant greens for culinary indulgence.
Setting Up a Hydroponic System for Dill Microgreens
Equipment Needed
🌱 Seeds & Growing Medium
-
Dill Microgreen Seeds (non-GMO, preferably organic)
-
Growing Medium (choose one):
-
Coconut coir mat
-
Hemp mat
-
Rockwool slab
-
Grow felt
-
Perlite + vermiculite mix (if using a shallow tray with drainage)
-
💧 Water & Nutrient System
-
pH-balanced Water (ideal pH: 6.0–6.5)
-
Hydroponic Nutrient Solution (specifically for leafy greens or microgreens)
-
pH Testing Kit or Digital pH Meter
-
pH Up/Down Solutions (to adjust water pH)
-
Measuring Syringe or Graduated Dropper (for nutrients)
🪴 Growing Containers
-
Shallow Growing Trays (10″x20″ standard microgreen trays work best)
-
With holes (for drainage, if using double tray method)
-
Without holes (for bottom watering or base tray)
-
-
Humidity Dome (or clear plastic lid for germination phase)
☀️ Lighting & Temperature
-
LED Grow Light (full-spectrum, ideally 12–16 hours/day)
-
Timer (to automate light schedule)
-
Thermometer (to monitor ambient temp, ideal: 65–75°F / 18–24°C)
-
(Optional): Heat Mat (if your room is below 65°F)
🧼 Sanitation & Tools
-
Spray Bottle (for misting during germination)
-
Sharp Scissors or Harvesting Knife
-
Hydrogen Peroxide or White Vinegar (for sterilizing trays)
-
Clean Towels or Paper Towels (for drying harvested greens)
-
Labels & Marker (to track planting dates or seed varieties)
Step-by-Step Guide
🪴 Step-by-Step Instructions: Grow Hydroponic Dill Microgreens
1: Prepare Your Growing Tray
-
Choose a shallow 10″x20″ microgreen tray.
-
If using a double-tray setup, place the tray with holes inside the tray without holes for easy bottom watering.
2: Add the Growing Medium
-
Cut your chosen growing mat (e.g., coconut coir or hemp) to fit the tray.
-
Place it flat and evenly in the tray.
-
Dampen it with clean pH-balanced water (pH 6.0–6.5) using a spray bottle or pour method.
-
Let it sit for a few minutes to fully absorb moisture.
3: Sow the Seeds
-
Evenly sprinkle dill microgreen seeds across the entire surface of the wet growing medium.
-
Gently press seeds down with a clean hand or flat tool to ensure contact with the medium—do not bury the seeds.
4: Germination Phase (Blackout)
-
Cover the tray with a humidity dome or use another tray on top to block light.
-
Place the setup in a dark, warm spot (65–75°F).
-
Mist lightly once or twice a day to keep the surface moist.
-
Keep covered for 3–5 days, until the seeds sprout and push against the lid.
5: Light Exposure & Growth Phase
-
Remove the cover and place the tray under a full-spectrum LED grow light for 12–16 hours per day.
-
Ensure the lights are about 4–6 inches above the canopy.
-
Maintain a room temperature between 65–75°F.
-
Start bottom watering every 1–2 days using a diluted hydroponic nutrient solution (¼ strength is usually enough for microgreens).
6: Monitor & Maintain
-
Check daily for:
-
Moisture levels (medium should stay damp, not soggy)
-
Mold (improve airflow if needed)
-
Stretched or pale growth (adjust light height or intensity)
-
-
Dill typically grows slower than other microgreens — allow 12–16 days before harvest.
7: Harvest
-
Once the dill microgreens are 3–5 inches tall and have developed true leaves, they’re ready to harvest.
-
Use sharp scissors or a clean knife to cut just above the growing medium.
-
Do not pull the roots—they are not edible.
8: Store or Use
-
Use fresh immediately or pat dry and store in an airtight container lined with a paper towel in the refrigerator.
-
Best used within 5–7 days for peak flavor and texture.
Tips for Maintenance and Care of Hydroponic Dill Microgreens
Watering and Nutrient Management
Watering and Nutrient Management
- Effective watering and nutrient management are crucial for the health and vitality of hydroponic dill microgreens.
- Ensure that the hydroponic system maintains an optimal moisture level to support the growth of the microgreens.
- Regularly monitor and maintain the nutrient solution to provide the essential elements required for robust and flavorful dill microgreens.
Common Issues and Solutions
Common issues such as mold growth, nutrient imbalances, and wilting may arise during the cultivation of hydroponic dill microgreens. To mitigate these challenges, it is essential to maintain proper hygiene, monitor nutrient levels diligently, and promptly address any signs of distress in the microgreens. Implementing proactive measures and swift solutions will ensure the continued success of your hydroponic dill microgreen cultivation.
- Mold Growth
- Nutrient Imbalances
- Wilting
Mold growth can be prevented by ensuring a clean and sanitized growing environment. Use a sterile growing medium and proper ventilation to reduce moisture accumulation, which can lead to mold development. Additionally, regularly inspect the microgreens for any signs of mold and promptly remove any affected plants to prevent its spread.
Proper monitoring of nutrient levels is crucial for preventing imbalances. Keep a close eye on the nutrient solution and adjust accordingly to maintain optimal levels for the microgreens. Consider using a quality pH and TDS meter to accurately measure and regulate the nutrient solution.
Wilting can be a result of various factors, including inadequate watering, high temperatures, or disease. Ensure consistent and appropriate watering practices, provide adequate ventilation to control temperatures, and maintain a disease-free growing environment to prevent wilting of the microgreens.
Conclusion
As we conclude our exploration of hydroponic dill microgreens, it’s evident that these tiny plants hold immense potential for adding flavor, nutrition, and visual appeal to culinary creations. By harnessing the innovative technique of hydroponic cultivation, enthusiasts can enjoy a continuous harvest of fresh and vibrant dill microgreens. Embrace the art of hydroponic gardening and savor the joy of cultivating these delightful and nutritious microgreens right at home.