How to Grow Hydroponic Chia Microgreens: A Step-by-Step Guide

Introduction
Microgreens and hydroponics go hand in hand. Ever wonder how to eat healthier and improve your quality of life? You have found the right place! Welcome to our comprehensive exploration of hydroponic soilless agriculture. In this article, we will delve into the fascinating world of hydroponic chia microgreens, providing you with expert knowledge on growing, harvesting, and reaping the benefits of this innovative agricultural practice. If you’ve ever wondered how to grow chia microgreens without soil and enjoy their incredible health benefits, you’re in the right place.
Answer to the Question
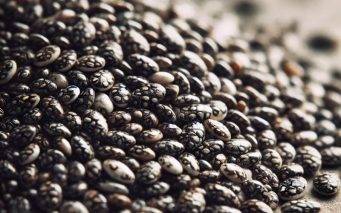
Chia plants (Salvia hispanica) are fast-growing, edible herbs that belong to the mint family. Originally grown by the Aztecs, chia is best known for its tiny, nutrient-packed seeds, which are rich in omega-3 fatty acids, fiber, and protein. When sprouted as microgreens, chia plants provide even more vitamins and antioxidants, making them a popular choice for health-conscious growers. People love chia because it’s easy to grow, requires minimal care, and adds a mild, slightly nutty flavor to salads, smoothies, and sandwiches. Whether grown for their seeds or microgreens, chia plants are a simple and nutritious addition to any diet.
Benefits of Hydroponic Chia Microgreens
The benefits of hydroponic chia microgreens are multifaceted. These nutrient-dense microgreens offer a concentrated source of essential vitamins, minerals, and antioxidants, making them a valuable addition to a health-conscious diet. They are rich in omega-3 vitamins and high in fiber, which aids digestions. Additionally, their rapid growth, minimal space requirements, and consistent supply make them an excellent choice for culinary enthusiasts, health-conscious individuals, and sustainable agriculture proponents. Chia Sprouts grow without light and can be consumed in 3 to 5 days. Chia microgreens, on the other hand, require light and have more chlorophyll and are packed with more nutrients.
How to Grow Hydroponic Chia Microgreens
How to Grow Hydroponic Chia Microgreens
Chia (Salvia hispanica) microgreens are nutrient-dense, fast-growing, and perfect for hydroponic cultivation. They don’t require soil and grow quickly with minimal maintenance.
Materials Needed
1. Growing Medium & Trays
- Non-porous growing surface (hemp mats, coconut coir mats, or a flat plastic tray)
- Shallow microgreens growing trays (10″x20″ standard tray or smaller)
- Humidity dome (optional but recommended for germination)
2. Chia Seeds
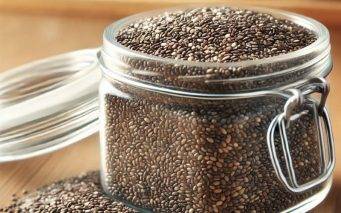
- Organic, untreated chia seeds (pre-check to ensure they aren’t coated)
3. Water & Nutrients
- Filtered or distilled water
- Hydroponic nutrient solution (optional, chia grows well without added nutrients)
4. Light Source
- Full-spectrum LED grow lights (if growing indoors)
- Access to natural light (if available and strong enough)
5. Additional Tools
- Spray bottle (for misting)
- pH testing kit (to ensure water pH is between 5.5-6.5)
- Scissors or sharp knife (for harvesting)
Step-by-Step Instructions
Prepare the Growing Tray
- Choose a shallow tray (with or without drainage holes).
- Place a hydroponic growing mat inside the tray, ensuring it lies flat.
- Moisten the mat evenly with filtered water, but don’t flood it.
Seed Soaking (Optional)
- Chia seeds gel when wet, so they don’t need soaking before planting.
- However, you can pre-hydrate them by mixing 1 part chia seeds with 5 parts water, stirring well, and letting them sit for 30 minutes to form a gel before spreading.
Spread the Seeds Evenly
- Evenly sprinkle chia seeds across the surface of the growing mat or tray.
- Avoid overcrowding to prevent mold and poor airflow.
- Mist lightly with a spray bottle to ensure they are slightly damp.
Germination Phase (2-3 Days)
- Cover the tray with a humidity dome or another tray to create darkness.
- Place in a warm area (65-75°F or 18-24°C).
- Mist daily to keep seeds hydrated but not waterlogged.
- After 2-3 days, check for sprouting. When most seeds have germinated, remove the cover.
Light Exposure (Day 4+)
- Move the tray to bright light (a sunny window or LED grow light).
- If using grow lights, keep them 6-12 inches above the greens and provide 12-16 hours of light daily.
- Continue misting daily, ensuring the mat remains damp but not soaking.
Growth & Maintenance (Days 5-8)
- Check moisture levels daily – chia microgreens don’t like excess water.
- If growing on a hemp or coconut coir mat, keep it evenly moist but not saturated.
- Chia microgreens typically do not require extra nutrients, but if you want to boost growth, a very mild hydroponic nutrient solution can be used.
Harvesting (Days 7-10)
- Once microgreens reach 2-3 inches in height, they are ready for harvest.
- Use clean scissors or a sharp knife to cut just above the growing mat.
- Rinse lightly and let them dry before storage.
Storage & Usage
- Store harvested chia microgreens in an airtight container in the refrigerator.
- They stay fresh for up to a week.
- Use them in smoothies, salads, sandwiches, or as a garnish for extra nutrients.
Harvesting and Storage of Hydroponic Chia Microgreens
Tips for Harvesting and Storing Hydroponic Chia Microgreens
🌿 Harvesting Tips
Timing is Key
- Harvest when chia microgreens are 7-10 days old or 2-3 inches tall for the best flavor and nutrition.
- Avoid waiting too long, as they can become fibrous and less tender.
Use Sharp Tools
- Use sharp scissors or a clean knife to make clean cuts and avoid crushing the stems.
- Cut just above the growing mat to prevent contamination.
Harvest When Dry
- Do not water for 8-12 hours before harvesting.
- Harvesting dry microgreens prevents excess moisture, which can lead to rot and mold in storage.
Harvest in Batches
- If you don’t need all at once, harvest only what you’ll use to keep the rest fresh.
- Microgreens stay fresh longer when left uncut in the tray.
Common Problems and Troubleshooting
Common Problems & Solutions
| Issue | Cause | Solution |
|---|---|---|
| Mold growth | Poor air circulation, excess moisture | Space seeds out, use a fan for airflow, reduce watering |
| Seeds not germinating | Old seeds, too much or too little water | Use fresh seeds, keep moisture balanced |
| Yellow microgreens | Lack of light | Provide grow lights or a sunny window |
| Weak growth | Overcrowding, too much humidity | Reduce seed density, provide ventilation |
🥶 Storage Tips
1. Dry Before Storing
After cutting, spread the microgreens on a paper towel to remove excess moisture.
Let them air dry for 10-15 minutes but don’t expose them to direct sunlight.
2.Use an Airtight Container
Store in a sealed glass container, plastic clamshell, or ziplock bag with a dry paper towel inside to absorb moisture.
If using plastic bags, leave them slightly open to prevent condensation.
3.Refrigerate Properly
Keep them in the crisper drawer or a cool section of the fridge.
Store at 35-40°F (1-4°C) for optimal freshness.
4.Avoid Washing Until Use
Washing before storage introduces moisture, which can cause spoilage.
Rinse only before eating and pat dry with a paper towel.
5.Check for Spoilage
If you see wilting, sliminess, or an off-smell, discard the affected microgreens.
Replace paper towels if they become damp.
Shelf Life Expectation
- Properly stored chia microgreens can last 5-7 days in the fridge.
- Consume within 3-4 days for the freshest taste.
💡 Pro Tip: Extend Storage Life
- Vacuum seal for longer shelf life (up to 10 days).
- Flash freeze in an airtight container for smoothies or soups (texture changes but nutrients remain).
- Would you like suggestions for meal ideas using fresh chia microgreens? 🍽️
Conclusion
In conclusion, hydroponic chia microgreens offer a wealth of nutritional benefits, culinary versatility, and sustainable agricultural practices. By embracing the art of hydroponic cultivation, individuals can experience the joy of growing and enjoying these vibrant and health-enhancing microgreens. The journey of cultivating hydroponic chia microgreens is an enriching one, filled with opportunity, innovation, and the satisfaction of growing your own nutrient-packed superfood.