Hydroponic Cherry Tomatoes: Complete Growing Guide from Seed to Harvest

Article-At-A-Glance
- Cherry tomatoes are ideal for hydroponics, offering year-round harvests with up to 30% faster growth and higher yields than soil growing
- For beginners, Deep Water Culture (DWC) systems provide the simplest entry point to hydroponic cherry tomato growing
- Compact varieties like ‘Tiny Tim,’ ‘Sun Gold,’ and ‘Sweet 100’ thrive in limited-space hydroponic setups
- Maintaining the proper nutrient balance (EC 1.8-3.0) and pH (5.8-6.3) is critical for cherry tomato success
- With HydroGrow’s innovative nutrient solutions, even first-time growers can achieve professional-level harvests at home
Imagine plucking sweet, juicy cherry tomatoes from your indoor garden in the middle of winter. With hydroponics, this isn’t just possible—it’s surprisingly simple. Whether you’re a beginner looking to start your first food-growing project or an experienced gardener wanting to extend your growing season, hydroponic cherry tomatoes offer the perfect combination of quick results and continuous harvests. HydroGrow’s specialized nutrient formulations make this process even more accessible, providing the perfect balance for tomato plants at every growth stage.
Growing hydroponic cherry tomatoes means you’ll enjoy fresh harvests regardless of outdoor conditions, with plants that produce up to three times longer than garden-grown varieties. Let’s dive into everything you need to know about cultivating these delicious fruits without a speck of soil.
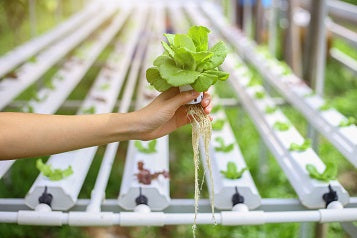
Why Cherry Tomatoes Thrive in Hydroponic Systems

“First Time Growing Hydroponic Tomatoes …” from www.youtube.com and used with no modifications.
Cherry tomatoes are the superstar performers of hydroponic gardens for good reason. Their compact growth habit and shorter time to maturity make them ideal candidates for indoor growing systems where space might be limited. Unlike their larger cousins, cherry tomatoes typically don’t require the extensive support structures that beefsteak varieties need, making them more manageable for beginners.
Year-Round Harvests Without Seasonal Limitations
When you grow cherry tomatoes hydroponically, you break free from the constraints of traditional growing seasons. No longer will you need to wait until summer for fresh tomatoes—your indoor garden can produce continuously regardless of outdoor temperatures, daylight hours, or weather conditions. For those interested in optimizing their indoor garden setup, understanding the ideal grow tent temperature and humidity can be crucial. This means fresh cherry tomatoes for your salads in January and tomato-basil snacks during autumn months when garden plants have long since stopped producing.
With careful management of your growing environment, a single hydroponic cherry tomato plant can produce for 8-10 months, compared to the typical 3-4 month growing season outdoors. This extended production period means more harvest from each plant and greater return on your initial setup investment.
Faster Growth and Higher Yields Than Soil Growing
Hydroponically grown cherry tomatoes typically reach maturity 20-30% faster than their soil-grown counterparts. This acceleration happens because plants don’t need to expend energy developing extensive root systems to search for nutrients and water—everything they need is delivered directly to their roots. The first ripe cherry tomatoes can appear as soon as 45-60 days after transplanting, compared to 60-80 days in soil. To ensure optimal growth, it’s important to maintain proper pH and EC levels in your hydroponic system.
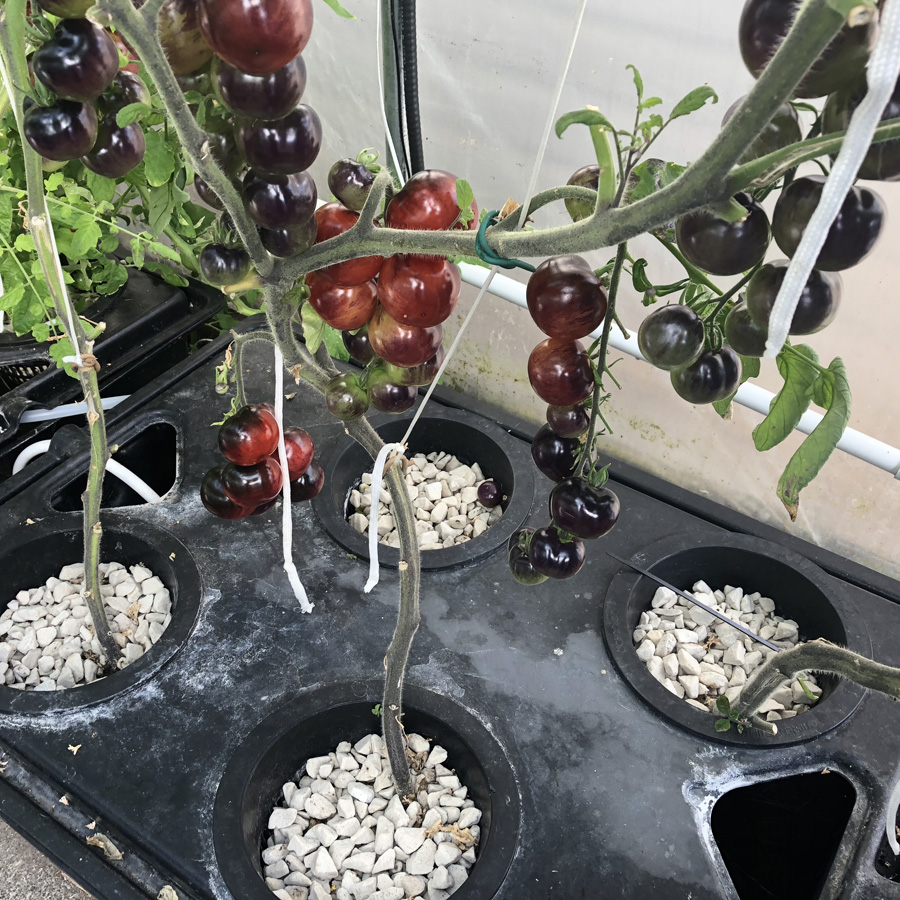
Yields are equally impressive, with a well-managed hydroponic cherry tomato plant producing up to 30 pounds of fruit over its lifetime. This productivity comes from the plant’s ability to direct more energy toward fruit production rather than root development, combined with the perfect balance of nutrients and absence of soil-based stressors.
Protection From Common Soil-Borne Diseases and Pests
One of the most significant advantages of hydroponic growing is the dramatic reduction in pest and disease issues. Without soil, you eliminate the habitat for many common tomato problems like fusarium wilt, verticillium wilt, and nematodes that plague garden tomatoes. This soil-free environment means you can often grow without pesticides, resulting in cleaner, healthier produce.
Indoor hydroponic systems also create a barrier against outdoor pests like hornworms, aphids, and whiteflies that typically devastate tomato crops. While not completely immune to all issues, hydroponic cherry tomatoes generally require far less intervention to maintain plant health, making them ideal for organic growing approaches.
Setting Up Your Hydroponic System for Success
“What Are Hydroponic Systems and How Do …” from www.freshwatersystems.com and used with no modifications.
The beauty of growing hydroponic cherry tomatoes lies in the flexibility of system options. Your choice will depend on your space, budget, and how hands-on you want to be with the growing process. Regardless of which system you choose, cherry tomatoes will adapt well as long as basic requirements are met.
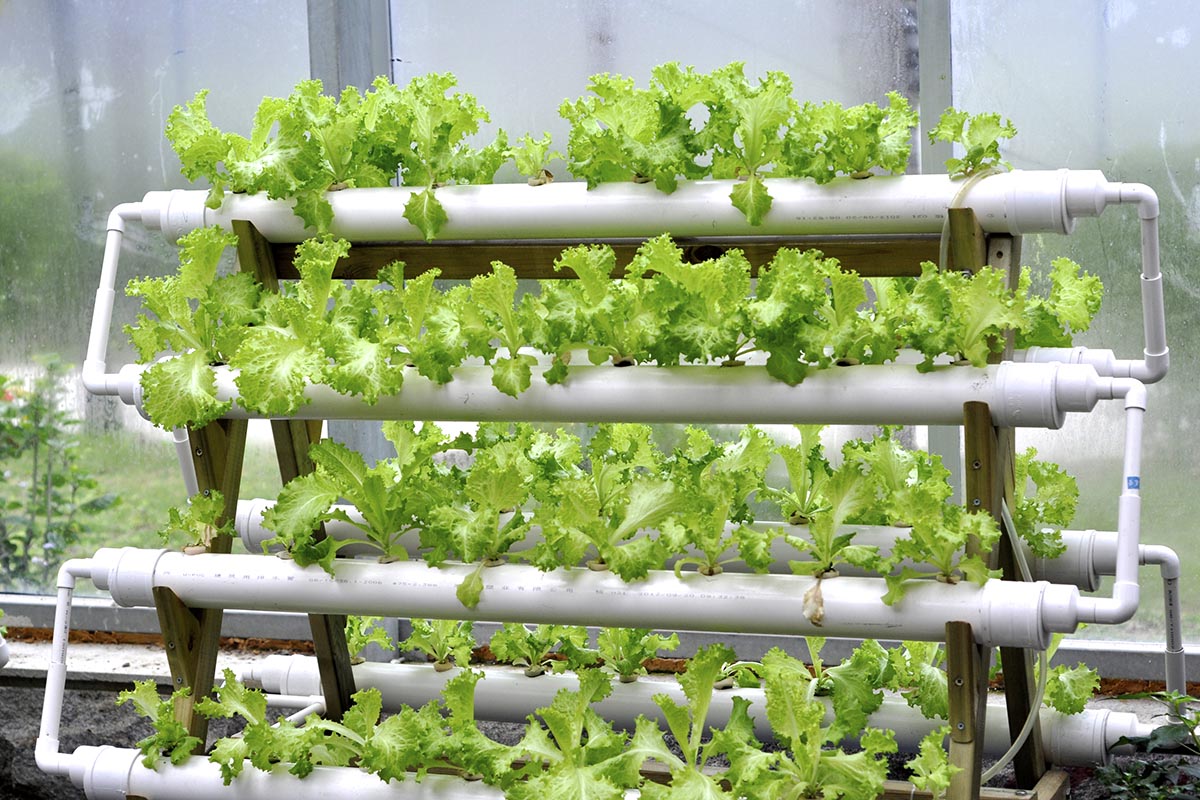
Best Systems for Cherry Tomatoes: NFT, DWC, and Drip
For beginners, Deep Water Culture (DWC) systems provide the simplest entry point to hydroponic growing. In a DWC setup, your cherry tomato plants sit in net pots suspended above a nutrient solution, with their roots hanging directly into the water. An air pump provides oxygen to prevent root rot, while the constant access to water and nutrients creates ideal growing conditions. DWC systems are inexpensive to build, easy to maintain, and forgiving of minor fluctuations in nutrient levels.
More experienced growers often prefer drip systems, where nutrient solution is pumped from a reservoir to the base of each plant. This method offers precise control over feeding schedules and works particularly well for cherry tomatoes, which appreciate consistent but measured hydration. Nutrient Film Technique (NFT) systems, which flow a thin film of nutrient solution over plant roots, can also work for cherry tomatoes but require more careful management of plant size and root mass.
Essential Equipment Checklist
Creating a successful hydroponic system for cherry tomatoes requires some specialized equipment, though many components can be found at local hardware stores or online retailers specializing in hydroponics. Here’s what you’ll need to get started:
- Growing containers or system (DWC bucket, NFT channels, or drip system)
- Grow lights (LED or high-output fluorescent for smaller setups; HPS or CMH for larger operations)
- Growing medium (rockwool, expanded clay pellets, or coconut coir)
- Nutrient solution formulated for fruiting plants
- pH testing kit and adjustment solutions
- EC/TDS meter to monitor nutrient strength
- Air pump and air stones (for DWC systems)
- Water pump (for drip or NFT systems)
- Timer for lights and possibly water pumps
- Support structures (stakes, trellis, or cages)
- Pruning shears for plant maintenance
This equipment list might seem extensive, but many starter kits include most of these items, making the initial setup process more straightforward. HydroGrow offers complete starter packages specifically designed for cherry tomatoes that include optimized nutrient formulations and detailed setup instructions.
Space Requirements and Location Planning
Cherry tomatoes require less space than their larger counterparts, but they still need room to grow upward. Plan for plants that can reach 3-4 feet in height, depending on the variety, with each plant occupying about one square foot of horizontal space. Most hydroponic setups place plants 10-14 inches apart, which allows for good air circulation while maximizing production per square foot.
Location matters significantly for hydroponic systems. Choose an area with stable temperatures between 65-80°F during the day and no lower than 55°F at night. Avoid places with large temperature swings like garages or sunrooms without climate control. Also consider proximity to water sources, electrical outlets, and ease of maintenance—you’ll need regular access to check on your plants and system operation.
Budget Options for Beginners vs. Advanced Setups
One of the beauties of hydroponic cherry tomatoes is the scalability of investment. Beginners can start with a simple DIY bucket system for under $100, including basic nutrients and a small grow light. This entry-level approach lets you test the waters before committing to larger investments. A single 5-gallon bucket DWC system can support one cherry tomato plant and produce several pounds of fruit over its lifetime. For those interested in understanding more about nutrient requirements, check out this guide on hydroponic nutrients.
For those ready to invest more, pre-built systems ranging from $200-500 offer greater automation, larger growing capacity, and more sophisticated nutrient delivery. These systems often include timers, better pumps, and more efficient lighting. Advanced growers might spend $1,000+ on commercial-grade systems that can support 8-12 cherry tomato plants simultaneously with precise environmental controls and automated nutrient dosing.
Choosing the Perfect Cherry Tomato Varieties for Hydroponics

“grow hydroponic cherry tomatoes Indoors …” from letpot.com and used with no modifications.
Not all cherry tomatoes perform equally in hydroponic systems. The best varieties combine compact growth habits with continuous fruiting and disease resistance. Your selection should also consider your taste preferences and the specifics of your growing system.
Top 5 Compact Varieties for Small Systems
For those with limited space, these compact varieties deliver excellent yields without overwhelming your system: ‘Tiny Tim’ grows just 12-18 inches tall, making it perfect for windowsill systems or small DWC buckets. ‘Red Robin’ is another dwarf variety that produces sweet 1-inch fruits on plants reaching only 18 inches. ‘Micro Tom’ is the smallest of all, growing just 8 inches tall while producing tasty cherry-sized fruits. ‘Tumbling Tom’ has a cascading growth habit ideal for vertical systems. ‘Patio Princess’ offers larger cherry tomatoes on compact plants that rarely exceed 2 feet in height.
These varieties have been specifically bred for container growing, which translates well to hydroponic systems where root space and vertical growth need management. Their genetic compact nature means less pruning and training while still delivering impressive harvests.
High-Yield Varieties Worth Your Investment
If maximum production is your goal, these prolific varieties consistently outperform in hydroponic systems: ‘Sun Gold’ produces incredibly sweet, golden-orange fruits that many consider the best-tasting cherry tomato available. A single plant can yield hundreds of fruits over its productive life. ‘Sweet 100’ lives up to its name by producing clusters of 100+ fruits per truss, with exceptional sweetness and classic tomato flavor. ‘Juliet’ offers slightly larger grape-shaped fruits that resist cracking and have excellent shelf life. ‘Black Cherry’ provides unusual dark coloration and complex, rich flavor on highly productive vines. ‘Supersweet 100’ improves on the original Sweet 100 with even higher sugar content and disease resistance.
These varieties may require more robust support systems and vigilant pruning, but they reward that extra effort with phenomenal production rates. In a well-managed hydroponic system, a single ‘Sweet 100’ plant can produce over 2,500 cherry tomatoes during its extended growing season.
Disease-Resistant Options That Simplify Growing
While hydroponics reduces disease pressure, selecting varieties with built-in resistance provides extra insurance against common problems. Look for variety descriptions containing letters like “V” (Verticillium wilt resistance), “F” (Fusarium wilt resistance), “T” (Tobacco mosaic virus resistance), and “N” (Nematode resistance). ‘Mountain Magic’ offers exceptional resistance to late blight and cracking, a common issue in high-humidity hydroponic environments. ‘Sunpeach’ combines excellent flavor with resistance to leaf mold, a particular concern in indoor growing. ‘Jasper’ stands out with its impressive resistance to early blight, late blight, and septoria leaf spot, while ‘Valentine’ offers crack resistance and improved shelf life.
These disease-resistant varieties allow you to minimize or eliminate chemical interventions, maintaining a clean and organic growing environment. This becomes especially important for long-term hydroponic production where plants may remain in the system for many months.
Starting Seeds: The Foundation of Healthy Plants
“Preparing Seedlings for Planting …” from www.microdrips.com and used with no modifications.
While you can purchase seedlings to transplant into your hydroponic system, starting from seed gives you access to more varieties and ensures your plants develop without the transplant shock that store-bought seedlings often experience. The foundation of successful cherry tomato growing begins with proper seed selection and germination techniques.
Germination Methods That Guarantee Success
Cherry tomato seeds typically germinate at rates exceeding 80% when conditions are optimal. Begin by soaking seeds in room temperature water for 6-12 hours to soften the seed coat and jumpstart the germination process. For the highest success rate, maintain a constant temperature between 75-85°F during germination – a seedling heat mat offers precise control over this critical factor. Cover seed trays with clear plastic domes or plastic wrap to maintain humidity levels near 100% until germination occurs, typically within 5-7 days. For more detailed information on cultivating these plants, you can explore hydroponic tomato growing techniques.
The paper towel method provides a simple alternative that lets you visually monitor germination progress. Place seeds between damp paper towels inside a sealed plastic bag, check daily, and transfer sprouted seeds to your growing medium as soon as the radical (primary root) appears. This technique allows you to select only the strongest, fastest-germinating seeds for your system.
Perfect Growing Medium for Seedlings
Rockwool cubes represent the industry standard for hydroponic seedling propagation due to their excellent water retention while still allowing oxygen to reach developing roots. These pre-formed cubes make transplanting simple—the entire cube with seedling moves directly into your hydroponic system without disturbing delicate roots. Before using rockwool, soak the cubes in pH-adjusted water (5.8-6.2) for at least an hour to neutralize their naturally alkaline properties.
Coconut coir offers an environmentally friendly alternative to rockwool, with excellent water retention and natural resistance to fungal growth. Expanded clay pellets (LECA) work well for larger seedlings but may not provide enough moisture retention for initial germination. For a hybrid approach that combines benefits, start seeds in small rockwool cubes, then transfer to net pots with expanded clay pellets once true leaves appear.

Light and Temperature Requirements During Early Growth
After germination, cherry tomato seedlings require 14-16 hours of light daily. Position grow lights 2-4 inches above seedlings, raising them as plants grow to maintain this distance. Standard fluorescent shop lights work well for seedlings, but upgrading to LED grow lights provides better spectrum coverage and energy efficiency. Light intensity should provide 200-300 μmol/m²/s PPFD (photosynthetic photon flux density) during this stage.
Temperature plays a critical role in seedling development, with daytime temperatures between 70-75°F and nighttime temperatures no lower than 65°F promoting strong, compact growth. Fluctuations outside this range can lead to leggy, weak seedlings or stunted growth. A small oscillating fan creates gentle air movement that strengthens stems while preventing dampening off disease, a common problem in seedling production.
When to Transfer Seedlings to Your Hydroponic System
The ideal transplant time comes when seedlings develop their second or third set of true leaves, typically 3-4 weeks after germination. At this stage, the root system is sufficiently developed to handle nutrient solution, but plants remain small enough to adapt quickly to hydroponic conditions. Before transplanting, gradually introduce seedlings to nutrient solution by watering with quarter-strength hydroponic nutrients for a few days.
During transplanting, handle seedlings by their growing medium, never by the stem, to avoid damage. Position the top of the growing medium slightly above the water line in DWC systems, or at the correct height in NFT channels or drip systems. After transplanting, maintain higher humidity (70-80%) for the first week to reduce transplant stress, and use half-strength nutrient solution until you see signs of new growth. For more information on maintaining optimal conditions, check out our guide on grow tent temp and humidity control.
Nutrient Solutions: The Lifeblood of Hydroponic Tomatoes
“Growing Hydroponic Tomatoes – GROZINE” from www.grozine.com and used with no modifications.
Unlike soil-grown plants that can extract nutrients from their growing medium, hydroponic cherry tomatoes rely entirely on the nutrient solution you provide. Getting this aspect right makes the difference between struggling plants with minimal yields and vigorous plants producing abundant harvests. Understanding the changing nutritional needs throughout the growth cycle is essential for success.
Ideal EC and pH Levels for Each Growth Stage
Cherry tomatoes require different nutrient concentrations as they progress from seedlings to mature fruiting plants. During the vegetative stage, maintain an Electrical Conductivity (EC) between 1.8-2.0, increasing to 2.2-2.4 during the early fruiting stage, and finally to 2.5-3.0 during peak production. These increasing EC levels reflect the plant’s greater nutritional demands during fruit production. Simultaneously, pH levels must remain between 5.8-6.3 to ensure optimal nutrient availability—below 5.5 or above 6.5, certain nutrients become unavailable to plants regardless of their presence in the solution. For more detailed information on growing techniques, you can refer to this guide on hydroponic tomatoes.
Monitor these values daily using calibrated meters, as cherry tomatoes can rapidly change solution parameters as they take up water and nutrients. Dramatic swings in EC or pH can stress plants and lead to blossom end rot, stunted growth, or nutrient deficiencies. Small, gradual adjustments are always preferable to large corrections that shock plant systems.
Mixing Your Own vs. Pre-Made Solutions
Pre-made nutrients offer convenience and reliability for beginners, with formulations specifically designed for fruiting plants like tomatoes. These typically come as two or three-part solutions that, when combined according to instructions, provide the complete spectrum of macro and micronutrients cherry tomatoes need. HydroGrow’s Cherry Boost formula delivers exceptional results with its precise ratio of calcium, magnesium and potassium—critical elements for preventing blossom end rot and enhancing fruit flavor.
Advanced growers often prefer mixing their own nutrients from individual salts, which allows precise customization for specific varieties and growing conditions. This approach requires careful measurement of components like calcium nitrate, potassium nitrate, magnesium sulfate, and various micronutrients. While more technical, this method can reduce costs by up to 70% for larger operations and enables fine-tuning nutrients as plants progress through growth stages.
Adjusting Nutrients When Plants Show Deficiency Signs
Even with careful monitoring, cherry tomato plants sometimes display nutrient deficiencies that require prompt correction. Yellow leaves with green veins typically indicate iron deficiency, requiring iron chelate supplementation. Purple leaf undersides suggest phosphorus deficiency, common during cooler temperatures even when phosphorus is present in the solution. Curled, yellow-edged leaves often point to magnesium deficiency, easily corrected with Epsom salt (magnesium sulfate) added at 1 teaspoon per gallon.
The most problematic deficiency for cherry tomatoes is calcium, which manifests as blossom end rot—dark, sunken areas at the bottom of fruits. Prevention is far easier than cure, so maintain calcium levels between 150-200ppm and avoid letting the reservoir run too low, as calcium is often one of the first nutrients depleted. When deficiency appears, a foliar spray of calcium nitrate can help new fruits while you adjust the main nutrient solution.
Lighting Requirements That Maximize Fruit Production
“Hydroponics Grow Light – Red blue …” from www.wehydroponics.com and used with no modifications.
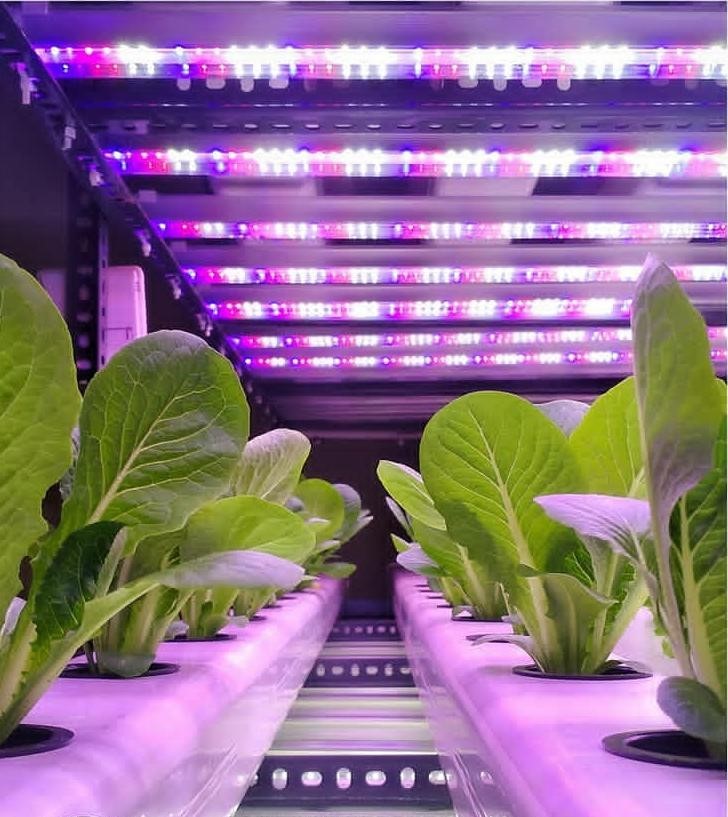
Cherry tomatoes require substantial light to produce their sweet, abundant fruits. As high-light plants, they need more intense illumination than leafy greens or herbs in hydroponic systems. Understanding how to provide optimal lighting will dramatically impact your harvest quantity and quality.
Natural vs. Artificial Light Options
While a sunny south-facing window might seem sufficient, most indoor environments simply don’t provide enough natural light for fruiting plants like cherry tomatoes. Window light rarely exceeds 1,500-2,000 lux, while tomatoes require 20,000-40,000 lux (400-600 PPFD) for optimal fruiting. Supplemental lighting isn’t just helpful—it’s essential for meaningful production outside of greenhouse environments.
For small setups with 1-3 plants, quality LED grow lights in the 100-200W range provide sufficient light intensity while minimizing electricity costs. HPS (High Pressure Sodium) lights deliver excellent results for larger setups but generate significant heat that may require additional ventilation. The latest generation of full-spectrum LED fixtures offers the best balance of energy efficiency, heat management, and spectral quality, though at a higher initial investment.
Setting the Perfect Light Schedule
Cherry tomatoes produce best with 14-16 hours of light daily, followed by 8-10 hours of darkness. This extended photoperiod provides ample energy for fruit development while still allowing the darkness period plants need for respiration and growth hormone regulation. Using an inexpensive outlet timer ensures consistent scheduling without manual intervention.
During vegetative growth (the first 3-4 weeks after transplanting), you can extend light periods to 18 hours to promote faster development. Once flowering begins, reduce to 16 hours or less to encourage stronger fruiting response. Maintaining consistent timing is crucial—irregular light schedules can confuse plants and reduce flowering. For optimal results, consider using a grow tent temp and humidity controller to maintain the right environment.
Signs Your Plants Need More Light
Cherry tomato plants clearly communicate when they’re light-starved. Telltale signs include elongated, thin stems stretching toward light sources, with unusually large spaces between leaf nodes. This “legginess” represents the plant’s attempt to reach better light conditions. Leaves may appear smaller than normal and lighter green due to reduced chlorophyll production. For more detailed guidance on growing conditions, check out this guide to growing hydroponic tomatoes indoors.
Flowering and fruiting provide the most definitive indicators of light adequacy. Insufficient light results in flower drop, poor pollination, and small fruit clusters. If your plants grow vegetatively but produce few flowers or fruits, increasing light intensity by lowering lights or upgrading to more powerful fixtures typically resolves the issue within 7-10 days. For optimal growth, it’s also important to maintain the right grow tent temperature and humidity levels.

Training and Pruning for Maximum Yields
Left to their own devices, cherry tomato plants become bushy tangles of stems competing for light and nutrients. Strategic training and pruning channels plant energy into fruit production rather than excessive vegetation, resulting in higher yields of better-quality tomatoes.
Single-Stem vs. Multi-Stem Training Methods
The single-stem (or indeterminate) method involves training one main stem upward, removing all side shoots (suckers) that emerge from leaf axils. This approach maximizes light penetration, air circulation, and nutrient distribution to developing fruits. Plants trained this way can grow very tall—often 6-8 feet in hydroponic systems—but remain manageable with proper support systems. A single-stem plant typically produces fruit earlier and with more consistent sizing.
Multi-stem systems allow 2-4 main stems to develop by permitting selected suckers to grow rather than removing them all. This approach produces more fruits overall but may delay the initial harvest while the plant develops its broader structure. In space-limited systems, the single-stem approach generally provides better results, while larger systems can accommodate the greater spread of multi-stem plants.
Removing Suckers for Focused Energy
Suckers—the shoots that emerge from the leaf crotches—represent energy diversion from your main fruiting stems. For single-stem systems, remove all suckers weekly before they exceed one inch in length. This is best done by pinching them off with your fingertips in the morning when plants are most hydrated, making clean breaks easier. For more tips on growing tomatoes, you can visit Gardening Know How.
For multi-stem systems, select 2-4 strong suckers that emerge from the lower portion of the plant, typically below the first flower cluster. Allow these to develop while removing all others. As these selected stems grow, treat each as a main stem by removing its subsequent suckers. This focused approach prevents the plant from becoming an unmanageable bush while still increasing overall yield potential.
Support Systems That Prevent Breakage
Even compact cherry tomato varieties need substantial support in hydroponic systems. As fruits develop, a single truss can weigh several ounces, creating stress points that may snap stems. String trellising works exceptionally well in hydroponic setups, with garden twine suspended from overhead supports and gently wrapped around the main stem as it grows. Attach the string to the base of the plant using loose loops that won’t constrict stem expansion. For more information on supporting plant growth, you can explore how big hydroponic plants get.
For multi-stem systems, tomato cages adapted to fit your hydroponic containers provide ideal support. The horizontal rings prevent stems from splaying outward under the weight of fruit clusters. Whatever system you choose, inspect and adjust supports weekly as plants grow rapidly in optimal hydroponic conditions.
Leaf Management for Better Airflow
Proper leaf management prevents the humid microclimate that encourages fungal disease development. Remove leaves that touch the water or growing medium, as they become vectors for pathogen entry. As the plant matures, gradually remove lower leaves below the lowest producing fruit truss to improve air circulation. Never remove more than 30% of leaves at once, as this can shock the plant and reduce photosynthesis capacity.
When removing leaves, use clean scissors or pruning shears rather than tearing, which can create ragged wounds that heal slowly. Make cuts close to the main stem without damaging it. Perform leaf management in the morning so wounds can dry during the day, reducing infection risk.
Pollination Techniques in the Absence of Bees
Indoor hydroponic systems lack the natural pollinators that outdoor gardens enjoy. Without intervention, your cherry tomato flowers may bloom beautifully but fail to develop into fruits. Understanding pollination requirements and techniques ensures those flowers transform into the sweet harvests you’re working toward.
Hand Pollination Methods That Work
The simplest and most reliable pollination method involves gently shaking flowering stems for a few seconds daily during peak bloom. This mimics the vibration caused by bees’ wings and helps pollen move from anthers to stigma within each flower. For more targeted pollination, use a small artist’s paintbrush to collect pollen from flower to flower, touching the center of each open bloom. For more tips on growing tomatoes, check out this guide to hydroponic tomatoes.
Electric toothbrushes or small handheld vibration tools provide even more efficient pollination. Hold the vibrating device against the main stem behind flower clusters (not directly on flowers) for 1-2 seconds per cluster. This technique most closely mimics buzz pollination performed by bees and typically results in excellent fruit set with minimal time investment. For those interested in optimizing their growing environment, understanding grow tent temperature and humidity control can be beneficial.
Using Fans to Mimic Natural Air Movement
Strategic air circulation not only prevents disease but assists with pollination. Position a small oscillating fan to create gentle air movement throughout your growing area, strong enough to cause slight stem movement but not so powerful that it stresses plants. This constant air flow helps distribute pollen within and between flowers while strengthening stems and reducing humidity around leaf surfaces. For more tips on maintaining optimal conditions, explore our guide on grow tent temperature and humidity control.
For optimal results, combine fan pollination with occasional hand pollination during peak flowering periods, typically every 2-3 days. The fan provides background passive pollination while direct methods ensure complete coverage of all flower clusters.
Electric Pollinators: Are They Worth It?
Purpose-built electric pollinators designed specifically for tomatoes can be worth the $20-40 investment if you maintain more than a few plants. These devices deliver the precise frequency that most effectively releases tomato pollen and include collection cups that prevent pollen loss. Commercial growers report up to 30% improvement in fruit set using these specialized tools compared to manual shaking.
For hobbyists with just a few plants, the improvement over manual methods may not justify the expense. However, those with physical limitations that make daily plant shaking difficult often find electric pollinators allow them to maintain productive gardens with minimal strain.
Disease Prevention and Management
“Hydroponic Systems – Home Grown Farm” from www.homegrowncoop.org and used with no modifications.
While hydroponic systems eliminate many soil-borne diseases, cherry tomatoes remain susceptible to various pathogens, particularly fungal and bacterial issues. Prevention through environmental management remains your best strategy, as treating established diseases often proves challenging in food production systems. For effective management, consider maintaining proper temperature and humidity levels to minimize the risk of disease.
Common Hydroponic Cherry Tomato Diseases
Powdery mildew appears as white powdery patches on leaves and stems, thriving in environments with poor air circulation and fluctuating humidity. Gray mold (Botrytis) develops in similar conditions, appearing first as gray fuzzy growth on dying flowers before spreading to stems and fruits. Leaf mold presents as yellow patches on leaf tops with olive-green spores on undersides, especially prevalent in consistently humid environments.
Bacterial diseases like bacterial spot create small dark lesions with yellow halos on leaves and rough, scabby patches on fruits. Early identification allows for isolated removal of affected plant parts before diseases spread throughout your system.
Maintaining Proper Humidity to Prevent Fungal Issues
Humidity management forms the cornerstone of disease prevention in hydroponic cherry tomatoes. Maintain relative humidity between 50-70% during vegetative growth, reducing to 40-60% during fruiting. These lower levels discourage fungal spore germination while still supporting plant transpiration. Dehumidifiers become essential equipment in enclosed growing areas, particularly during rainy seasons or in naturally humid climates.
Equally important is preventing humidity fluctuation. Rapid changes between high and low humidity stress plant tissues and create condensation that promotes pathogen development. Use hygrometers to monitor levels, positioning them at plant height rather than ceiling level for accurate readings relevant to plant conditions.
Organic Treatment Options That Won’t Harm Your Harvest
When prevention fails, several organic treatment options remain safe for use on producing plants. Neem oil applications (1% solution applied weekly) provide broad-spectrum protection against fungal issues while remaining safe for consumption after a short waiting period. Bacillus subtilis sprays offer preventive and curative effects against powdery mildew and botrytis without risking harmful residues.
Milk spray (1 part milk to 9 parts water) creates a surprisingly effective treatment for powdery mildew due to its naturally occurring proteins and beneficial bacteria. For bacterial infections, copper-based products remain among the few effective organic options, though they should be used carefully and sparingly to avoid accumulation issues.

Pest Control in the Indoor Environment
While indoor hydroponic systems reduce pest exposure, they’re not immune to infestations. Once established, pests reproduce rapidly in the ideal conditions that also benefit your tomatoes. Implementing integrated pest management strategies keeps these unwanted visitors in check while maintaining the safety of your harvest.
Identifying Common Cherry Tomato Pests
Spider mites appear as tiny moving specks on leaf undersides, often accompanied by fine webbing between leaves and stems. These nearly microscopic pests cause stippling damage that first appears as small yellow dots before leaves bronze and die. Aphids cluster around growing points and new leaves, leaving sticky honeydew residue while causing leaf curling and stunted growth. Their soft-bodied colonies often appear overnight on previously healthy plants.
Whiteflies resemble tiny white moths that fly up in clouds when disturbed, while their immobile nymph stages attach to leaf undersides. Fungus gnats don’t damage plants directly but indicate overly wet conditions and can become nuisance insects in indoor environments. Early detection through regular inspection, particularly of leaf undersides and stem joints, allows for intervention before populations explode. For more information on managing pests in hydroponic systems, check out this guide to hydroponic tomatoes.
Prevention as Your First Line of Defense
Physical barriers provide your most effective prevention strategy. Cover all ventilation openings with fine insect screening (less than 0.5mm mesh) to prevent flying insects from entering your growing area. Maintain a “clean room” protocol by changing clothes or wearing coveralls when entering growing areas after being outdoors. Inspect all new plants thoroughly and isolate them for two weeks before introducing them to your main system.
Yellow sticky traps hung at plant height capture flying pests like whiteflies and fungus gnats while serving as early warning indicators of developing problems. Regular leaf washing with gentle water spray dislodges developing pest populations before they establish. These preventive practices require minimal effort but significantly reduce the likelihood of serious infestations. For more information on optimizing your growing environment, check out our guide on venting grow tent frequency.
Safe Treatment Options for Edible Plants
When pests appear despite preventive efforts, insecticidal soap provides safe control of soft-bodied insects like aphids and young spider mites. Apply to all plant surfaces, particularly leaf undersides, repeating every 5-7 days for three applications to catch newly hatched individuals. Neem oil serves double-duty against both pests and diseases, disrupting insect life cycles without leaving harmful residues.
For persistent infestations, beneficial insects offer targeted biological control. Predatory mites (Phytoseiulus persimilis) specifically target spider mites, while lacewing larvae consume aphids and other soft-bodied pests. These beneficial insects continue reproducing as long as prey remains available, providing ongoing protection without chemical applications. For more information on pest management, check out this guide to hydroponic tomatoes.
Harvesting Your Bounty: Timing is Everything
After weeks of care, the moment arrives to enjoy your first hydroponic cherry tomatoes. Harvest timing significantly impacts both flavor development and plant health. Unlike commercial operations that pick tomatoes underripe for shipping, your home-grown treasures can remain on the vine until reaching peak flavor. For more information on growing techniques, check out this guide to hydroponic tomatoes.
- Red varieties show best flavor when fully colored with slight softening
- Yellow and orange varieties should develop full color with slight give when gently squeezed
- Black/purple varieties are ready when their shoulders darken and bottoms show reddish hues
- Green varieties like Green Grape are ripe when they develop a yellowish undertone
- All varieties should be harvested before showing signs of splitting or overripening
With consistent care, a single cherry tomato plant in a well-maintained hydroponic system can produce 2-4 pounds of fruit monthly for 6-8 months or longer. This extended harvest period represents one of the greatest advantages of hydroponic growing over traditional gardening.
Establishing a regular harvesting routine encourages continuous production. Check plants daily during peak season, as cherry tomatoes can progress from nearly ripe to overripe in just 24-48 hours under optimal growing conditions.
Visual Cues That Indicate Perfect Ripeness
Perfect ripeness in cherry tomatoes combines color development with subtle textural changes. The deepest flavor develops when fruits are allowed to fully ripen on the plant rather than picked early. For red varieties like Sweet 100 or Sweetie, wait until the entire fruit shows deep red coloration without any orange or pink areas. The skin should maintain a slight glossiness rather than becoming dull, which indicates overripening.
Specialized varieties require different visual assessments. Sun Gold cherry tomatoes reach peak flavor when they develop a deep golden-orange color with slight translucency. Black varieties like Black Cherry show ripeness through a combination of dark shoulders and mahogany-red bottom coloration. Regardless of variety, fruits should yield slightly to gentle pressure without feeling soft or mushy.
Harvesting Techniques That Protect Your Plants
Proper harvesting technique prevents damage to both fruits and plants. Rather than pulling fruits directly, hold the fruit cluster in one hand while using the other to twist and separate each tomato. For cherry varieties that cling tightly to stems, small scissors or garden snips allow clean separation without stressing the plant. When harvesting entire trusses for visual appeal, cut the main stem well back from the first fruit to avoid damaging neighboring clusters. For more on hydroponic practices, explore hydroponics explained.
Morning harvest provides optimal flavor, as fruits have cooled overnight and contain maximum sugars before daytime temperatures rise. Tomatoes harvested during peak afternoon heat often taste less sweet and may soften more quickly during storage. For more insights, you can read about growing hydroponic tomatoes. Collect fruits in shallow containers rather than deep buckets to prevent crushing and skin damage.
Extending Harvest Season Through Proper Plant Care
Cherry tomato plants naturally slow production after several months of heavy fruiting. Rejuvenate tired plants by performing a “half cutback” – removing the upper half of the main stem(s) just above a healthy leaf node. This dramatic pruning stimulates new growth and flowering from lower portions of the plant. Simultaneously, increase nutrient concentration slightly and ensure light levels remain optimal to support the flush of new growth.
Replace one-quarter of the nutrient solution with fresh solution weekly rather than performing complete changes. This maintains beneficial microbial populations that develop in established systems while preventing nutrient imbalances. With this rejuvenation strategy, many hydroponic cherry tomato plants can produce continuously for 12-18 months before requiring replacement.
Troubleshooting Common Hydroponic Cherry Tomato Problems

“How To Grow Hydroponic Tomatoes For …” from www.gardeningknowhow.com and used with no modifications.
Even experienced growers encounter challenges with hydroponic cherry tomatoes. Recognizing common issues early allows for prompt intervention before plant health and productivity suffer significantly. Most problems stem from environmental factors or nutrient imbalances rather than inherent plant weaknesses.
Regular system maintenance prevents many common issues. Check pH and EC levels daily, inspect plants for early signs of stress or disease, and maintain cleanliness throughout your growing area. This proactive approach catches problems while they remain easily correctable.
Blossom End Rot: Causes and Solutions
Blossom end rot (BER) appears as dark, sunken areas at the bottom of developing fruits – a devastating sight for any grower. This physiological disorder stems from calcium deficiency within developing fruits, though the root cause isn’t always insufficient calcium in your nutrient solution. More often, environmental stressors prevent proper calcium transport within the plant. High temperatures above 90°F, EC levels exceeding 3.0, or significant humidity fluctuations can all trigger BER even when calcium levels appear adequate.
To resolve BER, first ensure calcium levels remain between 150-200ppm in your solution while maintaining pH between 5.8-6.2 for optimal calcium availability. Stabilize growing conditions by moderating temperature extremes and humidity fluctuations. Calcium nitrate foliar sprays (1 tablespoon per gallon) applied to developing fruits can provide emergency intervention while you correct underlying issues, though they won’t salvage already damaged fruits.
Leaf Curling: What It Means and How to Fix It
Leaf curling in cherry tomatoes typically indicates environmental stress rather than disease. Upward curling (leaves folding along the central vein like a taco) usually signals excessive light intensity or heat stress. Lower lights or increase the distance between lights and plants, and ensure temperatures remain below 85°F during the day. Providing additional air circulation often alleviates symptoms within days.
Downward curling, where leaf edges droop toward the ground, often indicates overwatering in media-based systems or insufficient oxygen in DWC setups. Check that air stones function properly and that bubbling appears vigorous throughout the nutrient solution. In drip systems, adjust irrigation frequency rather than duration – multiple shorter cycles often resolve issues better than fewer longer ones.
Slow Fruit Development: Identifying the Culprits
When flowers appear but fruits develop slowly or not at all, three main factors typically contribute: insufficient pollination, temperature extremes, or nutrient imbalances. First, ensure proper pollination through manual techniques, as indoor environments lack natural pollinators. The telltale sign of pollination failure is flowers dropping without forming even tiny fruits at their bases.
Temperature significantly impacts fruit development speed. Daytime temperatures between 75-85°F and night temperatures between 62-72°F create optimal conditions for fruit setting and development. Outside these ranges, pollen viability decreases and plant hormones that regulate fruit development function poorly. Phosphorus deficiency similarly slows fruit development, so ensure P levels remain adequate (30-50ppm) during fruiting stages.
System Failures: Emergency Response Plan
Power outages, pump failures, or controller malfunctions can quickly threaten plant survival in hydroponic systems. Prepare for emergencies by keeping backup equipment on hand – particularly air pumps, which maintain crucial oxygen levels in DWC systems. Battery-powered air pumps provide critical life support during electrical outages, giving plants the extra hours they need until normal operation resumes.
For longer disruptions, manual watering with properly balanced nutrient solution can sustain plants temporarily. Keep premixed emergency nutrient solution on hand, properly pH adjusted and ready for use. Cherry tomatoes can tolerate brief periods without active circulation but will suffer rapidly if roots dry out or oxygen levels crash. Having clean buckets ready for emergency water changes can save a crop when primary systems fail unexpectedly.
Your Hydroponic Tomato Journey Continues

“RijkZwaan A Grade Hydroponic Cherry …” from www.indiamart.com and used with no modifications.
Growing hydroponic cherry tomatoes opens the door to year-round harvests of fruits with exceptional flavor and nutritional value. As you gain experience, you’ll develop an intuitive understanding of your plants’ needs based on subtle visual cues and system performance patterns. Each growing cycle builds knowledge that improves your results, whether you’re maintaining a simple windowsill system or expanding to a dedicated grow room. Remember that even experienced growers face occasional challenges—the willingness to observe, adjust, and learn from each crop distinguishes successful hydroponic gardeners. HydroGrow’s specialized nutrient formulations and growing supplies continue to support gardeners at every stage of this rewarding journey.
Frequently Asked Questions
These common questions address the concerns most new hydroponic cherry tomato growers encounter. Understanding these fundamentals will help you avoid common pitfalls and achieve better results from your first growing cycle.
While hydroponic growing involves some technical elements, the learning curve is manageable with proper guidance. Most growers find that the year-round harvests and exceptional quality more than compensate for the initial learning investment.
How long does it take to grow cherry tomatoes hydroponically from seed to harvest?
Cherry tomatoes typically require 60-80 days from seed to first harvest in a well-maintained hydroponic system. Germination takes 5-7 days, seedling development requires 21-28 days, and fruiting begins approximately 30-45 days after transplanting seedlings into the hydroponic system. This timeline can vary based on variety, with smaller-fruited types like ‘Tiny Tim’ or ‘Sun Gold’ generally producing faster than larger cherry varieties. Once production begins, plants continue fruiting for months with proper care, providing continuous harvests long after soil-grown plants have finished.
Can I use tap water for my hydroponic cherry tomatoes?
Tap water can work for hydroponic cherry tomatoes, but first test its quality. Ideal water contains less than 200ppm total dissolved solids and minimal chlorine. Let tap water sit 24 hours before use to allow chlorine to dissipate, or use a carbon filter for chloramine removal. Hard water (high in calcium and magnesium) requires special nutrient formulations that account for these minerals. For optimal results, consider reverse osmosis filtration systems that provide a blank slate for precise nutrient management, particularly valuable for advanced growers seeking maximum control over plant nutrition. For more information on growing hydroponic tomatoes, visit Gardening Know How.
Do hydroponic cherry tomatoes taste as good as soil-grown ones?
Well-grown hydroponic cherry tomatoes often surpass their soil-grown counterparts in flavor, particularly during off-seasons when traditional gardens aren’t producing. The key to exceptional taste lies in allowing fruits to fully ripen on the vine and maintaining proper EC levels during the fruiting stage. Higher EC levels (2.8-3.0) during ripening increase sugar content and flavor complexity, though this requires careful monitoring to prevent plant stress.
Blind taste tests consistently show that growing method matters far less than varietal selection and harvest timing. Hydroponic ‘Sun Gold’ or ‘Sweet 100’ harvested at peak ripeness will deliver outstanding flavor regardless of growing method. The controlled environment of hydroponics allows optimization of all factors that contribute to flavor development.
How often should I change the nutrient solution in my hydroponic system?
For cherry tomatoes, perform a complete nutrient solution change every 2-3 weeks, with weekly top-offs using fresh solution as plants consume water. Mature plants can deplete certain nutrients while leaving others behind, creating imbalances over time. Between complete changes, monitor EC and pH daily, making small adjustments as needed. DWC systems typically require less frequent changes than NFT or drip systems due to their larger reservoir volumes. Signs that solution needs changing include unexplained EC fluctuations, yellowing lower leaves, or slowed growth despite appropriate environmental conditions.
Can I grow cherry tomatoes hydroponically without artificial lights?
Cherry tomatoes can grow hydroponically using natural light alone, but only when placed in south-facing windows receiving at least 6-8 hours of direct sunlight daily. Even under these conditions, supplemental lighting typically improves yields substantially. Without sufficient light intensity, plants produce elongated stems, small leaves, and minimal fruit development. For consistent year-round production, artificial lighting becomes essential during shorter winter days or in locations without ideal sun exposure.
- South-facing windowsills: Possible but with reduced yields
- Sunrooms/conservatories: Good results during summer months
- North-facing locations: Require full artificial lighting
- Partially shaded areas: Insufficient for meaningful production
- Supplemental lighting: Recommended even with good natural light
When relying primarily on natural light, choose compact varieties specifically bred for container growing, as these have lower light requirements than full-sized indeterminate types. ‘Micro Tom,’ ‘Red Robin,’ and ‘Tiny Tim’ perform better than larger varieties under marginal light conditions. For those interested in a more controlled environment, consider using a grow tent to optimize light and temperature conditions.
Growing hydroponic cherry tomatoes combines the precision of controlled-environment agriculture with the satisfaction of producing fresh, flavorful fruits year-round. Whether you’re starting with a simple single-plant system or developing a comprehensive indoor garden, the principles remain consistent: provide optimal light, balanced nutrition, appropriate support, and consistent care. Your reward will be months of continuous harvests and the unmatched flavor of perfectly ripened cherry tomatoes regardless of outdoor conditions.
Ready to experience the difference that professional-grade nutrients make in your hydroponic tomato garden? HydroGrow’s Cherry Boost formula provides the perfect balance of calcium, magnesium, and trace elements to prevent common deficiencies while maximizing flavor development in your hydroponic cherry tomatoes.