Hydroponic Tomatoes: Step-by-Step Guide for Beginners
Key Takeaways
- Hydroponic tomatoes grow up to 30-50% faster than soil-grown plants and can be harvested year-round with the right setup.
- Determinate varieties like Roma and indeterminate types such as Cherry tomatoes are excellent choices for hydroponic systems.
- For beginners, DWC (Deep Water Culture) and ebb and flow systems offer the best balance of simplicity and effectiveness.
- Maintaining proper light (12-16 hours daily), temperature (70-80°F), and nutrient balance is crucial for successful hydroponic tomato growing.
- With Alto Garden’s complete hydroponic systems, even beginners can enjoy fresh, homegrown tomatoes regardless of outdoor growing conditions.
Hydroponic Tomatoes: The Easiest Way to Grow Year-Round
“Hydroponic Tomatoes: Tips for a …” from www.spider-farmer.com and used with no modifications.
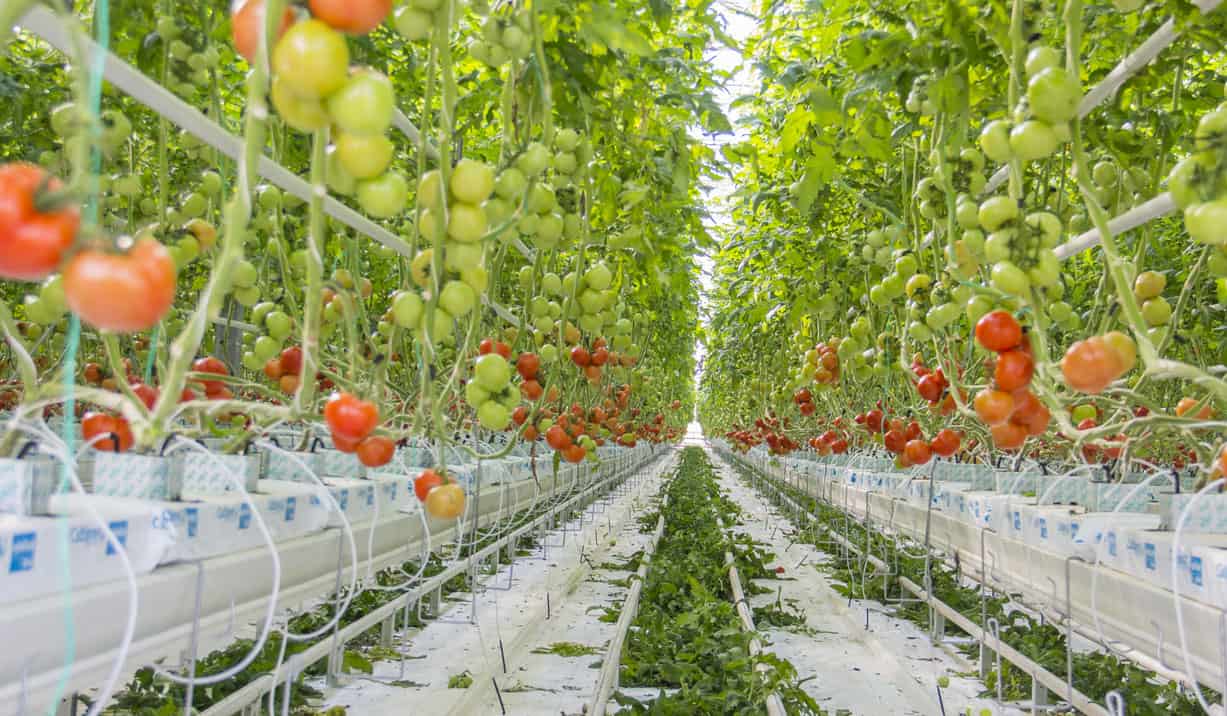
Growing tomatoes without soil might sound like science fiction, but it’s actually one of the most rewarding ways to enjoy fresh tomatoes any time of year. I’ve found that hydroponic tomatoes not only grow faster than their soil counterparts, but they often taste better and contain more nutrients. This method puts you in complete control of your plants’ environment, eliminating weather concerns, seasonal limitations, and many common garden pests.
The secret to hydroponic success lies in providing plants with exactly what they need, when they need it. Without soil acting as a buffer, your tomato plants get direct access to water, oxygen, and nutrients—creating ideal growing conditions that can accelerate growth by 30-50% compared to traditional gardening. For beginners especially, this means fewer frustrations and faster rewards.
Alto Garden specializes in helping new growers navigate the world of hydroponics with systems designed specifically for beginners who want professional results. Their complete setups take the guesswork out of hydroponic growing while still giving you all the satisfaction of harvesting your own produce.
What You Need for Your First Hydroponic Tomato System

“Hydroponic Tomatoes: Complete Guide to …” from hydroponicsystems.eu and used with no modifications.
Starting your hydroponic journey doesn’t require a degree in horticulture or engineering. The basics are simpler than you might think: a container for your nutrient solution, a way to deliver that solution to your plants, growing media to support the roots, proper lighting, and of course, the right nutrients. Your setup can be as basic or advanced as your comfort level and budget allow.
Best Hydroponic Systems for Beginner Tomato Growers
For your first hydroponic tomato garden, I recommend starting with either a Deep Water Culture (DWC) or an Ebb and Flow system. DWC systems suspend plant roots directly in nutrient-rich, oxygenated water, making them incredibly simple to set up and maintain. Ebb and Flow systems periodically flood the growing tray with nutrient solution before draining it back to a reservoir, mimicking natural water cycles. Both systems are forgiving for beginners while still producing impressive results. If space is limited, a vertical hydroponic tower can maximize your growing area while creating a stunning visual display of cascading tomato plants.
Essential Equipment Checklist
- Reservoir container (10-20 gallon capacity for multiple plants)
- Growing containers or net pots
- Growing medium (rockwool, expanded clay pellets, or coco coir)
- Air pump and air stones (for DWC systems)
- Water pump (for Ebb and Flow systems)
- Hydroponic nutrients formulated for tomatoes
- pH testing kit and adjusters
- TDS/EC meter to measure nutrient strength
- Full-spectrum LED grow lights (unless using a sunny window or greenhouse)
- Trellising system or plant supports
Selecting the Right Tomato Varieties for Hydroponics
Not all tomatoes perform equally in hydroponic environments. When selecting varieties, consider both the plant’s growth habit and your system’s capacity to support it. Determinate varieties like Roma, Tiny Tim, and Patio Princess stay relatively compact, making them ideal for smaller setups. These types grow to a predetermined height, flower, set fruit all at once, and then decline.
Indeterminate varieties like Cherry, Beefsteak, and most heirloom types continue growing indefinitely and produce fruit throughout their lifespan. These varieties require more robust support systems and regular pruning but reward you with months of continuous harvests. For beginners, I often suggest starting with cherry tomato varieties like Tiny Tim or Sweet 100—they’re incredibly productive, compact, and forgiving of minor nutrient fluctuations.
If you’re working with limited vertical space, bush-type determinate varieties will be your best option. For those with room for plants to climb, indeterminate varieties can produce remarkably high yields over a longer period. Just remember that whatever variety you choose, hydroponic tomatoes will grow more vigorously than you might expect from garden experience, so plan your spacing accordingly.
Budget-Friendly Setup Options
Don’t let cost concerns prevent you from trying hydroponic tomatoes. I’ve helped countless beginners start with simple DIY systems using plastic storage totes, PVC pipe, or even repurposed 5-gallon buckets. A basic single-plant DWC system can be built for under $50, while a multi-plant setup might run $100-200 depending on your choice of lighting. If you’re really watching your budget, start with just 1-2 plants under a sunny window to minimize initial investment in grow lights.
Commercial kits offer convenience but come at a premium price. If you’re handy, building your own system saves money and provides valuable learning experience. Online tutorials abound, and communities like r/Hydroponics are full of supportive growers sharing budget builds. Remember that your first system doesn’t need to be perfect—you can always upgrade components as you gain experience.
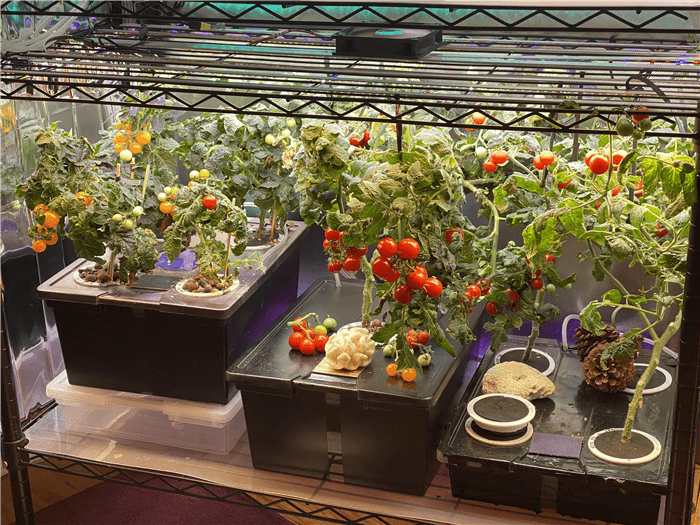
Setting Up Your Hydroponic Tomato Garden
“Cherry Tomatoes and How to Grow Them …” from aeroponicsvshydroponics.com and used with no modifications.
The setup process follows logical steps that prepare your system for healthy plant growth. Taking time to set things up correctly now saves headaches later and gives your tomatoes the best possible start.
Step 1: Choose Your Growing Location
Select a spot that offers stable temperature, minimal disturbance, and easy access for maintenance. Indoor locations should have electrical outlets for pumps and lights, while considering potential water damage from spills. A spare room, basement, or kitchen corner often works well for beginners. Ensure your floor can handle the weight of a water-filled system, and consider placing a waterproof mat underneath for protection. The ideal location also allows you to check on your plants daily—out of sight often means out of mind with hydroponics.
Step 2: Assemble Your System
Follow manufacturer instructions if using a kit, or your design plan for DIY systems. Test all components before adding plants—run water through the system for 24 hours to check for leaks and ensure pumps function properly. Position grow lights at the appropriate height (usually 18-24 inches above where plants will grow) and set timers for your lighting schedule. For DWC systems, ensure air stones create vigorous bubbling throughout the reservoir. This crucial oxygenation prevents root rot and supports healthy growth.
Step 3: Prepare Your Nutrient Solution
Start with room-temperature dechlorinated water. If using tap water, let it sit for 24 hours to allow chlorine to dissipate, or use a water conditioner. Follow the nutrient manufacturer’s recommendations for vegetative growth stage dilution—typically at half-strength for young plants. Mix thoroughly and test the solution’s pH, adjusting to between 5.8-6.3 for optimal tomato growth. Then check your EC (Electrical Conductivity) or PPM (Parts Per Million) to ensure appropriate nutrient concentration. For tomato seedlings, aim for 800-1000 PPM, increasing to 1200-1500 PPM as plants mature.

Step 4: Start Your Tomato Seeds
While you can buy seedlings, starting from seed gives you more variety choices and prevents introducing pests. Begin seeds in rockwool cubes, moistened with pH-adjusted water (no nutrients initially). Place seeds 1/4 inch deep, maintain temperature around 75°F, and keep humidity high until germination occurs in 5-10 days. Once seedlings develop their first true leaves, begin introducing very dilute nutrient solution. Keep grow lights close to prevent stretching, and gradually increase light intensity as seedlings develop.
Step 5: Transfer Seedlings to Your System
When seedlings have developed 2-3 sets of true leaves and a strong root system (usually 3-4 weeks after germination), they’re ready for transfer to your hydroponic system. Gently place the rockwool cube with seedling into your growing medium or net pot, ensuring roots have access to the nutrient solution. For DWC systems, the solution level should touch the bottom of the rockwool without submerging the stem. Position plants with adequate spacing—at least 12 inches for determinate varieties and 18-24 inches for indeterminate types. Install support structures now, before plants become unwieldy.
Maintaining Perfect Growing Conditions
Consistency is the key to hydroponic success. Unlike soil which buffers environmental fluctuations, hydroponic systems respond rapidly to changes. Establishing a regular monitoring routine keeps your tomatoes thriving and helps you catch potential problems early.
Light Requirements for Maximum Fruit Production
Tomatoes are high-light plants that need significant photosynthetic energy to produce fruit. Provide 12-16 hours of light daily, with 14 hours being ideal for most varieties. If using artificial lighting, position full-spectrum LED or high-pressure sodium lights 18-24 inches above plant tops, moving them upward as plants grow. Light intensity should increase during flowering and fruiting stages. Watch for signs of inadequate light like stretching stems or pale leaves, which indicate you need brighter or closer lighting.

Temperature and Humidity Control
Tomatoes thrive in temperatures between 70-80°F (21-27°C) during the day and 60-65°F (16-18°C) at night. This day/night temperature differential is crucial for proper fruit development. Consistently high temperatures above 85°F can cause blossom drop and poor fruit set, while temperatures below 55°F slow growth significantly. I’ve found that maintaining proper temperature is often more important than having perfect lighting.
For humidity, aim for 50-70% relative humidity. Too high, and you risk fungal diseases; too low, and plants may struggle with pollination and transpiration. In particularly dry indoor environments, consider adding a small humidifier near your garden. Monitor both temperature and humidity with an inexpensive digital hygrometer, making adjustments with fans, heaters, or humidifiers as needed.
pH and EC Monitoring Made Simple
Don’t let the technical aspects intimidate you—pH and EC monitoring become second nature with practice. Test pH levels daily, aiming to keep them between 5.8-6.3 for optimal nutrient uptake. Digital pH meters provide the most accurate readings, though test strips work for beginners on a budget. When pH drifts, adjust gradually using pH Up or pH Down solutions, adding small amounts and retesting until balanced.
Electrical Conductivity (EC) or PPM readings indicate your nutrient concentration. For young tomato plants, maintain EC around 1.2-1.5 (or 600-750 PPM), increasing to 2.0-3.0 EC (1000-1500 PPM) as plants mature and begin fruiting. Check these levels twice weekly, topping up with plain water when readings rise (indicating concentration) or adding more nutrients when readings fall. These simple tests take minutes but dramatically improve your results.
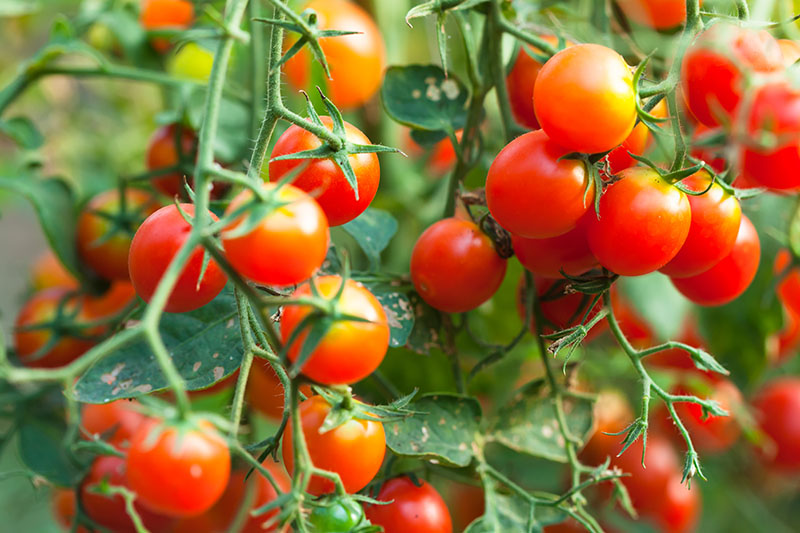
Feeding Your Hydroponic Tomatoes
“Hydroponic Tomatoes …” from www.biggergarden.com and used with no modifications.
Nutrition is where hydroponics truly shines, offering complete control over what your plants receive. Unlike soil gardening’s guesswork, hydroponics lets you precisely tailor nutrients to each growth stage.
Nutrient Solution Formulas for Different Growth Stages
Tomatoes have distinct nutritional needs as they develop. During early vegetative growth, use a formula higher in nitrogen (N) to encourage lush foliage and strong stems. As plants begin flowering, transition to a bloom formula with higher phosphorus (P) and potassium (K) to support fruit development. Commercial hydroponic nutrients often come in two or three-part formulas that allow you to adjust ratios according to your plants’ stage. For beginners, I recommend pre-formulated tomato-specific nutrients that take the guesswork out of mixing.
During the fruiting stage, slightly increasing calcium and magnesium helps prevent blossom-end rot and strengthens cell walls for firmer fruits. Micronutrients like iron, manganese, and zinc are equally important, though needed in smaller amounts—quality hydroponic nutrients include these essential elements in the proper ratios.
When and How to Change Your Nutrient Solution
Complete solution changes should happen every 1-2 weeks, depending on your system size and plant maturity. Larger reservoirs with fewer plants can go longer between changes. The best practice is to completely drain the reservoir, rinse the system with clean water, then refill with freshly mixed nutrient solution. Between full changes, top off evaporated water with plain pH-adjusted water rather than nutrient solution to prevent concentration buildup.
Record keeping becomes invaluable here—note when you change solutions, what strength you used, and how plants responded. These records help you refine your approach with each growing cycle, gradually developing the perfect feeding schedule for your specific varieties and setup.
Signs of Nutrient Deficiencies and How to Fix Them
- Yellowing lower leaves: Likely nitrogen deficiency. Increase your base nutrient concentration or use a nitrogen supplement.
- Purple leaf undersides: Phosphorus deficiency. Adjust to a bloom-formula with higher P values.
- Brown leaf edges: Potassium deficiency. Add a potassium supplement or switch to a fruiting formula.
- Yellow leaves with green veins: Iron deficiency. Check pH first (iron becomes unavailable above 6.5), then add iron supplement if needed.
- Black spots on fruit bottoms: Calcium deficiency (blossom end rot). Add calcium supplement and ensure consistent watering.
Always address pH issues before adding supplements, as improper pH can lock out nutrients even when they’re present in sufficient quantities. Most deficiencies resolve within 3-5 days once properly addressed.
Supporting and Pruning for Bigger Harvests
Without the natural support of soil, hydroponic tomatoes need your help standing tall. Strategic support systems and pruning techniques not only keep plants manageable but significantly increase both yield and fruit quality.
Trellising Methods for Indoor Hydroponic Tomatoes
Install your support structure when plants are still small to avoid damaging established roots later. For determinate varieties, simple tomato cages or stakes often suffice. For indeterminate varieties that can grow over 8 feet tall, consider string trellising where plants are supported by twine hanging from an overhead support. This method allows for continued vertical growth while keeping stems secure.
My favorite approach for indoor systems combines vertical and horizontal supports—plants grow up the vertical strings while horizontal lines prevent heavy fruit clusters from breaking branches. Use soft garden twine or plant clips to secure stems, checking weekly for new growth that needs supporting. The extra effort pays off with dramatically increased yields and healthier plants.
Pruning Techniques to Maximize Yield
Pruning hydroponic tomatoes improves airflow, redirects energy to fruit production, and prevents overcrowding. Start by removing the suckers—the small shoots that form in the crotch between the main stem and branches. For indeterminate varieties, maintain 1-2 main stems by consistently removing all suckers. For determinate types, more moderate pruning works best, removing only the lower suckers while leaving those near the top to produce fruit.
As plants mature, remove any yellowing or diseased leaves promptly, cutting them at the stem with clean scissors. Also consider removing lower leaves once they’re 12 inches above your growing medium—these older leaves contribute little to growth and removing them improves air circulation. Always prune in the morning when plants are most resilient, and avoid removing more than 25% of foliage at once to prevent stress.
Pollination in an Indoor Environment
Without natural pollinators indoors, you’ll need to hand-pollinate your tomato flowers. The process is surprisingly simple—gently shake flowering branches for a few seconds daily during mid-morning when pollen is most viable. This mimics the vibration caused by bees and releases pollen within the flowers. Alternatively, use a small artist’s paintbrush to transfer pollen between flowers, or an electric toothbrush held (not touching) near the flowers to create vibration.