Grow Tent Humidity Control: Tips for Healthy Plant Growth

Key Takeaways
- Maintaining proper humidity levels (70-75% for seedlings, 50-70% for vegetative growth, and 30-50% for flowering) is critical for plant health and maximizing yields in grow tents.
- Using tools like humidifiers, dehumidifiers, and properly calibrated hygrometers allows for precise environmental control that can dramatically improve plant performance.
- Strategic ventilation adjustments, including exhaust fan speed modifications, can help balance humidity without expensive equipment.
- Seasonal changes require different approaches to humidity control, with winter typically needing humidity increase methods and summer often requiring dehumidification.
- Water trays, misting techniques, and plant spacing all offer simple yet effective methods to adjust humidity levels without breaking the bank.
Why Humidity Makes or Breaks Your Grow Tent Success

“POTLAB Small Grow Tent for AeroGarden …” from www.amazon.com and used with no modifications.
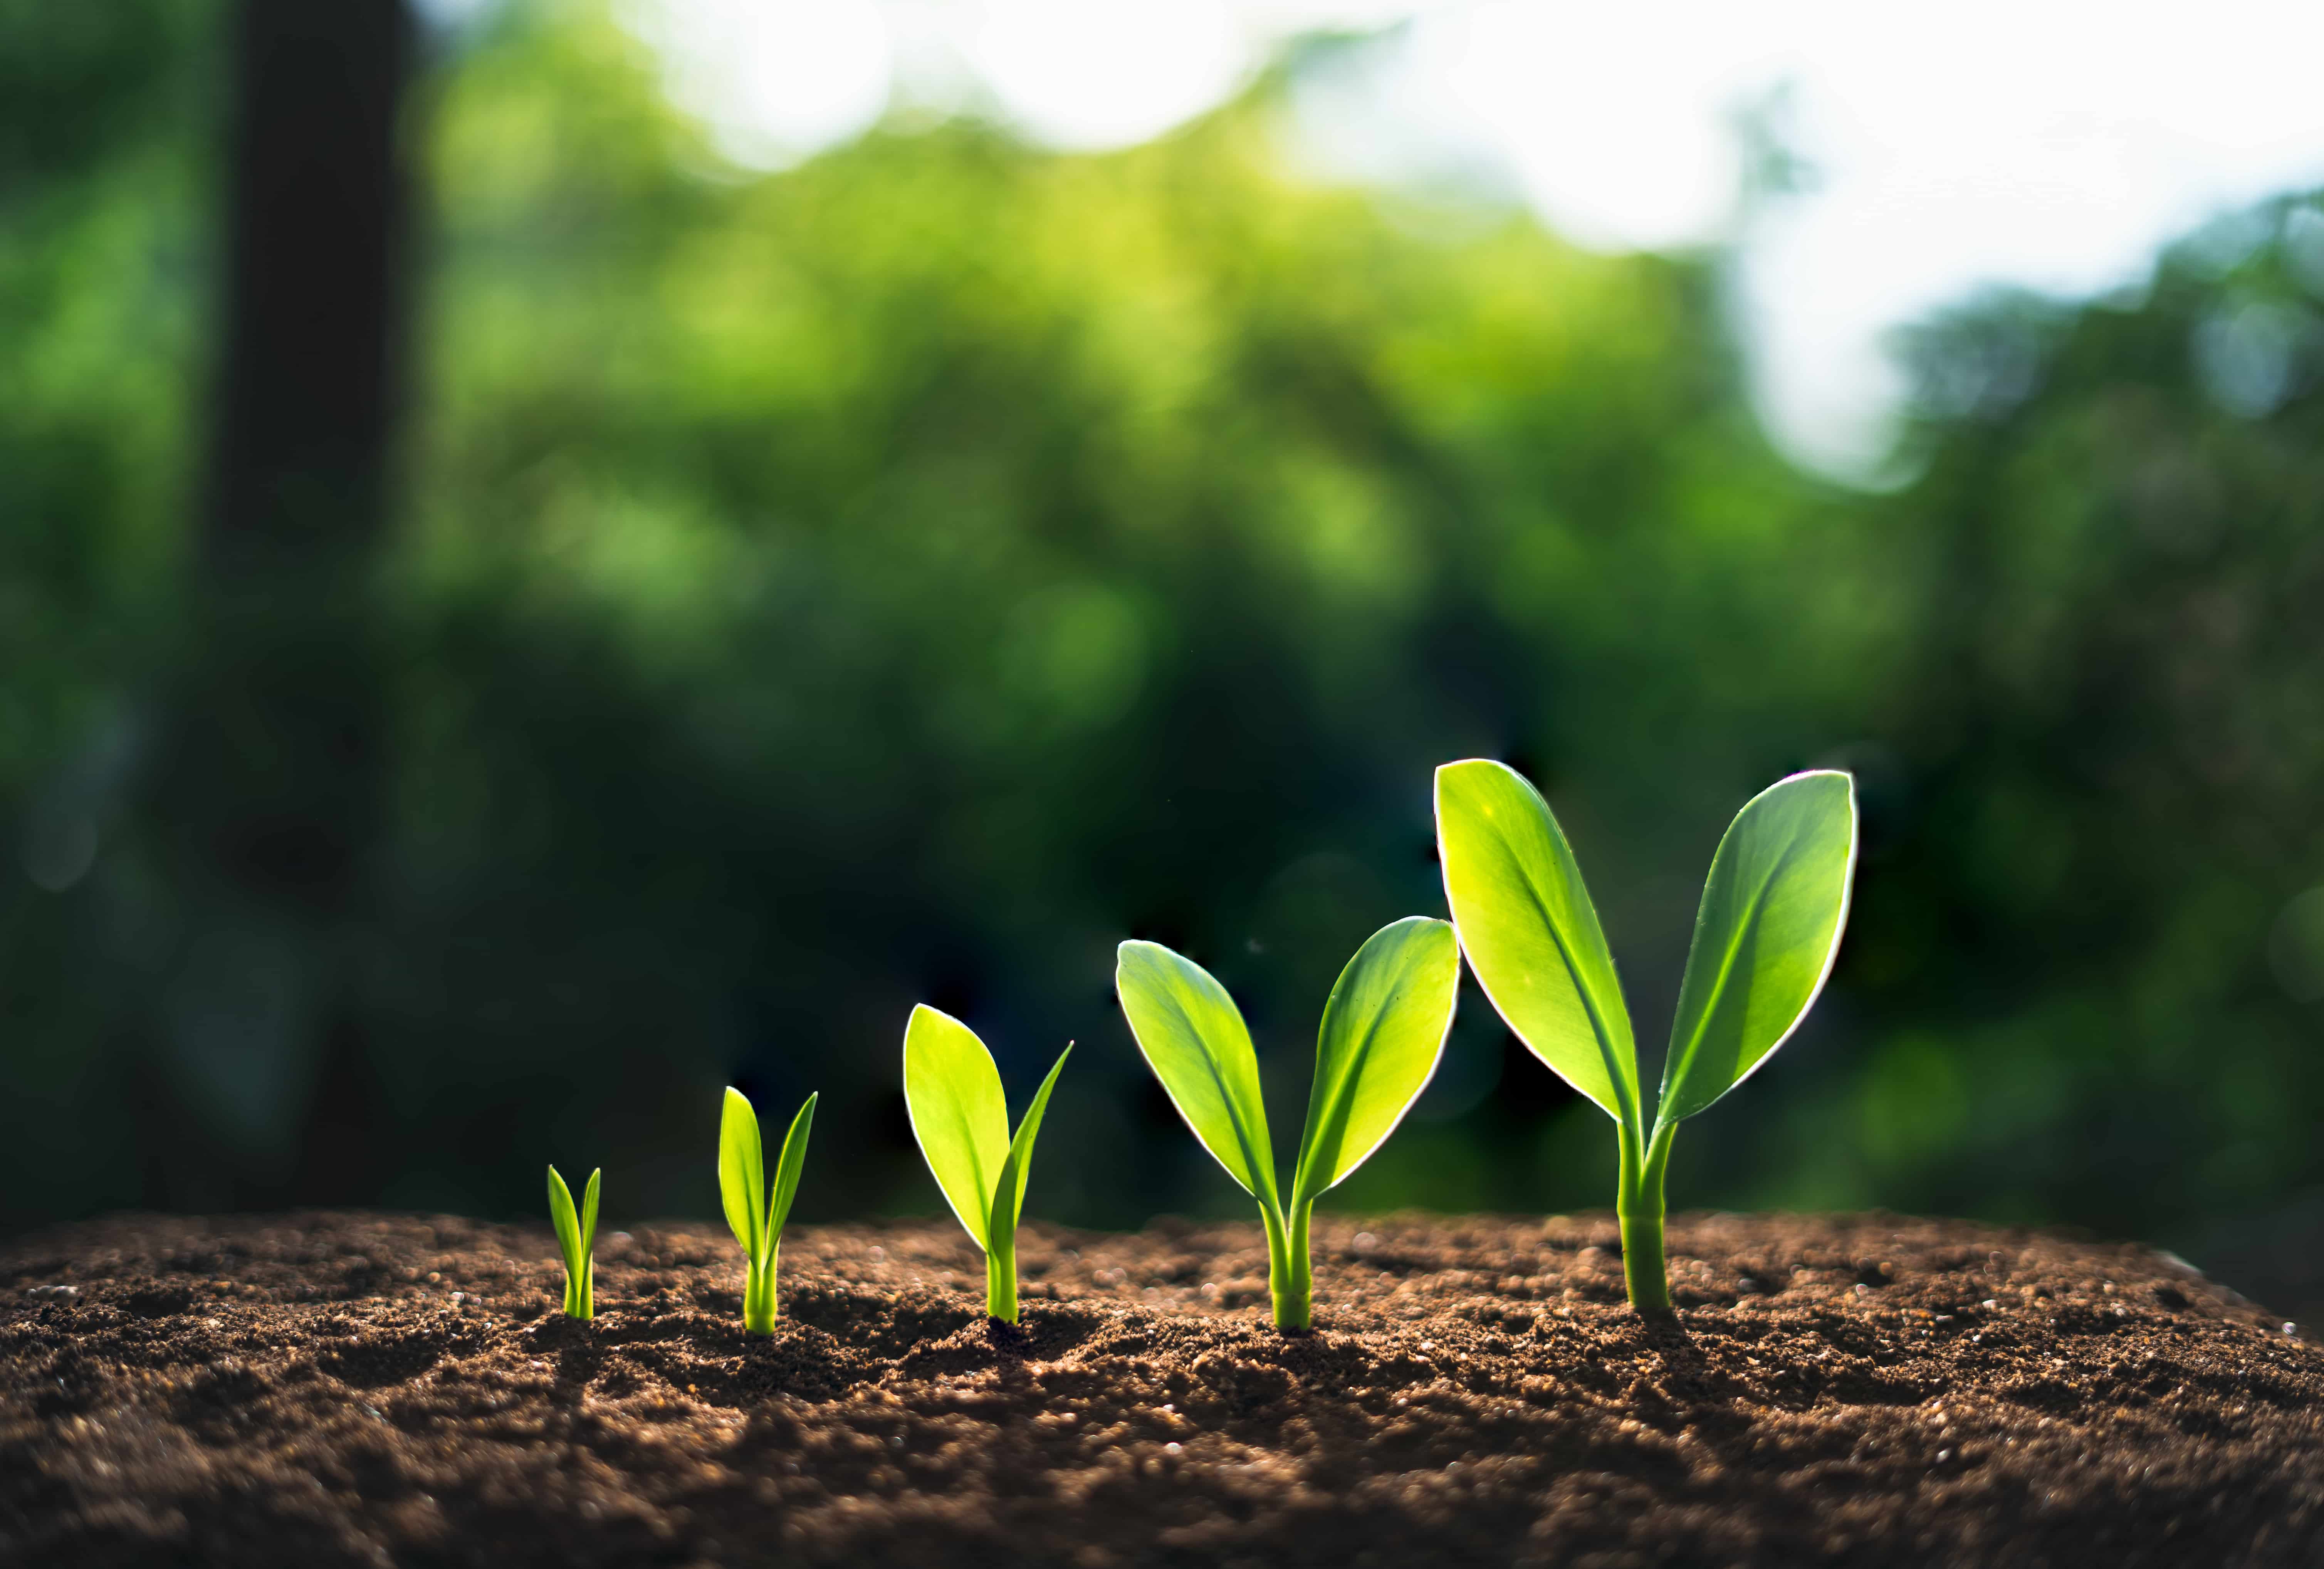
Humidity might be the most underappreciated factor in indoor growing success. While growers obsess over nutrients and lighting, the moisture content in your grow tent’s air silently determines whether your plants thrive or struggle. Plants interact with humidity constantly through transpiration—essentially plant sweating—which affects nutrient uptake, growth rates, and susceptibility to diseases. Without proper humidity control, even perfect lighting and premium nutrients can’t save your garden from stunted growth or pathogen outbreaks.
The relationship between plants and humidity is particularly crucial in the confined space of a grow tent, where natural environmental regulation is absent. Unlike outdoor growing where weather patterns naturally vary humidity levels, your tent’s environment is entirely your responsibility. This controlled environment is both the greatest advantage and challenge of indoor growing. With proper humidity management from GrowBuds, you’re giving your plants the optimal conditions for photosynthesis, nutrient absorption, and cellular development.
Think of humidity as the invisible conductor orchestrating your plants’ metabolic symphony. Too dry, and plants close their stomata to conserve moisture, slowing growth and nutrient transport. Too humid, and transpiration slows to a crawl, preventing plants from cooling themselves and creating perfect conditions for mold and mildew. Mastering humidity control transforms your grow tent from a simple shelter into a precision instrument for cultivating exceptional plants.
Perfect Humidity Levels for Each Growth Stage
“Four Stages of Business Growth …” from www.jec-llc.com and used with no modifications.
Understanding that plants require different humidity levels throughout their lifecycle is fundamental to successful indoor cultivation. Just as human babies have different needs than adults, plants’ humidity requirements evolve as they mature from delicate seedlings to robust flowering specimens. This isn’t merely a preference—it’s a biological necessity tied to how plants function at each stage of development.
Many growers make the critical mistake of setting one humidity level and forgetting it. This one-size-fits-all approach ignores the dramatic physiological changes plants undergo as they develop. A seedling with its minimal root system and tender leaves has fundamentally different moisture needs than a mature plant with extensive roots and developed foliage. Following stage-appropriate humidity guidelines can be the difference between struggling plants and a thriving garden.
The good news is that once you understand these changing requirements, you can create a humidity schedule that aligns perfectly with your plants’ growth stages. This proactive approach to humidity management prevents problems before they begin rather than forcing you to troubleshoot issues after damage has occurred. Let’s examine the specific humidity requirements for each crucial growth stage.
Properly adjusting humidity between growth stages should be done gradually over several days rather than abruptly. This transition period allows plants to adapt to changing conditions without stress. Plan to adjust humidity by approximately 5% every two days when transitioning between major growth stages.
- Clones/Cuttings: 75-85% humidity (highest requirements)
- Seedling Stage: 70-75% humidity
- Vegetative Stage: 50-70% humidity (reducing as plants mature)
- Early Flowering: 40-50% humidity
- Late Flowering: 30-40% humidity (lowest to prevent mold)
Seedling Stage: 70-75% Humidity Requirements
Seedlings and young clones require higher humidity levels (70-75%) because their root systems are underdeveloped and cannot yet efficiently take up water from the growing medium. With small roots, these young plants rely heavily on foliar absorption of moisture directly through their leaves. The high humidity creates a protective microclimate around these delicate new plants, reducing transpiration stress and allowing them to establish themselves without drying out. For those interested in exploring more about indoor gardening, consider reading about hydroponic Asian pea shoots for a fast and easy indoor garden guide.
During this critical establishment phase, consistent humidity is particularly important. Fluctuations can shock young plants and stunt their development right when they should be building the foundation for future growth. If humidity drops too low during this stage, seedlings may wilt rapidly and struggle to recover. Maintaining proper seedling humidity often requires more active management than later growth stages, as these young plants have less resilience to environmental stress.
Vegetative Stage: 50-70% Humidity Balance
As plants enter the vegetative stage, their root systems develop significantly, allowing them to pull more water from the growing medium. During this active growth phase, humidity requirements drop to 50-70%, with the ideal level gradually decreasing as plants mature. This moderate humidity level strikes the perfect balance between supporting leaf development and encouraging stronger stems and roots.
Vegetative plants with established root systems can tolerate brief fluctuations in humidity better than seedlings, but consistency remains important for optimal growth. During this stage, plants experience rapid growth and require substantial water uptake, which is facilitated by appropriate humidity levels. The mid-range humidity supports proper transpiration while preventing excessive moisture loss that could stress the plants.
Many growers miss the opportunity to gradually reduce humidity as vegetation progresses, which helps plants develop more robust structures. By slowly lowering humidity from 70% at the beginning of vegetation to around 50% as flowering approaches, you encourage stronger cell walls and improved resistance to environmental stressors. This gradual reduction prepares plants for the lower humidity requirements of flowering.
Flowering Stage: 40-50% for Maximum Yields
When plants begin flowering, humidity requirements shift significantly to 40-50%. This reduction serves several critical purposes that directly impact your final harvest quality and quantity. Lower humidity during early flowering promotes resin production and terpene development while reducing the risk of fungal problems that can devastate a nearly mature crop.
The flowering stage represents the culmination of all your growing efforts, making proper humidity control especially crucial. During this period, plants focus energy on reproductive structures rather than vegetative growth, changing how they interact with their environment. Excessive humidity during flowering can lead to diminished potency, diluted flavors, and increased susceptibility to bud rot or powdery mildew—particularly as the dense flower structures create microclimates that can trap moisture. For those interested in exploring different hydroponic options during this stage, consider learning about hydroponic red cabbage microgreens as a fresh alternative.
Maintaining the 40-50% range optimizes the balance between continued growth and disease prevention. At this stage, consistently monitoring and adjusting humidity becomes even more important as plants develop valuable flowers that are particularly vulnerable to humidity-related problems. Many experienced growers actually maintain detailed humidity logs during flowering to ensure conditions remain optimal throughout this critical phase.
Late Flowering: 30-40% to Prevent Mold
In the final weeks of flowering, reducing humidity further to 30-40% becomes crucial to prevent mold and mildew issues that can ruin your entire harvest. Dense flower structures create perfect environments for botrytis (bud rot) and other moisture-loving pathogens if humidity remains too high. This lower humidity range helps flowers properly ripen and develop while protecting your investment of time and resources. For those interested in growing techniques, you might explore hydroponic collard greens microgreens as an alternative method.
Late-flowering plants with heavy, dense buds are particularly vulnerable to moisture problems. The complex structure of mature flowers can trap humidity, creating microclimates within the buds that are significantly more humid than your ambient grow tent readings suggest. This final reduction in humidity helps ensure proper drying of these internal spaces, protecting against the devastating spread of mold that can occur in just days.
Many successful growers actually aim for the lower end of this range (closer to 30-35%) in the very final week before harvest. This not only protects against pathogens but also initiates the drying process while plants are still living, potentially enhancing final terpene profiles and resin production. The effort to maintain these precise late-flowering humidity levels often separates exceptional harvests from merely acceptable ones.
Effective Ways to Raise Humidity in Your Grow Tent

“Relative Humidity in a Grow Tent …” from www.wikihow.com and used with no modifications.
When humidity levels fall below optimal ranges, plants struggle to maintain proper transpiration rates, often resulting in nutrient deficiencies and stunted growth. Low humidity is particularly common in winter months, in air-conditioned spaces, and in grow tents with powerful ventilation systems. Fortunately, there are several effective methods to raise humidity levels without expensive equipment, though each approach has its optimal application depending on your specific setup. For example, understanding the difference between red and blue LED grow lights can help in adjusting environmental conditions effectively.
Before implementing any humidity-increasing strategy, it’s crucial to understand your baseline conditions and the factors influencing them. Take multiple humidity readings at different times of day to establish patterns, and consider how your current ventilation setup, room size, and external climate might be contributing to dry conditions. This diagnostic approach prevents overcompensation that could swing your environment from too dry to excessively humid. For more insights, you might explore this guide on growing hydroponic dill microgreens, which also requires careful environmental control.
1. Humidifiers: Types and Placement
Humidifiers represent the most reliable and precise method for increasing grow tent humidity. For small to medium tents (up to 4×4 feet), a standard room humidifier with a 1.5-2 gallon capacity typically provides sufficient moisture. Larger growing environments may require commercial-grade humidifiers with higher output capabilities. The two most effective types for grow tents are ultrasonic humidifiers, which create a fine mist using high-frequency vibrations, and evaporative humidifiers, which use a fan to blow air through a moistened wick or filter.
Proper placement is crucial for effective humidification without creating wet spots or directly spraying plants. Position your humidifier near your passive air intake or in a corner with good airflow, but never directly aimed at plants, which can cause localized moisture problems. For maximum effectiveness, elevate the humidifier slightly off the ground and direct the mist toward the center of the tent rather than at walls or equipment. allowing automated operation that maintains precise humidity levels without constant monitoring. This automation not only saves time but also prevents the wild humidity swings that can occur with manual operation. When selecting a humidifier, prioritize models with adjustable output settings, large tank capacity to reduce refill frequency, and ideally, built-in humidistats that can maintain target humidity levels.
2. Water Trays for Natural Evaporation
Water trays provide a simple, passive approach to raising humidity that requires no electricity and minimal investment. Place shallow trays or pans of water at various locations within your grow tent, particularly near air intake points or passive air circulation paths. The natural evaporation process gradually increases ambient moisture levels, especially when positioned where airflow passes over the water surface. For enhanced effectiveness, use trays with large surface areas rather than deep containers, as evaporation occurs at the surface. For more tips on optimizing your grow tent environment, check out this guide on how many hours of light hydroponic plants need.
To amplify the humidifying effect of water trays, add porous materials like perlite, clay pebbles, or sponges to the water. These materials increase the effective evaporation surface area through capillary action, pulling water up and exposing more moisture to passing air. Some growers place these trays directly under grow lights (though not touching them) to accelerate evaporation through increased temperature.
The primary limitation of water trays is their relatively modest impact on humidity levels, making them ideal for minor adjustments rather than dramatic increases. They work best in smaller grow spaces or as a supplementary method alongside other humidification techniques. Regular monitoring is necessary as trays require frequent refilling, and stagnant water can potentially become a breeding ground for algae or insects if not changed regularly.
3. Misting Techniques (Without Inviting Mold)
Strategic manual misting can provide immediate humidity increases during critical periods, particularly for seedlings and clones that benefit from higher moisture levels. Using a fine-mist spray bottle, gently mist the air above and around plants (not directly on foliage) several times daily to increase ambient humidity. This technique is especially effective during the heat of the day when humidity naturally drops, or when plants show signs of stress from dry conditions. For additional insights on maintaining optimal conditions, explore our guide on light requirements for hydroponic plants.
The key to successful misting without promoting mold or disease is proper timing and technique. Always mist early in the day to ensure any incidental moisture on leaves evaporates before the cooler evening temperatures. Never mist plants during flowering stages, as the dense bud structures can trap moisture and create perfect conditions for botrytis (bud rot) and other pathogens. Keep air circulation active during and after misting to prevent moisture from settling in any one area. For more tips on maintaining a healthy indoor garden, check out our guide on growing hydroponic Asian pea shoots.
For a more automated approach, some growers implement misting systems with timers that release brief bursts of fine mist at programmed intervals. These systems require careful calibration and monitoring to prevent excessive moisture, but can be effective when properly implemented. If using automated misting, start with very conservative settings (brief, infrequent mist cycles) and adjust based on measured humidity levels rather than visual assessment.
4. Reducing Exhaust Fan Speed
“High Performance 12025B220H Fan …” from www.alibaba.com and used with no modifications.
One of the most overlooked methods for increasing humidity involves simply adjusting your existing ventilation system. Many growers run exhaust fans at maximum capacity continuously, which rapidly removes humid air from the tent. By installing a variable speed controller on your exhaust fan, you can reduce the rate at which moist air is expelled, allowing humidity to build up to appropriate levels. This approach costs nothing beyond the controller itself and avoids introducing additional water sources into your growing environment.
The ideal fan speed strikes a balance between necessary air exchange and humidity retention. Start by reducing fan speed by approximately 25% and monitor humidity levels for 24 hours before making further adjustments. Remember that while this method effectively raises humidity, it also reduces the rate at which heat is removed from your tent. Monitor temperature closely when implementing this approach, especially if using high-intensity lighting that generates significant heat.
For optimal results, consider implementing a smart controller that automatically adjusts fan speed based on both humidity and temperature readings. These controllers maintain ideal environmental conditions by dynamically responding to changes, increasing fan speed when temperatures rise too high while reducing it when humidity falls below target levels. This automated approach maintains the perfect balance between humidity retention and necessary ventilation without constant manual adjustments. For more information, you can read about how to lower humidity in a grow tent.
How to Lower Humidity When It’s Too High
Excessive humidity in your grow tent creates the perfect breeding ground for mold, mildew, and fungal diseases that can destroy your crop in days. High humidity is particularly problematic during flowering stages when dense buds can trap moisture, creating microclimates that promote pathogen growth. Identifying and addressing humidity issues quickly is essential for protecting your plants from these serious threats.
Many growers mistakenly focus only on raising humidity, overlooking the equally important skill of reducing it when necessary. This becomes especially critical as plants mature and their humidity requirements decrease. Let’s explore the most effective methods for bringing down excessive humidity levels and creating the optimal environment for healthy plants at every growth stage.
1. Dehumidifiers: Sizing and Positioning
Dehumidifiers provide the most direct and effective solution for controlling excessive humidity in grow environments. For most home grow tents under 4×4 feet, a 20-30 pint residential dehumidifier is sufficient, while larger grow spaces may require commercial-grade units with 50+ pint capacity. When selecting a dehumidifier, prioritize models with built-in humidistats that automatically maintain your target humidity range without constant monitoring or adjustment. For those interested in expanding their grow setups, you might also want to explore growing hydroponic microgreens at home.
Proper placement maximizes a dehumidifier’s effectiveness while minimizing its impact on your grow environment. Position the unit centrally in larger tents where air circulation is good, but never directly adjacent to plants, which can create localized dry spots. In smaller tents where space is limited, consider placing the dehumidifier just outside the tent with ducting to direct dry air into the growing area. This configuration also prevents the heat generated by the dehumidifier from affecting your carefully maintained grow temperatures.
Remember that dehumidifiers produce water that must be regularly emptied unless you have a model with continuous drainage capabilities. Many experienced growers connect a drain hose that leads directly to a floor drain or collection container outside the tent, eliminating the need for frequent manual emptying. This automated drainage approach is particularly important during flowering stages when humidity control becomes critical to preventing bud rot and other moisture-related problems.
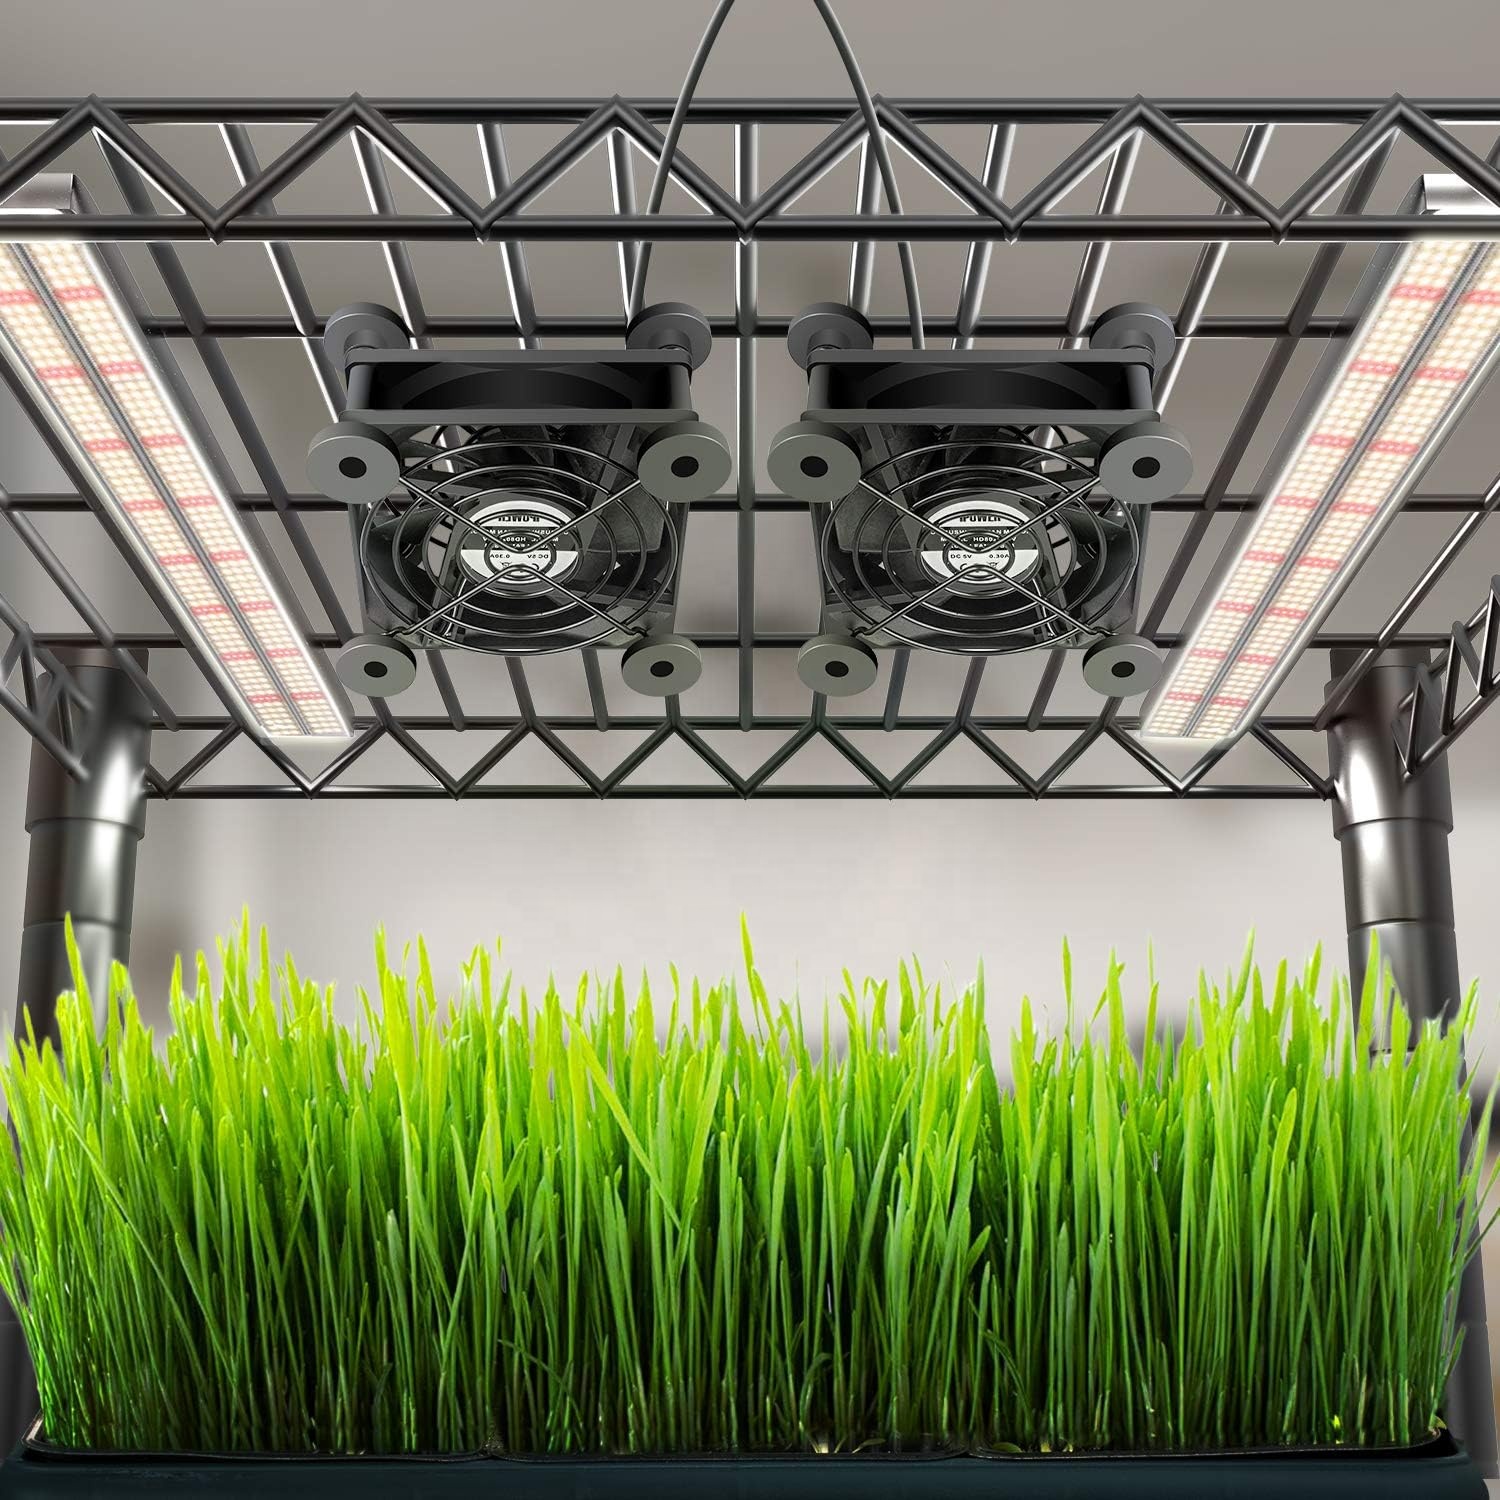
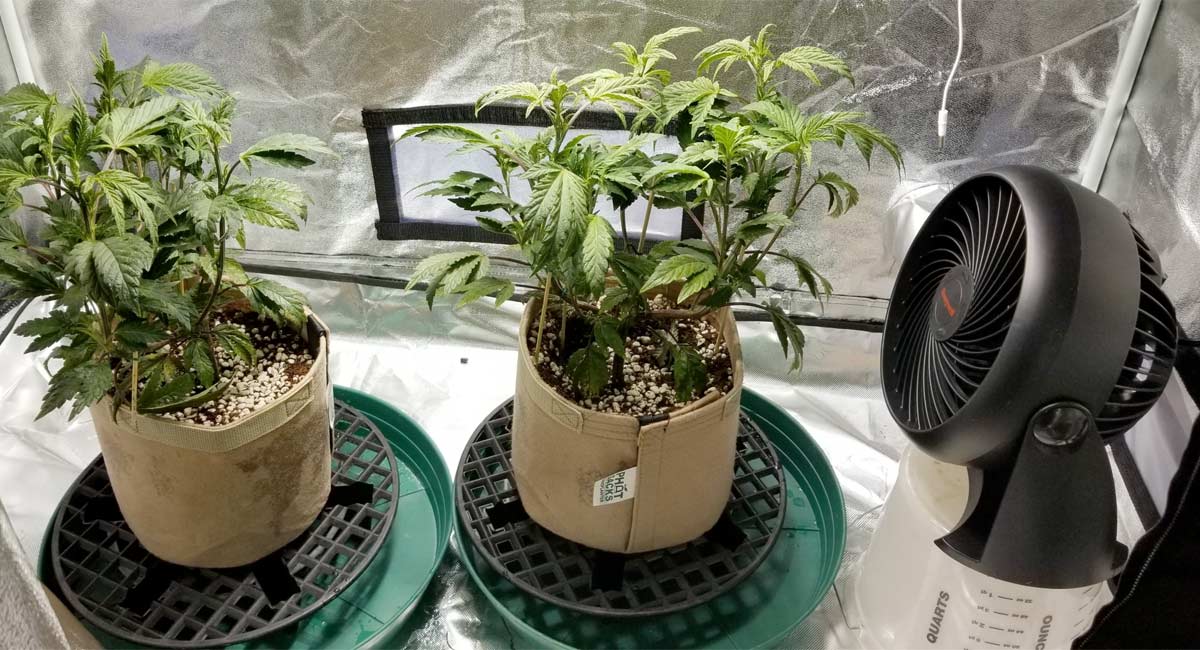
2. Proper Ventilation Systems
“Grow tent fans reviews: Finding the …” from happypotfarmer.com and used with no modifications.
A properly designed ventilation system serves as your first line of defense against excessive humidity. At minimum, effective grow tent ventilation requires an exhaust fan that moves air out of the tent, passive intake vents that allow fresh air to enter, and internal circulation fans that prevent stagnant air pockets. The exhaust fan should be sized appropriately for your tent volume, with the capacity to replace all the air in your tent every 1-3 minutes during high humidity periods. For those interested in alternative growing methods, consider exploring hydroponic systems which also benefit from proper ventilation.
Strategic placement of ventilation components dramatically improves their humidity-controlling effectiveness. Mount exhaust fans at the top of your tent where hot, humid air naturally accumulates. Position intake vents low on the opposite side of the tent to create a diagonal airflow pattern that efficiently sweeps through the entire growing space. Internal circulation fans should be aimed to create gentle movement throughout the canopy without directly blasting plants, which can cause windburn. For those interested in expanding their hydroponic setup, consider exploring how many hours of light hydroponic plants need to ensure optimal growth conditions.
For maximum humidity control, consider implementing a smart ventilation controller that adjusts fan speeds based on real-time humidity readings. These systems increase exhaust rates when humidity rises and reduce them when the environment becomes too dry, maintaining perfect conditions without constant manual adjustments. The investment in automated ventilation control typically pays for itself through improved plant health and reduced risk of crop-destroying mold issues.
3. Air Conditioning Solutions
Air conditioners provide a dual benefit of temperature and humidity control, making them particularly valuable in hot, humid environments. When air passes over the cooling coils of an air conditioner, moisture condenses out of the air, effectively dehumidifying it before it returns to your grow space. This process, called condensation dehumidification, can significantly reduce humidity levels while simultaneously managing temperature.
For small to medium grow tents, portable air conditioners with dehumidification modes offer an excellent solution without requiring permanent installation. These units typically include flexible ducting that allows you to direct cooled, dehumidified air into your tent while exhausting hot air outside the growing area. When selecting a portable AC for humidity control, prioritize models with dedicated dehumidification modes and automatic drainage options to prevent water collection issues.
In larger grow operations, mini-split air conditioning systems provide more efficient climate control with less noise and better energy efficiency than portable units. These systems allow for precise temperature and humidity management across multiple grow spaces, with separate air handlers in each area connected to a single outdoor compressor unit. The higher initial investment in mini-split systems is often justified by their superior performance and lower operating costs over time.
4. Plant Spacing and Pruning Methods
Proper plant spacing plays a crucial role in humidity management by allowing adequate airflow between and through plants. Overcrowded grow spaces restrict air movement, creating humid microclimates where moisture becomes trapped among dense foliage. As a general rule, plants should never touch one another, and you should be able to see through the canopy to the grow medium below from most angles. For more tips on optimizing your grow space, check out this guide on red and blue LED grow lights.
Strategic pruning and defoliation techniques can significantly improve humidity conditions, particularly in the dense canopy interior where air circulation is naturally limited. Remove large fan leaves that block airflow, especially those pointing inward toward the plant center or overlapping with neighboring plants. Focus defoliation efforts on the lower third of plants where light penetration is minimal but humidity often accumulates due to reduced air movement.
For plants prone to extremely dense growth, techniques like lollipopping (removing all growth from the lower portion of plants) and strategic branch removal can create open architecture that dramatically improves air circulation. These approaches are particularly valuable during late vegetative and flowering stages when plants naturally develop denser foliage and humidity control becomes more challenging. Remember that pruning should be done gradually over multiple sessions rather than removing large amounts of plant material at once, which can stress plants and temporarily increase humidity through transpiration from cut surfaces.
5. Watering Schedule Adjustments
Your watering practices directly impact grow tent humidity, particularly in the critical hours after irrigation. Water evaporates not only from plant surfaces through transpiration but also directly from the growing medium, substantially increasing ambient humidity. By adjusting when and how you water, you can minimize humidity spikes and maintain more consistent environmental conditions.
The timing of watering can dramatically affect humidity patterns. Watering at the beginning of your light cycle allows maximum evaporation time while lights are on and ventilation is typically running at higher rates. This approach prevents humidity from remaining elevated into the dark period, when cooler temperatures naturally increase relative humidity and ventilation may be reduced. Avoid watering in the final hours before lights turn off, as this creates perfect conditions for condensation and mold development during the dark period. For more insights on optimal light cycles, check out how many hours of light hydroponic plants need.
Consider implementing drip irrigation or bottom-feeding techniques that deliver water directly to the root zone without wetting the growing medium surface. These methods significantly reduce evaporation compared to top watering, helping maintain lower ambient humidity levels. For extreme humidity challenges, some growers transition to growing media that retain less surface moisture, such as clay pebbles or rockwool, which drain more efficiently and contribute less to environmental humidity than more absorbent media like coco coir or soil.
Essential Monitoring Tools for Perfect Humidity Control

“Red/Blue Grow Light | 3 Headed …” from gathera.com and used with no modifications.
Effective humidity management begins with accurate measurement. Without reliable monitoring tools, you’re essentially growing blindfolded, making decisions based on guesswork rather than data. The difference between 60% and 70% humidity might be imperceptible to human senses, but it can significantly impact plant health and development. Investing in quality monitoring equipment provides the foundation for all other humidity control efforts. For more information on maintaining an optimal growing environment, check out this guide on red and blue LED grow lights.
Modern grow technology offers a range of monitoring solutions, from basic standalone devices to sophisticated networked systems that track environmental conditions over time. The right choice depends on your grow scale, budget, and how precisely you want to control your environment. Let’s explore the essential monitoring tools that empower growers to maintain perfect humidity conditions throughout every growth stage.
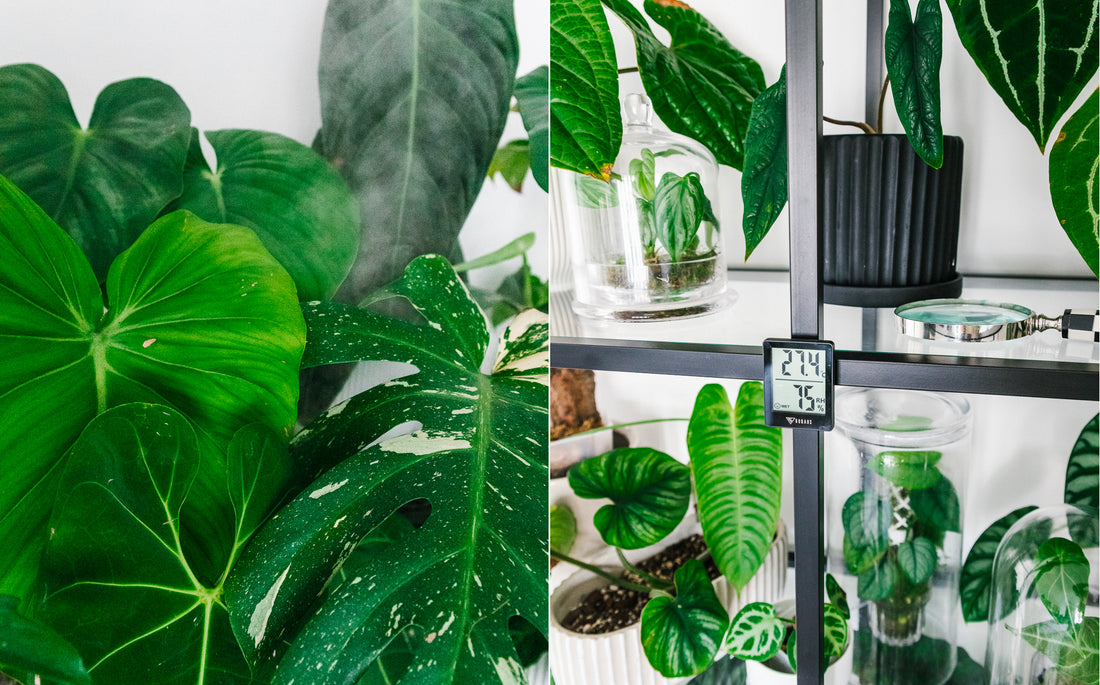
Hygrometers: Digital vs. Analog Options
Digital hygrometers offer superior accuracy compared to analog models, typically measuring relative humidity within ±2-3% when properly calibrated. Look for digital models with temperature monitoring capability, as the relationship between temperature and relative humidity is crucial for understanding your grow environment. Many digital hygrometers also include minimum/maximum recording features that track humidity extremes between readings, helping identify potential problems even when you’re not actively monitoring the grow space.
For budget-conscious growers, analog hygrometers provide basic humidity readings at a lower price point, though their accuracy typically ranges from ±5-7%. If using analog models, purchase at least two units to cross-reference readings and identify potential calibration issues. Regardless of which type you choose, periodic calibration is essential for maintaining accuracy. Most hygrometers can be calibrated using the “salt test” method, which creates a precisely 75% humid environment using a saturated salt solution in a sealed container. For more insights on optimizing your indoor garden, explore our guide on hydroponic Asian pea shoots.
Consider upgrading to Bluetooth or WiFi-connected hygrometers that send real-time data to your smartphone, allowing remote monitoring and alerting you when conditions fall outside acceptable parameters. These connected devices often store historical data, enabling you to analyze trends and correlate environmental conditions with plant performance. The ability to monitor humidity remotely provides peace of mind and allows for prompt intervention when problems arise, even when you’re away from your grow area.
Environmental Controllers Worth the Investment
Environmental controllers represent the pinnacle of grow space automation, connecting your humidity management equipment (humidifiers, dehumidifiers, fans) to sensors that monitor conditions in real-time. These controllers automatically activate or deactivate equipment as needed to maintain target parameters without constant manual adjustment. Basic controllers manage single functions like humidity or temperature, while advanced models coordinate multiple environmental factors simultaneously, ensuring they work in harmony rather than opposition.
When selecting an environmental controller, look for models with programmable day/night settings that automatically adjust target humidity levels based on your light cycle. This feature is particularly valuable for maintaining lower night humidity to prevent condensation issues while allowing slightly higher daytime levels that support optimal transpiration. The most sophisticated controllers also offer remote access via smartphone apps, allowing you to monitor conditions and make adjustments from anywhere with internet access.
Controller Investment Analysis
Basic 1-function controller: $40-80 (controls fans OR humidifier)
Mid-range 2-function controller: $100-200 (controls temperature AND humidity)
Advanced environmental controller: $300-600+ (controls multiple devices with data logging)
Return on investment: Typically recovered in a single grow cycle through prevented crop loss. For more on maximizing your grow cycle, explore how to grow hydroponic red cabbage microgreens effectively.
While quality environmental controllers represent a significant initial investment, their value becomes clear when considering the cost of crop loss due to environmental issues. A single case of botrytis during late flowering can destroy weeks of effort and investment, making the prevention capability of automated controllers well worth their cost. Most commercial growers consider environmental controllers essential equipment rather than optional upgrades.
Proper Sensor Placement for Accurate Readings
The location of your humidity sensors dramatically affects the accuracy and usefulness of their readings. Ideally, humidity should be measured at plant canopy level, where conditions most directly impact plant health and development. Avoid placing sensors near tent walls, directly in front of fans, or adjacent to humidifiers/dehumidifiers, as these locations can provide misleading readings that don’t reflect the actual conditions experienced by your plants.
For comprehensive monitoring in larger grow spaces, implement multiple sensors at different heights and locations. This multi-point approach reveals microclimates within your tent and identifies potential problem areas before they affect plant health. Pay particular attention to monitoring dense canopy interiors during flowering stages, as these areas often develop higher humidity levels than the surrounding air due to restricted airflow and transpiration from closely packed leaves.
Consider the impact of your light cycle on sensor placement and readings. Many growers mount sensors on adjustable cords or hooks that allow repositioning as plants grow taller. Shield sensors from direct light exposure, which can affect readings through localized heating of the sensor housing. For maximum accuracy, some growers use aspirated sensors housed in small enclosures with mini fans that draw representative air samples across the sensing elements, eliminating the influence of radiant heat from grow lights.
Common Humidity Problems and Quick Fixes
Even with the best preventative measures, humidity challenges inevitably arise during the growing cycle. Recognizing the early signs of humidity-related problems allows for prompt intervention before serious damage occurs. Most humidity issues manifest in distinctive patterns of plant stress or visible symptoms on leaves and stems. Developing the ability to “read” these signs transforms reactive problem-solving into proactive plant care. For those interested in expanding their plant care knowledge, you might consider exploring how to grow hydroponic collard greens indoors as a way to manage and monitor humidity levels effectively.
Successful growers maintain a mental library of humidity-related issues and their solutions, allowing them to quickly identify and address problems before they escalate. Let’s examine the most common humidity-related challenges and the proven strategies for resolving them without disrupting your plants’ growth cycle.
Combating White Powdery Mildew
White powdery mildew (WPM) appears as distinct white powder-like patches on leaves, stems, and occasionally flowers. This fungal disease thrives in humid environments with poor air circulation, particularly when relative humidity exceeds 60% and temperatures range from 60-80°F. Without prompt treatment, WPM spreads rapidly through spores, potentially affecting your entire crop within days and reducing photosynthesis efficiency by blocking light absorption.
Immediate action is crucial when WPM appears. First, isolate affected plants if possible and carefully remove the most severely affected leaves, sealing them in plastic bags before removal from your grow area to prevent spore dispersal. Then implement a combination of environmental corrections and treatment measures: reduce humidity below 50%, increase air circulation with additional fans, and treat affected plants with approved fungicides or organic alternatives like diluted milk spray (1:10 milk to water ratio) or potassium bicarbonate solutions, which modify leaf surface pH to inhibit fungal growth. For more information on maintaining optimal growing conditions, you might find this guide on how many hours of light hydroponic plants need helpful.
Prevention remains the most effective strategy against WPM. Maintain humidity below 60% during vegetative growth and below 50% during flowering, while ensuring continuous air movement throughout your canopy. Some growers implement preventative applications of silica supplements, which strengthen cell walls and increase plants’ natural resistance to fungal penetration. Regular inspection of leaf undersides and dense canopy interiors—prime locations for early WPM development—allows for early detection before widespread infection occurs.
Preventing Bud Rot During Flowering
Botrytis cinerea, commonly known as bud rot or gray mold, represents one of the most devastating humidity-related diseases, capable of destroying entire flowers within days. This pathogen typically begins inside dense buds where moisture becomes trapped, appearing first as withering pistils (hairs) followed by browning, rotting tissue. By the time visible symptoms appear on the exterior of flowers, significant internal damage has usually occurred, making prevention absolutely critical.
The primary defense against bud rot is maintaining flowering-stage humidity between 40-50% and ensuring strong air circulation throughout your canopy. Defoliate strategically to improve airflow around developing flowers, removing large fan leaves that block air movement or overlap with developing bud sites. Implement night temperature controls to prevent the temperature drops that lead to condensation on plant surfaces, as free moisture is a primary catalyst for botrytis development.
If bud rot appears despite preventative measures, immediate surgical removal is the only effective response. Cut affected buds at least one inch below visible infection, disinfecting your tools between cuts with isopropyl alcohol. Examine surrounding flowers carefully, as spores likely spread before symptoms appeared. After removing infected material, temporarily reduce humidity even further (30-35%) and increase air circulation to inhibit further development. Many experienced growers incorporate preventative applications of beneficial bacteria like Bacillus subtilis during late flowering, which colonize plant surfaces and compete with pathogenic fungi for resources.
Dealing with Stunted Growth from Improper Humidity
Plants experiencing improper humidity often display stunted growth patterns that can be mistaken for nutrient deficiencies or light issues. In low-humidity environments, plants typically develop smaller leaves with crispy edges, upward leaf curling, and slowed vertical growth as they conserve moisture by limiting transpiration and new cell development. Conversely, excessively humid conditions often produce plants with unusually large, thin leaves, elongated stems with excessive spacing between nodes, and generally weak structural development due to cells expanding with excess water rather than building dense, supportive tissues.
Seasonal Humidity Challenges and Solutions
“Understanding Humidity – The Soil Ninja …” from www.soil.ninja and used with no modifications.
Seasonal changes present unique humidity management challenges for indoor growers. The external environment significantly influences your grow tent’s internal conditions, even in seemingly isolated setups. Understanding how seasonal patterns affect your growing environment allows you to anticipate and prepare for these cyclical challenges rather than constantly reacting to unexpected changes.
Winter Dry Air Strategies
Winter heating systems dramatically reduce indoor air moisture, often creating extremely dry conditions that challenge even the most diligent growers. During cold months, grow tent humidity can drop below 20% without intervention, severely restricting plant growth and nutrient uptake. Combat winter dryness by implementing multiple humidification strategies simultaneously: use larger capacity humidifiers, reduce exhaust fan speeds to retain moisture, and consider tent size reduction if growing fewer plants to create a more manageable humid environment.
Summer Humidity Management
Summer months bring excessive humidity challenges, particularly in naturally humid climates where outdoor air already contains significant moisture. During these periods, grow tent humidity can easily exceed 70% without proper management, creating perfect conditions for mold, mildew, and pest proliferation. Address summer humidity by scheduling waterings for early morning to allow maximum evaporation time, increasing ventilation rates during the coolest parts of the day when outdoor humidity is typically lowest, and potentially incorporating dehumidifiers or air conditioning systems during the most challenging periods.
Consider adjusting your growing schedule to align with seasonal advantages rather than fighting against nature’s patterns. Many experienced growers focus on humidity-sensitive flowering plants during drier winter months when maintaining lower humidity is easier, while cultivating more humidity-tolerant vegetative plants during summer when higher humidity naturally supports lush growth. This strategic approach works with seasonal patterns rather than constantly battling against them, reducing equipment needs and energy consumption while improving results. For instance, you can learn how to grow hydroponic collard greens indoors, which thrive in higher humidity levels.
Creating the Perfect Humidity Balance for Healthier Plants

“Healthy and unhealthy plants compared …” from www.sciencephoto.com and used with no modifications.
Achieving optimal humidity control requires thinking of your grow tent as a complete environmental system where all factors interconnect. Temperature, airflow, plant density, watering practices, and lighting all influence humidity levels, creating a complex dance of environmental factors. The most successful growers develop an integrated approach that harmonizes these elements rather than treating humidity as an isolated variable.
Integrated Humidity Management Checklist
✓ Monitor humidity at multiple heights within the canopy
✓ Adjust environmental controls based on growth stage
✓ Coordinate watering timing with light cycles
✓ Balance ventilation rates with humidity requirements
✓ Adapt techniques seasonally based on external conditions
✓ Keep detailed environmental logs to identify patterns, similar to how you might track growth when you grow hydroponic red cabbage microgreens.
Developing sensitivity to your plants’ responses allows you to fine-tune humidity beyond simple number targets. Learn to recognize the subtle signs of humidity stress: leaves that appear unusually dull or shiny, changes in stem rigidity, alterations in growth patterns, or variations in water consumption rates. These plant communications often reveal humidity issues before measurement tools detect problems, allowing for proactive adjustments that prevent stress before it impacts growth.
Remember that perfect humidity management isn’t about maintaining absolutely static conditions, but rather creating appropriate rhythms that support natural growth patterns. In nature, humidity naturally fluctuates between day and night, and plants have evolved to expect and utilize these variations. Allowing slight controlled humidity fluctuations (5-10%) between day and night cycles can actually strengthen plants and improve their resilience to stress, provided these variations remain within the appropriate range for their current growth stage.
The journey to mastering grow tent humidity control represents one of the most rewarding aspects of indoor cultivation. As you develop this skill, you’ll witness dramatic improvements in growth rates, plant health, and harvest quality that reflect your increasing environmental management expertise. The effort invested in understanding and controlling this critical variable transforms your growing results from acceptable to exceptional.
Frequently Asked Questions
Through years of helping growers troubleshoot humidity challenges, certain questions arise consistently. These frequently asked questions represent the common hurdles that both new and experienced growers encounter when managing grow tent environments. Addressing these questions directly can save you time, resources, and potential crop losses as you develop your humidity management skills.
Quick Reference Guide: Optimal Humidity by Growth Stage
Clones/Cuttings: 75-85%
Seedlings: 70-75%
Early Vegetative: 60-70%
Late Vegetative: 50-60%
Early Flowering: 40-50%
Late Flowering: 30-40%
Understanding these stage-specific requirements provides the foundation for all humidity management decisions. Remember that these ranges represent targets rather than absolute requirements—plants can tolerate brief excursions outside these parameters without harm, particularly when other environmental factors remain optimal. The goal is maintaining conditions within these ranges for the majority of each growth stage to support optimal development.
Let’s address the most common questions growers ask about humidity management, providing practical solutions based on proven growing experience rather than theoretical ideals. These answers focus on real-world applications that work across different growing styles and equipment setups.
How often should I check humidity levels in my grow tent?
For manual monitoring setups without automated alerts, check humidity levels at minimum twice daily—once during the light period and once during the dark period. These checks should occur at consistent times each day to establish reliable baseline readings for your environment. During critical transitions like moving from vegetative to flowering stages or during extreme weather events, increase monitoring frequency to three or four times daily until conditions stabilize. For more insights on plant care, explore our guide on hydroponic light requirements.
Many experienced growers implement a more comprehensive monitoring schedule that includes checks during key environmental transition points: just before lights turn on, 30 minutes after lights turn on, midway through the light cycle, just before lights turn off, and 30 minutes after darkness begins. This pattern reveals how your environmental systems respond to the significant temperature changes that occur during light transitions, which often trigger humidity fluctuations that brief monitoring might miss.
The ultimate solution involves implementing digital monitoring systems with continuous logging and alert capabilities, which eliminate the need for manual checks while providing comprehensive data for analysis. These systems notify you immediately when conditions exceed your specified parameters, allowing for prompt intervention regardless of whether you’re physically present in your grow area. The peace of mind and plant protection these systems provide typically justifies their investment for serious growers.
Humidity Monitoring Schedule
Basic monitoring: Morning and evening daily checks
Intermediate monitoring: Five daily checks at key transition points
Advanced monitoring: Continuous digital tracking with alerts
Critical periods requiring increased vigilance: Weather changes, growth stage transitions, after significant defoliation
Can I use a household humidifier for my grow tent?
Standard household humidifiers can effectively manage humidity in grow tents smaller than 4×4 feet, particularly during vegetative growth stages when higher humidity is beneficial. Look for models with adjustable output settings, built-in humidistats for automatic operation, and easy-cleaning features to prevent mineral buildup. Ultrasonic humidifiers work particularly well in grow environments due to their silent operation and fine mist production, though they may deposit mineral dust on surfaces if used with untreated tap water.
What’s the fastest way to lower humidity in an emergency?
When facing dangerously high humidity that threatens plant health, implement these emergency measures in order of effectiveness: First, maximize exhaust fan speed to rapidly remove moist air while opening additional passive intake vents to increase fresh air exchange. Second, temporarily reduce temperatures by dimming lights or turning off some fixtures, which automatically lowers relative humidity as air can hold less moisture at lower temperatures.
For severe situations, bring in a powerful dehumidifier or air conditioner from another area of your home and position it to direct dry air directly into the tent. As an immediate but temporary measure, you can place containers of moisture-absorbing materials like silica gel, calcium chloride (DampRid), or even rice in the tent to help pull moisture from the air while implementing more substantial solutions.
After addressing the immediate emergency, investigate the underlying cause to prevent recurrence. Common culprits include malfunctioning equipment, excess plant density restricting airflow, water leaks within the tent, or dramatic weather changes that overwhelmed your environmental controls. Developing an emergency response plan before problems occur ensures you can act quickly when minutes matter in protecting your plants. For more insights on managing plant growth, check out our guide on how many hours of light hydroponic plants need.
Humidity Emergency Response Protocol
1. Maximize exhaust ventilation (100% fan speed)
2. Reduce temperatures if possible
3. Introduce emergency dehumidification
4. Increase air circulation within canopy
5. Delay watering until conditions normalize
Do different plant strains require different humidity levels?
Genetic origins significantly influence optimal humidity preferences, with strains originating from equatorial regions typically preferring higher humidity levels (60-70% during vegetation) while those from arid regions often thrive in drier conditions (40-60% during vegetation). These adaptations reflect the native environments where these genetics evolved over thousands of generations. When growing multiple strains simultaneously, position humidity-loving varieties lower in the tent where conditions naturally remain more humid, and place drought-resistant strains in upper positions where humidity is typically lower.
Will a carbon filter help control humidity in my grow tent?
Carbon filters primarily target odor molecules rather than water vapor and have minimal direct impact on humidity levels. However, the installation of carbon filters often indirectly affects humidity by necessitating stronger exhaust fans to overcome the additional airflow resistance. This increased air exchange can significantly reduce humidity, particularly in smaller grow spaces. When incorporating carbon filtration into your ventilation system, you may need to adjust other humidity control methods to compensate for the increased air exchange rate.
To maximize filtration efficiency while minimizing unwanted humidity reduction, consider implementing a variable speed controller on your exhaust system. This allows you to run the minimum necessary airflow for effective odor control without excessive moisture removal. Some advanced growers implement separate ventilation circuits—one optimized for humidity control that operates continuously, and another dedicated to odor control that activates only when necessary for managing scent.
Remember that the pre-filter component of carbon filtration systems requires regular cleaning to maintain proper airflow. Dust and particle buildup on these filters can restrict ventilation, potentially creating stagnant air pockets where humidity accumulates to problematic levels. Implement a regular maintenance schedule that includes checking and cleaning pre-filters at least bi-weekly for optimal system performance.